
The image optimisation tool in Mail Designer 365 helps you prepare images at a practical size and resolution for an email design. Thoughtful email image optimization can reduce unnecessary file weight, help graphics load sooner for recipients, and preserve the clarity of logos, photos, and text-based artwork.
Large source images often contain more pixel data than an email layout can display. Sending that excess data can slow image loading, particularly on mobile connections. Mail Designer 365 provides suitable settings for the selected image and also lets you review the output format and quality before applying the change.
Open the image optimisation tool
Select the image you want to optimise in your design. This opens the Style menu for that image. Choose “Edit link and background” to access the relevant image controls.
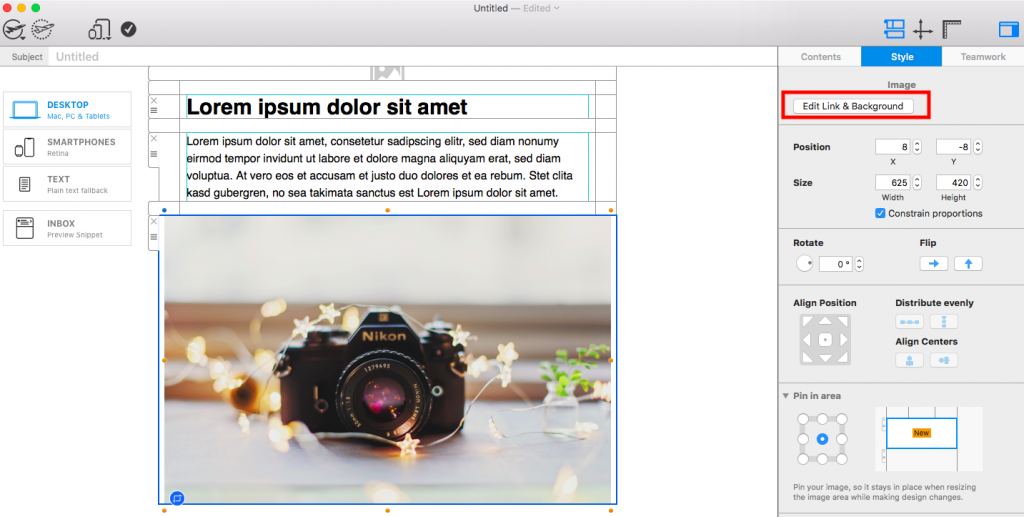
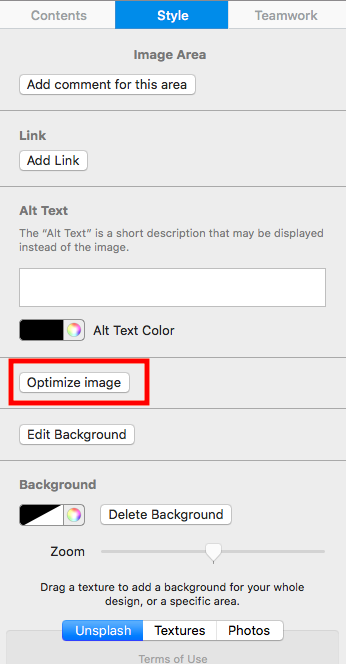
Next, select “Optimise Image.” The image optimisation tool opens so you can compare the available file formats and, where applicable, adjust image quality.
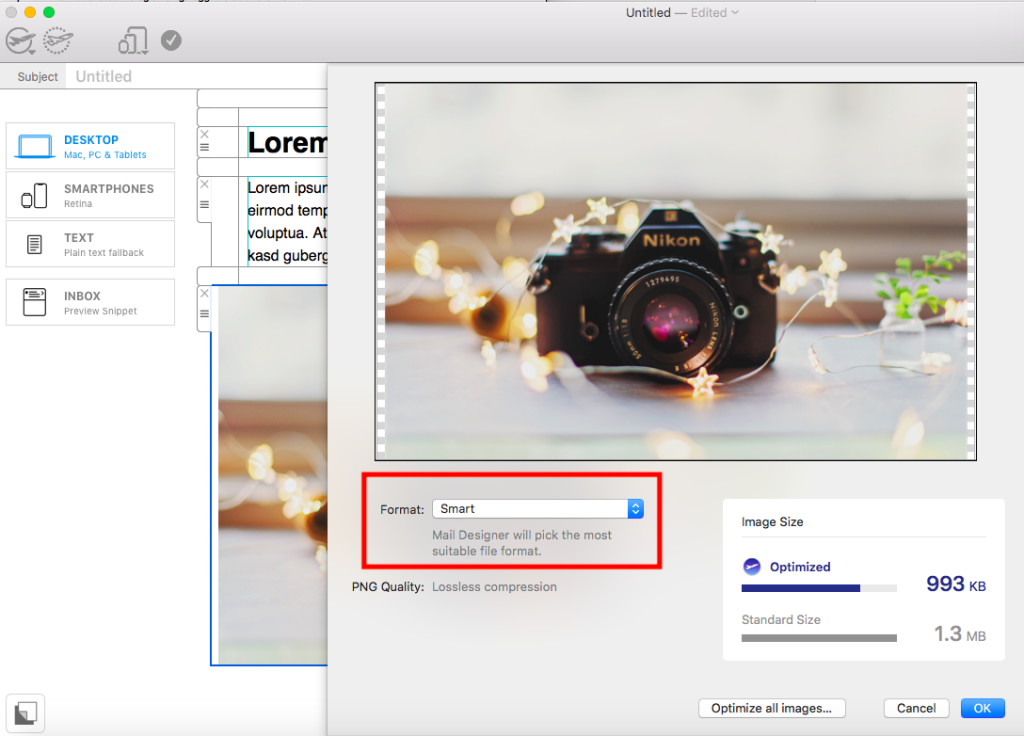
Choose Smart, PNG, or JPEG
In the optimisation window, choose a file type from the dropdown menu. The right choice depends on the image content and whether transparency is required.
PNG supports transparency and lossless image data. It is often a good fit for simple graphics, interface elements, logos, or artwork that contains sharp text. Photo-like images can produce larger PNG files because they contain many colours and fine details. Mail Designer 365 applies additional PNG compression to reduce the file size.
JPEG uses lossy compression. It is commonly suitable for photographs and other complex images, and you can use the quality slider to balance detail against file size. Very low quality can create visible noise or “speckling,” especially around text and sharp edges. JPEG does not support transparency, so transparent or empty areas are filled with white.
Smart lets Mail Designer 365 choose an appropriate option. If you do not have a specific format requirement, Smart is a useful starting point because it avoids making the decision solely from the original filename.
Balance image quality and file size
For JPEG images, adjust the quality slider while watching the preview. Aim for the smallest practical file that still keeps important details clean. Product photos and textured scenes can usually tolerate some compression, while screenshots, typography, and diagrams may reveal artifacts sooner.
The automatically selected settings are a sensible default for most email designs. Change them only when the preview gives you a clear reason. A slightly larger file is preferable when extra compression damages a logo, makes text difficult to read, or introduces distracting blocks and halos.
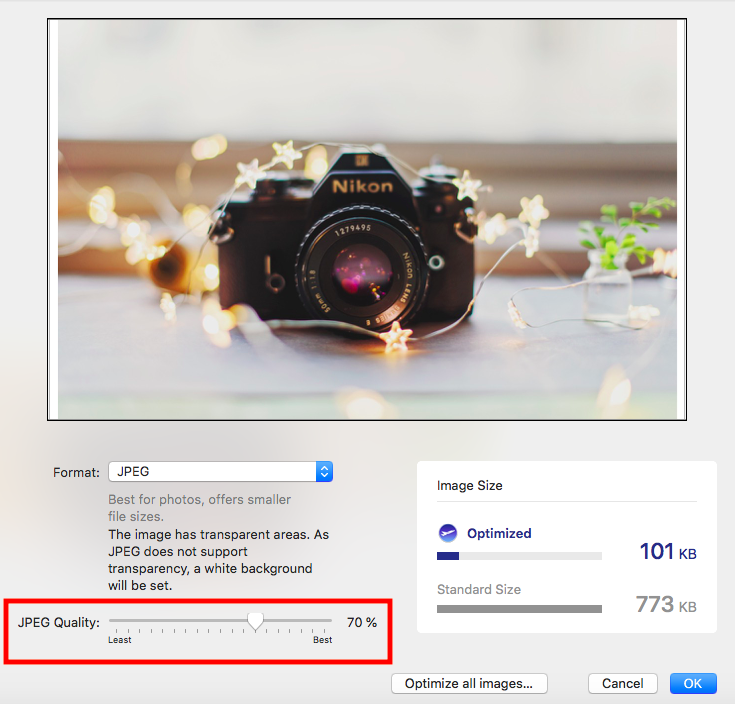
When the preview looks right, click “OK” to apply the settings to the image.
Check optimized images before sending
Review the design in desktop and smartphone previews after using the image optimisation tool. Confirm that text within screenshots remains readable, transparent edges look correct, and photographs retain the details needed for the message. Also check that important information is not available only inside an image; recipients may initially view the email with images blocked.
Send a test email when possible and inspect it on the inbox environments that matter to your audience. This verifies the real balance between loading speed and visual quality. If an image looks soft or shows compression artifacts, return to the tool and choose a higher quality setting or a more suitable format.
For more preparation guidance, see how to optimize an image area in Mail Designer 365. Keeping image dimensions close to their displayed size and using concise alternative text supports a lighter, more accessible email design.
How Can We Help?