
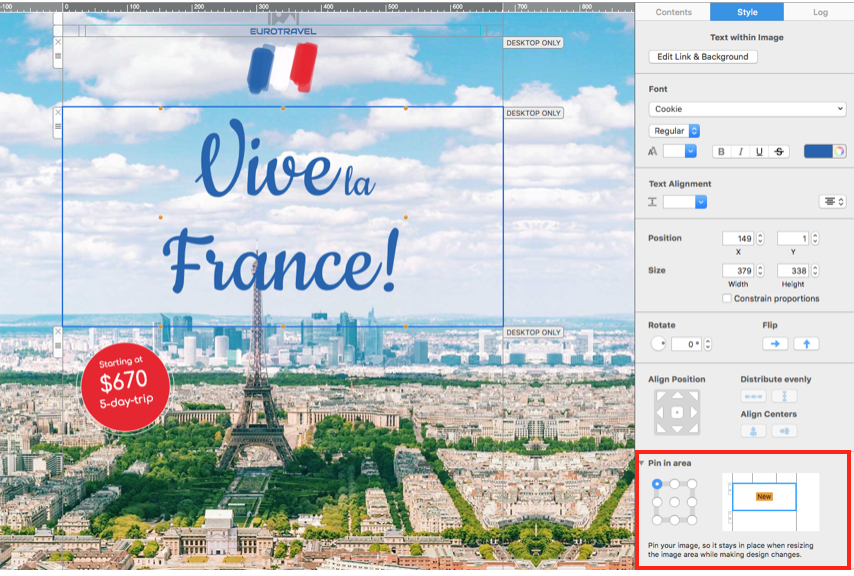
Mail Designer 365 Pinning Tool
The pinning feature in Mail Designer 365 makes it easier for you to pin design elements in place whilst editing your newsletter designs. The pin tool pins a design element inside an image area and fixes it to an area of your choice. The visual interface displays where your design element will be fixed within the image area:

To pin a design element, click on the element and you will notice the pin tool in the "Style" menu in the app sidebar.
Locations
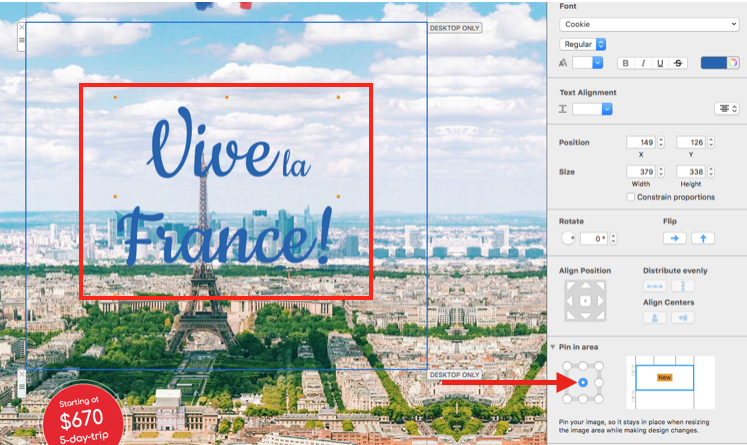
If you pin in the center, your design element will stay in the center of its layout block despite any resizing. Here is an example:
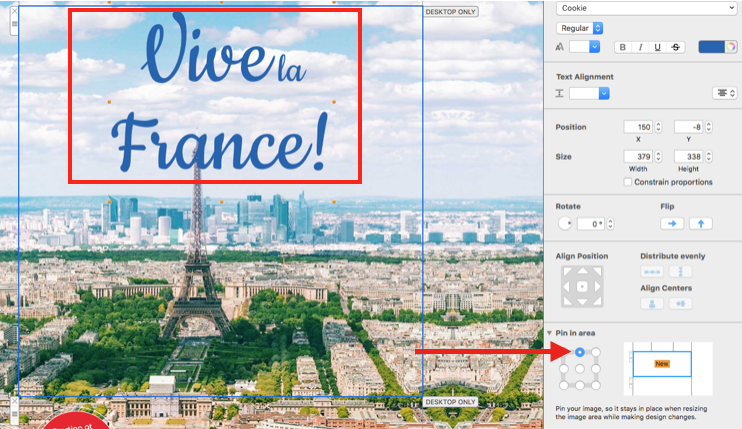
If you pin at the top, your design element will stay fixed at the top of its layout block if you resize - this is particularly good for titles and headings. Here is an example:
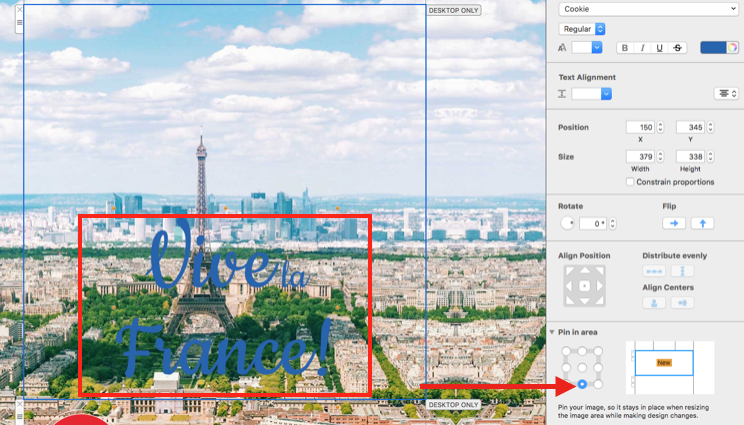
Lastly, if you pin at the bottom, the design element will remain at the bottom of its layout block if you resize. Here is an example:
How Can We Help?