How to Check Mailchimp Format After Upload
The Mailchimp format shown inside an editing interface may not always match the final rendered email. When a Mail Designer 365 template looks unusual after upload, first distinguish between the editor’s working representation, Mailchimp’s preview, and a real test message received in an inbox.
Do not immediately rebuild the design based only on the editor canvas. Preview the campaign, send a test, and identify whether the issue exists in the delivered email before changing the source template.
If the design has not yet been transferred, first follow the Mailchimp export guide, then return here to verify the imported result.
Open the Mailchimp Preview
- Open the imported template or campaign in Mailchimp.
- Find the preview or testing controls. Depending on the current Mailchimp interface, the label or location may differ from older screenshots.
- Open the desktop preview and, when available, the mobile preview.
- Compare the preview with the original Mail Designer 365 design.
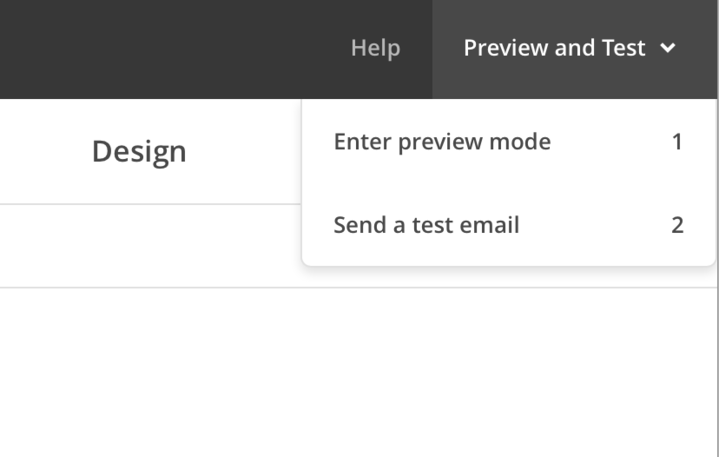
In the interface shown below, the option is available from Preview and Test and then Enter preview mode.

Send a Test Email
A preview is useful, but a received test message is the stronger check. Send the campaign to an inbox you can inspect and review it at desktop and mobile widths. When the email is important to a broad audience, test more than one major inbox because rendering behavior can differ between email clients.
Check the complete message rather than only the first visible section:
- headings, paragraphs, and line breaks;
- image sizes, crops, and alternative text;
- button labels, colors, spacing, and destinations;
- column stacking and mobile alignment;
- background colors and section boundaries;
- footer content, unsubscribe controls, and required sender information.
Decide Whether the Problem Is Only in Edit Mode
If the editor view looks simplified but Mailchimp’s preview and the delivered test both match the intended design, avoid unnecessary source changes. The editor canvas is a working surface and may represent imported HTML differently from the final message.
If the problem also appears in the test email, return to the Mail Designer 365 source and correct it there when possible. Export or upload the revised design again, then repeat the preview and test cycle. This keeps the source template and the version used for sending aligned.
Troubleshoot Common Mailchimp Formatting Issues
Spacing or Columns Look Different
Compare the desktop and mobile variants and identify the exact section that changes. Check whether the issue occurs in one inbox or every tested inbox before making a broad layout change.
Images Are Missing or Incorrectly Sized
Confirm that every image loads in the delivered test. Check the source image, its image area, and its mobile crop. Avoid judging the final image behavior only from the editing canvas.
Buttons or Links Do Not Work
Click every important call to action in the received test. Correct the destination in the source design or campaign configuration, then send another test rather than assuming the preview proves the link works.
Text Styling Changes
Identify the affected text object, font, size, or line break. Use email-appropriate styling and verify the correction in a delivered message. Font availability and rendering can differ between recipient environments.
Final Mailchimp Format Checklist
- Review the imported design in preview mode.
- Send a test email to a real inbox.
- Check desktop and mobile layouts.
- Verify images, text, buttons, and links.
- Correct confirmed problems in the source design.
- Upload the revision and complete one final test.
Keep the Source and Imported Version in Sync
When a confirmed formatting correction belongs to the layout, make it in the Mail Designer 365 source rather than applying unrelated fixes in several copies. Name or archive the revised export clearly, replace the intended Mailchimp version, and record which campaign uses it. This reduces the chance of sending an older template after a successful test.
The goal is not to make every editing surface look identical. The goal is a Mailchimp format that renders correctly in the preview and, most importantly, in the message recipients receive.
How Can We Help?
A Quick Tour of Mail Designer 365
Background
Layout Blocks
TextScout
Editing Text
Links and Buttons
Configuring Text Styles
Tables
Image Areas
Images
Using Retina Images with your Design
Graphics and Other Objects
Creative Tools
Advanced Design Techniques
Blend Modes
Optimizing your Template for Mobile
Plain Text
Preview your Design
Feedback and Sharing
Preparing your Design for Sending
Contacts and Audiences
Sending Emails
1:1 Emails
Email Analytics
HTML Export
Other Sharing Options