
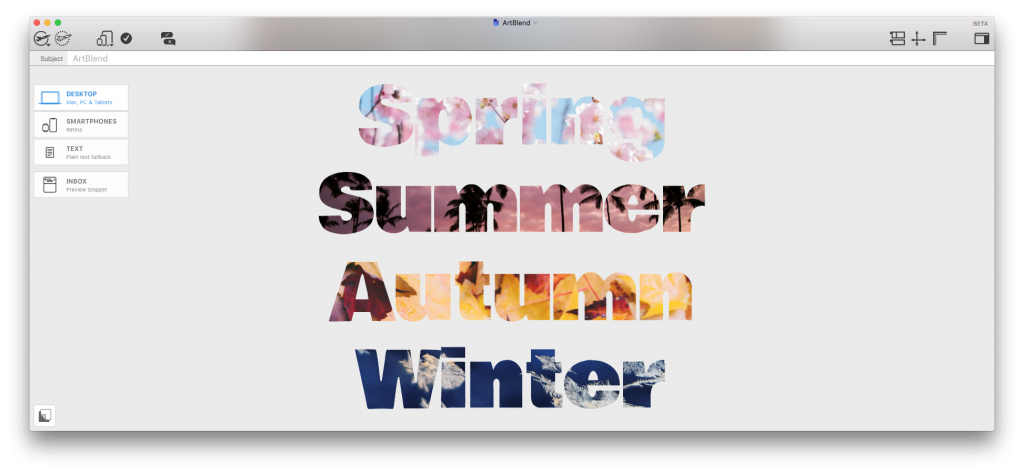
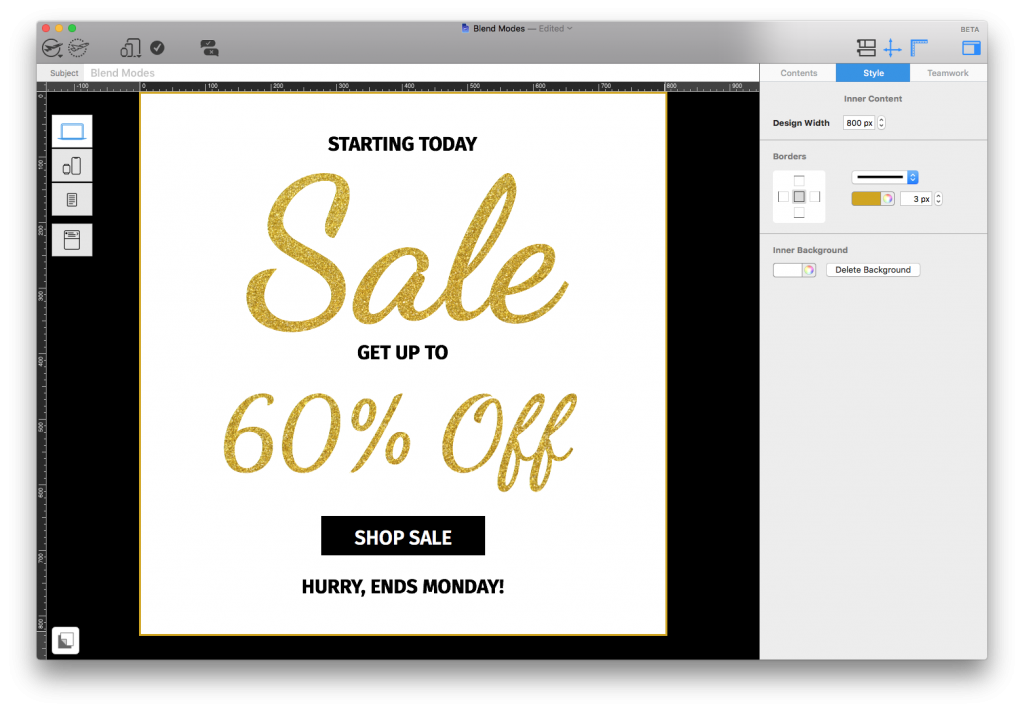
You can use the Blend Modes feature to make unique text effects for your email designs. These kind of effects are great for bold headlines or creating text-based eye-catchers like this:
Here's how it works...
Using Blend Modes for text effects
To get started, go to the "Contents" menu and add a Text Object to an image area:
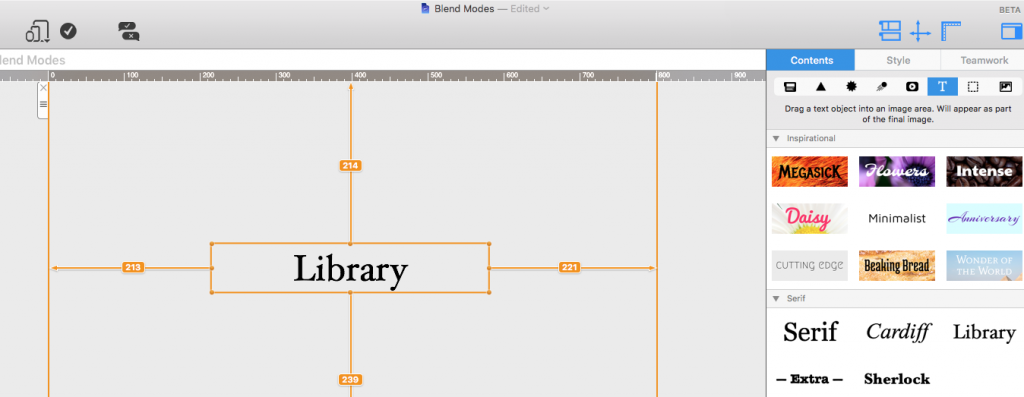
Edit the text: Adjust the font, size, text etc. to make it fit your design:
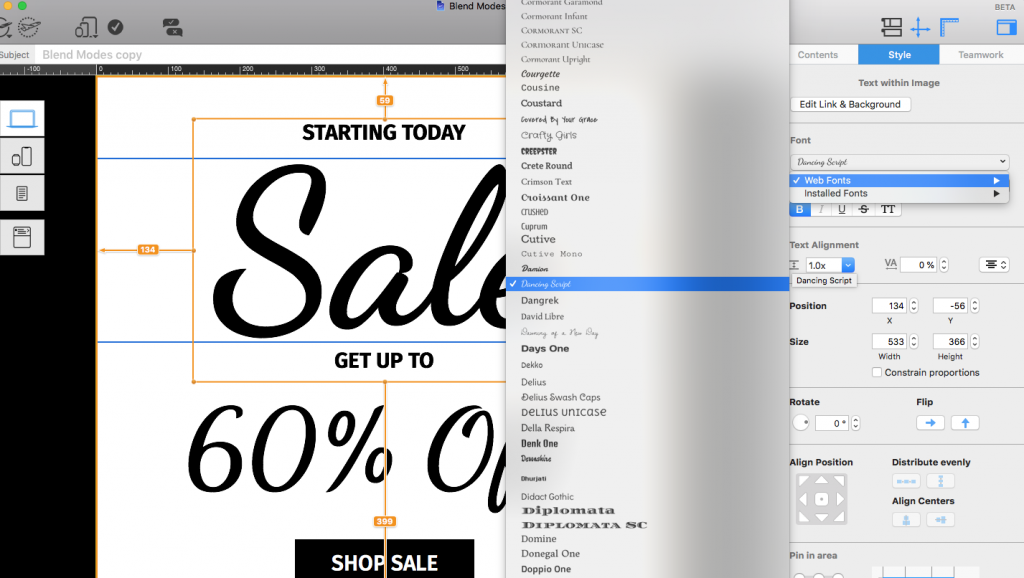
To make your text look extra special, choose a vibrant image you would like to use to fill in your text. Use your own image or one from the Unsplash library. This could be a pattern, a textured image, or anything else you think may suit your design.
Drag your chosen image into the image area and position it over the text; making sure all text is covered:

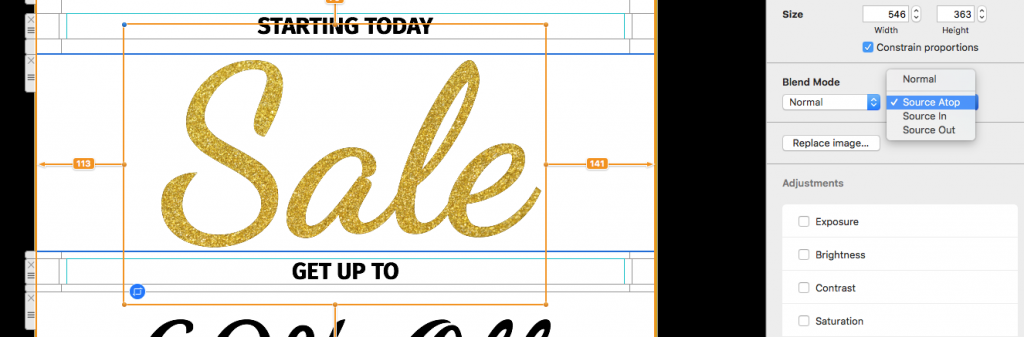
Select the image, go to the "Style" menu and to "Blend Mask." From the drop down menu, apply the "Source Atop" Blend Mask. The lighter-colored text will now be filled in by the image you have chosen:
You can now carry on and repeat this effect throughout your design to create cool patterned text effects:
How Can We Help?