
Adjust letter spacing for email text styles
Adjust letter spacing in Mail Designer 365 when a heading, label, or short text element needs more or less space between characters. Letter spacing can help create a distinctive text style, improve the visual balance of uppercase headings, or make compact typography easier to read.
Use the setting carefully: large changes can reduce readability, especially in body copy and on small screens. This guide explains how to select text, enter a precise spacing value, save the result in a text style, and test the finished email.
Select the text you want to change
- Open the email design in Mail Designer 365.
- Click inside the relevant text area.
- Highlight the word, line, or paragraph whose spacing you want to adjust.
- Open the Style tab.
Select only the text that should receive the new spacing. If the entire text area uses one style, you can select all of it. For a single emphasized phrase, limit the selection so surrounding copy keeps its existing appearance.
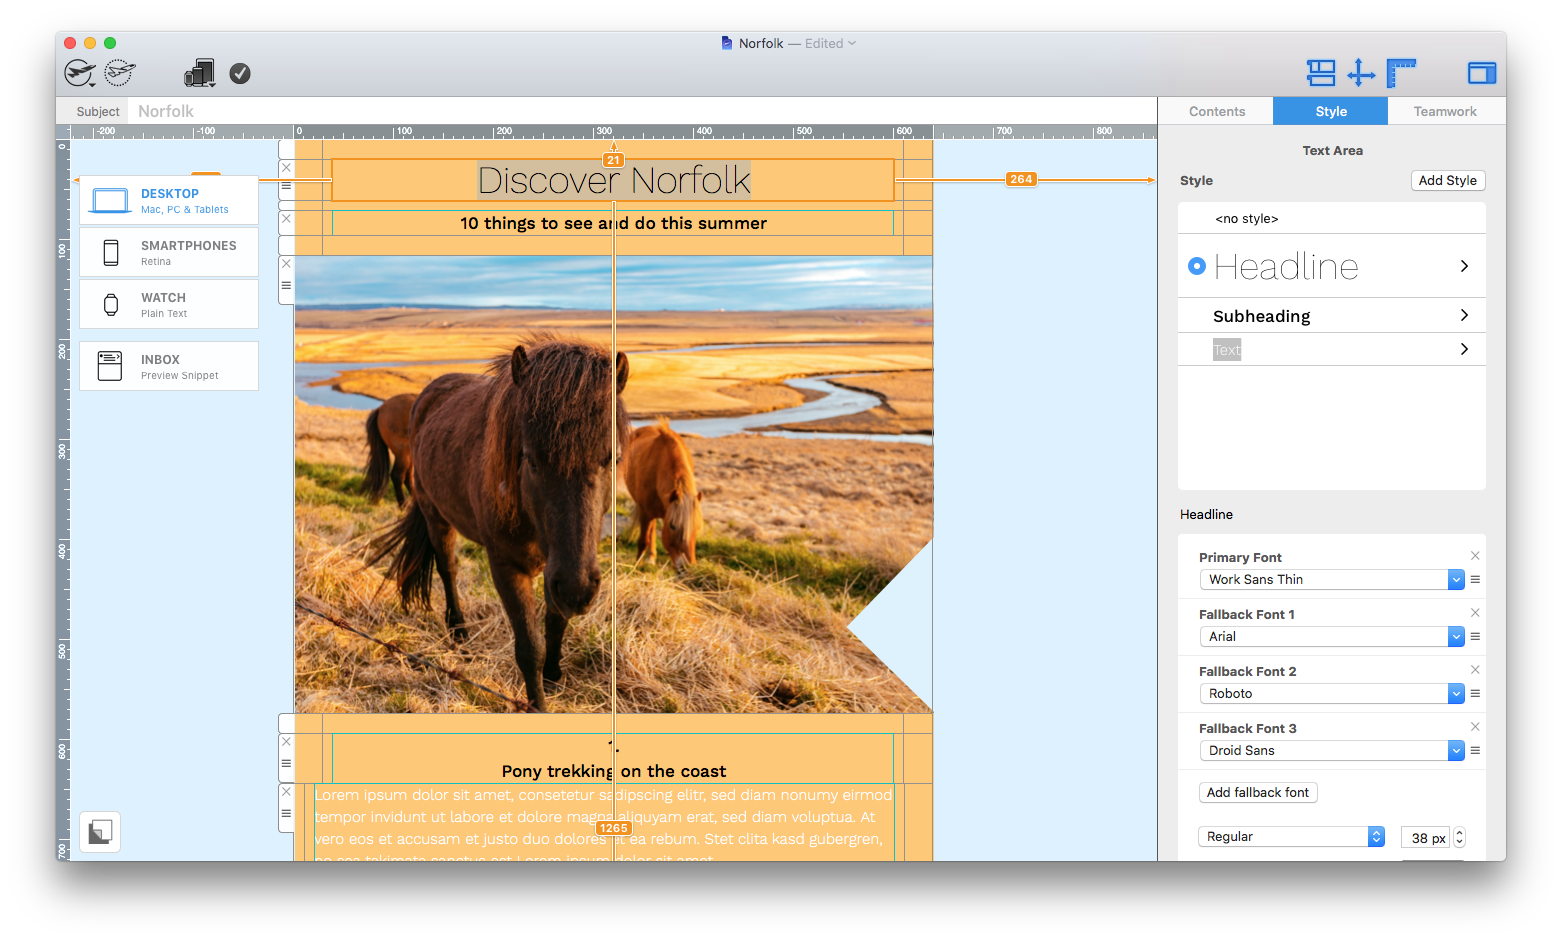
Enter a letter-spacing value
Scroll in the Style controls until you find Letter spacing. Enter a precise percentage value, or use the up and down arrows to compare small changes. Watch the selected text in the design while adjusting the value.
Start with a modest change. Headings may benefit from a little extra space, while body text usually needs tighter and more consistent spacing. Negative values bring characters closer together; positive values move them farther apart.
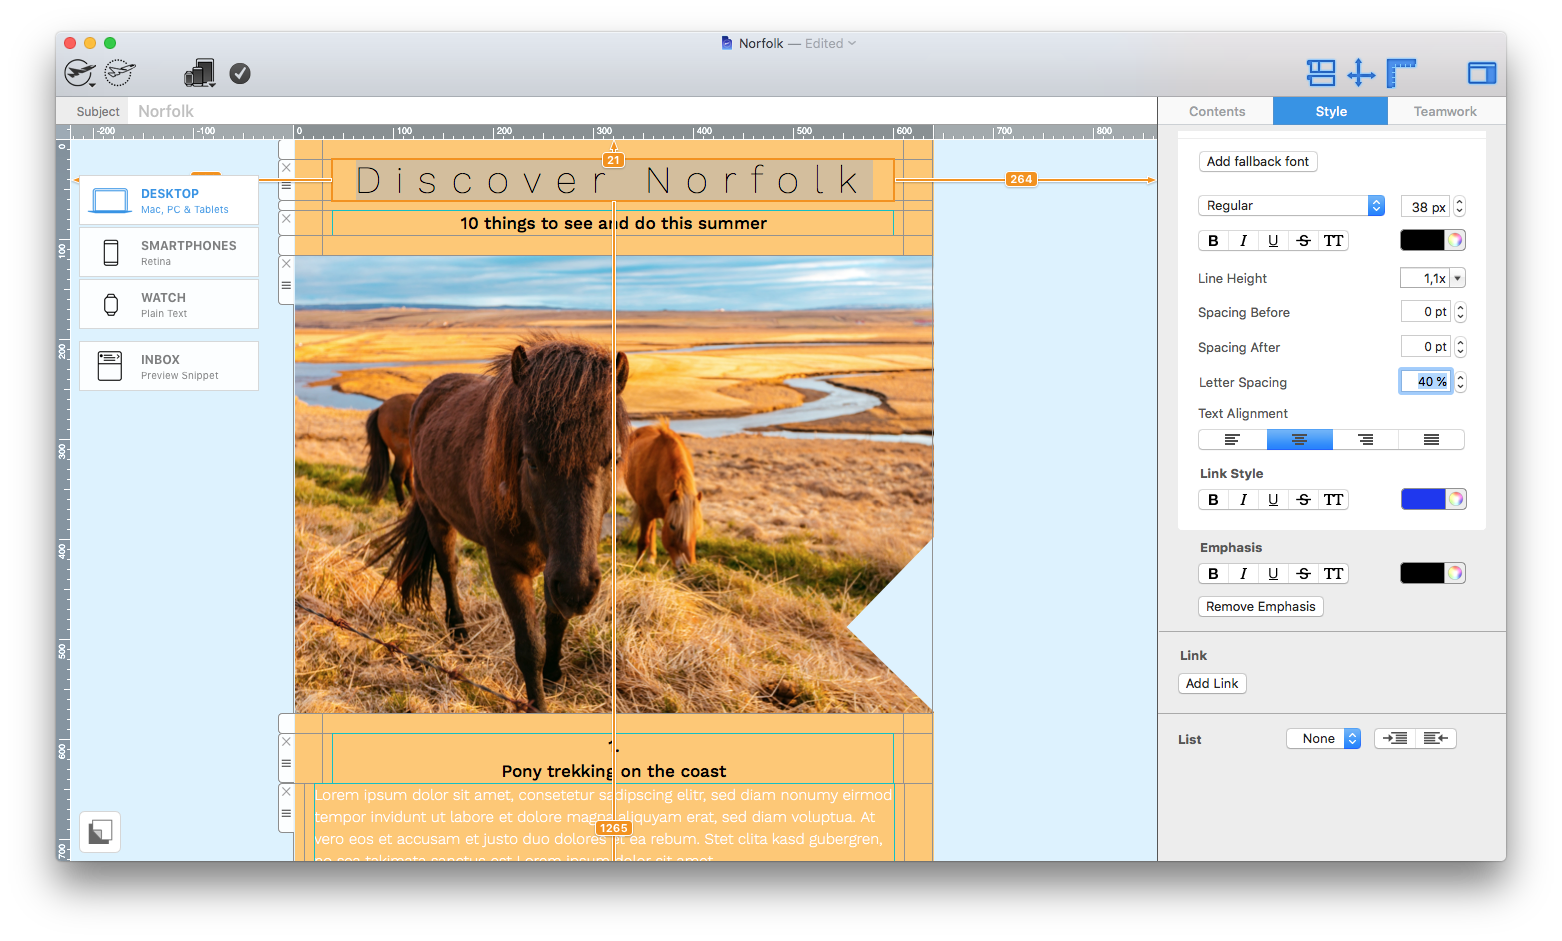
Choose spacing for the type of text
Uppercase headings often tolerate wider spacing because the individual letters have strong shapes. Short labels and buttons may also benefit from a subtle increase. Long paragraphs, narrow columns, and small text should usually stay close to the font’s default spacing.
Consider the font as well. A value that looks balanced with one typeface may appear too loose or too tight with another. Review the actual words used in the campaign rather than judging the style from placeholder text.
Save the setting in a text style
Mail Designer 365 saves the letter-spacing setting as part of the text style. This helps you reuse consistent typography across the email. When you apply that style to another text element, check that its different word length and container width still produce a good result.
If you need a style that is used only in the mobile version, see creating mobile-only text styles.
Check line breaks and layout width
Changing character spacing also changes the total width of the text. A heading may wrap to another line, a button label may no longer fit, or a paragraph may become taller. Check the surrounding layout after every significant adjustment.
Do not reduce font size solely to compensate for excessive spacing. A smaller spacing value or shorter wording usually preserves readability more effectively.
Preview desktop and smartphone versions
- Check headings and body copy at both layout widths.
- Look for unexpected line breaks or clipped text.
- Confirm that button labels remain centered and readable.
- Compare the visual hierarchy with nearby sections.
- Review text contrast as well as spacing.
Mobile layouts have less horizontal space, so a wide letter-spacing value can cause wrapping that does not appear on desktop. Make separate adjustments where the design workflow supports them.
Send a test email
Previewing in the editor is useful, but a test email shows how the typography renders in actual email clients. Open the message on a phone and desktop computer, then compare important headings, buttons, and paragraphs.
When the spacing looks consistent and the text remains easy to read, save the design and reuse the style where appropriate. Treat letter spacing as a refinement that supports the message rather than a decorative effect applied to every text element.
How Can We Help?