
Export Mail Designer to Mailchimp when you want to build a responsive email in Mail Designer 365 and send the finished campaign through Mailchimp. Mail Designer 365 also offers integrated sending features in the Mail Designer 365 Delivery Hub.
In order to export your Mail Designer 365 email design to Mailchimp, go to Share > Mailchimp:
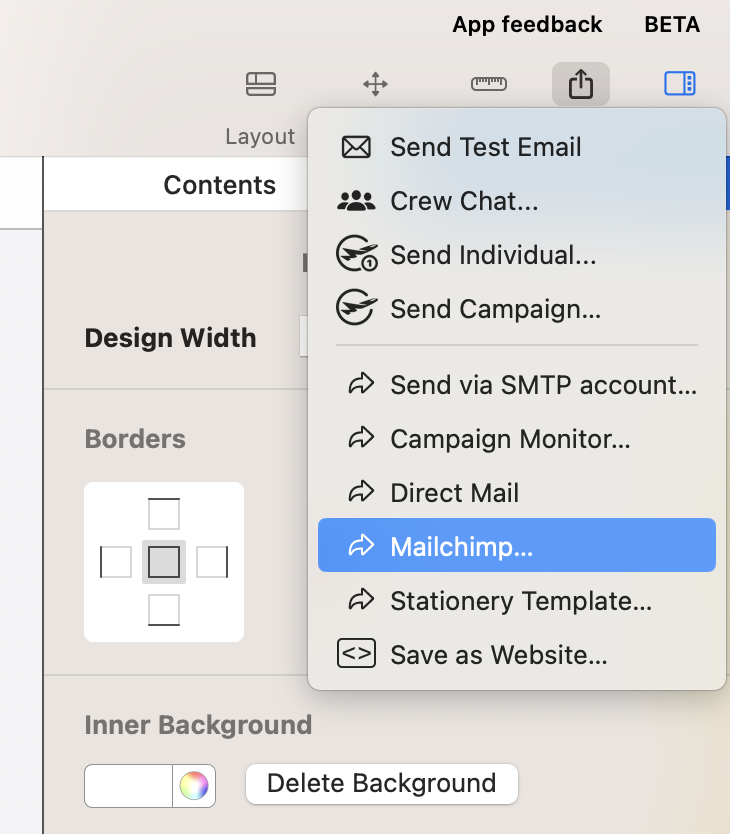
You’ll then need to enter your Mailchimp API key:
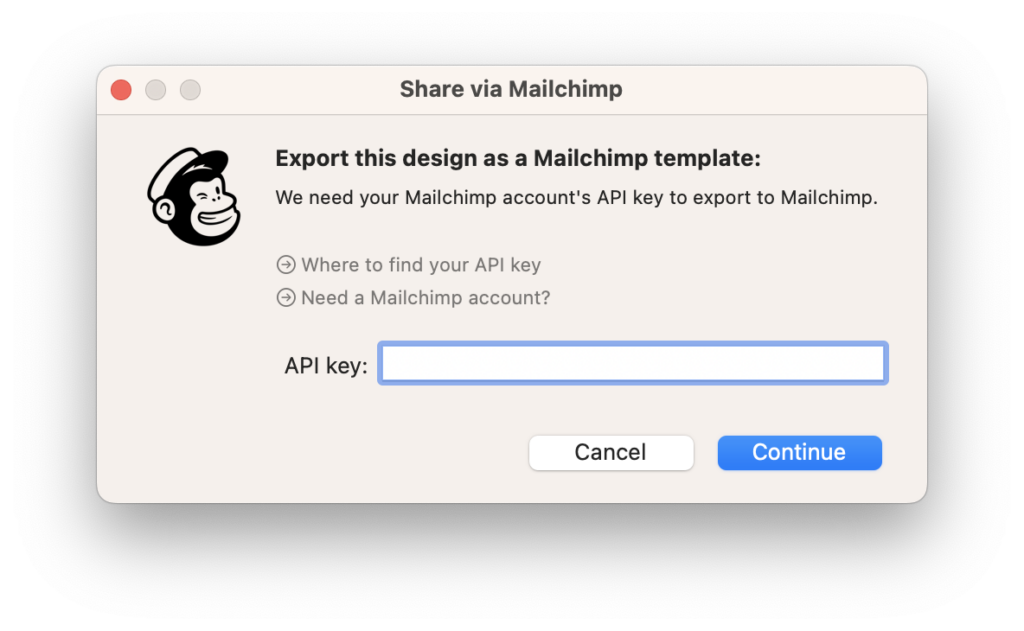
To generate your API key, follow these steps:
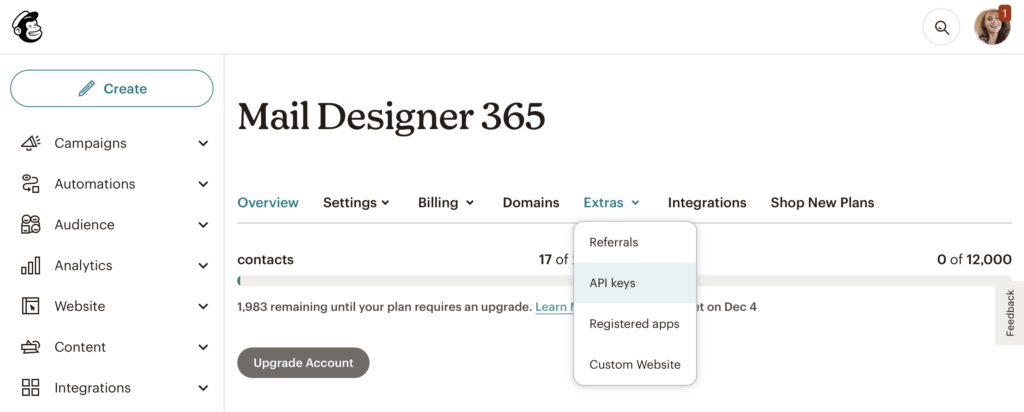
Go to the Mailchimp website and sign in to your Mailchimp account. Then, click the icon to go to your account settings and choose Extras > API keys:
Here you can create a new API key for Mail Designer 365:
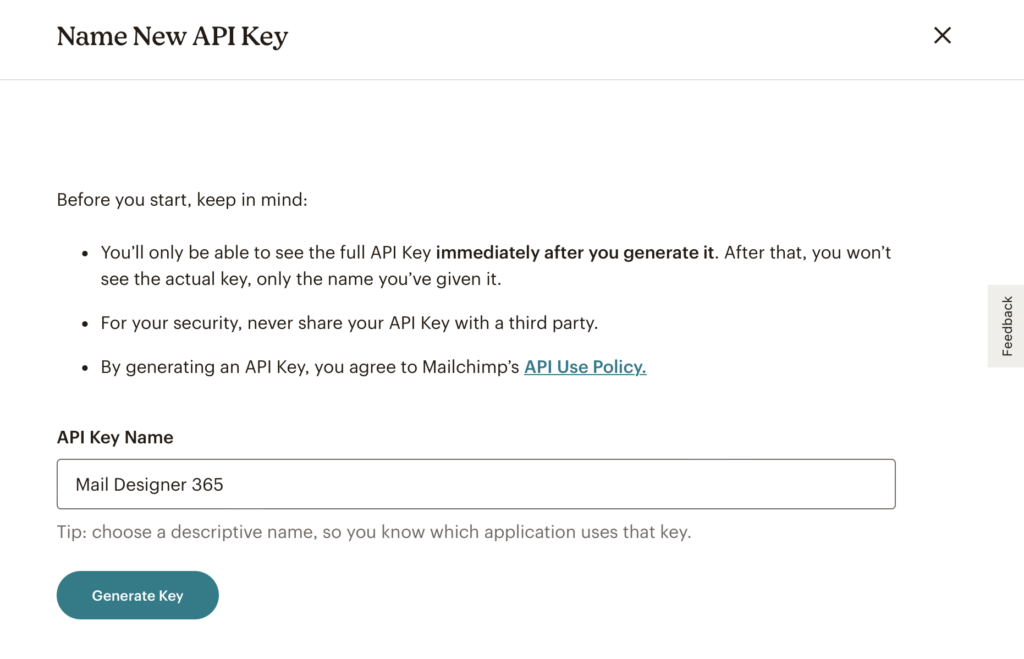
Copy and paste the API key into Mail Designer 365 in the field provided. Mail Designer 365 can store your API key in your keychain, so you only need to set this up once.
Once you have added your Mailchimp API key to Mail Designer 365, click Export to share your design to Mailchimp.
How Can We Help?
Export Mail Designer to Mailchimp step by step
Before you export, finish the design in Mail Designer 365 and check the desktop and mobile previews. Confirm that every image is available, each button points to the intended destination, and any placeholder text has been replaced. This keeps the Mailchimp copy focused on final sending checks instead of design repairs.
Connect Mailchimp securely
Choose Share > Mailchimp in Mail Designer 365 and enter the Mailchimp API key requested by the integration. Use a key for the correct Mailchimp account and keep it private. After the connection succeeds, select the destination account or template area shown in the export flow and complete the transfer.
Check the exported Mailchimp template
Open the exported design in Mailchimp and confirm that the expected layout, images, links, and text are present. Send a Mailchimp test email to yourself before scheduling a campaign. Check the message on desktop and mobile, click every important link, and verify the sender details, subject line, preview text, audience, and unsubscribe behavior in Mailchimp.
If an image is missing after export, return to the original Mail Designer 365 design and make sure the source image can be accessed and has completed loading. Export again only after correcting the source design. Keeping one approved Mail Designer version reduces the risk of making conflicting edits in both systems.
When to use this workflow
Use this workflow when Mail Designer 365 is your design environment and Mailchimp is your campaign delivery service. It transfers the finished email design to Mailchimp; it does not export an existing Mailchimp campaign back into Mail Designer 365. That distinction keeps this guide separate from Mailchimp backup, account-transfer, or HTML-download instructions.
Pre-export checklist
- Confirm the final subject line and preview text will be set in Mailchimp.
- Replace sample names, dates, prices, and placeholder links in the Mail Designer 365 design.
- Check image alternative text and verify that important information is also available as live text.
- Use descriptive link labels and make sure the primary button clearly explains the next step.
- Review the design at mobile width and confirm that text remains readable without zooming.
After the transfer, treat Mailchimp as the sending environment. Audience selection, sender authentication, scheduling, campaign analytics, and compliance settings are handled there. If you later change the design in Mail Designer 365, export the updated version deliberately and test it again rather than assuming the earlier Mailchimp copy changed automatically.