
You can export email marketing designs from Mail Designer 365 when another newsletter service supports custom HTML templates with images. The exact import workflow depends on the destination provider, but the exported files normally include the HTML and image assets required to reproduce the design.
Mail Designer 365 also provides integrated sending options for email campaigns. Export is useful when your organisation needs to deliver through another compatible email service provider.
Check the destination tool before exporting
Before preparing the design, confirm that the destination service accepts custom HTML email templates. Check whether it supports uploaded image files, a complete ZIP archive, pasted HTML, or another package format. Some services limit custom code or require particular account permissions.
Review the provider's current documentation instead of assuming that every platform uses the same import screen. Mail Designer 365 creates the export, while the receiving service controls how that package is uploaded, validated, and sent.
Export the HTML email design
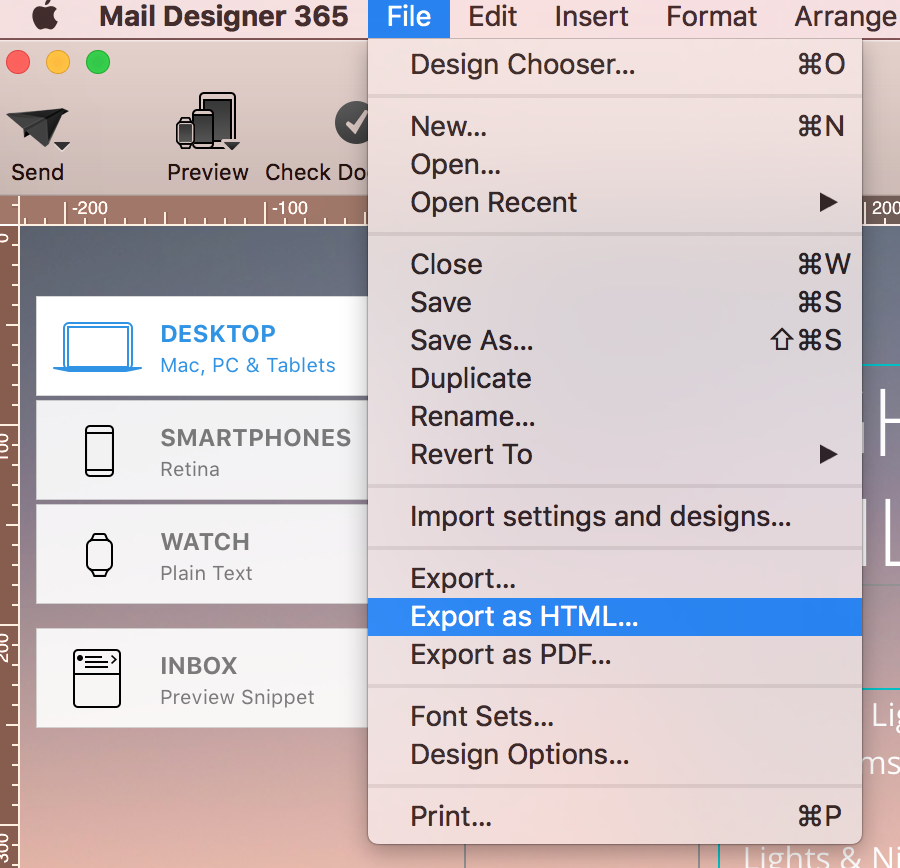
Complete the layout, links, alternative text, desktop version, and mobile version before exporting. Then use the Mail Designer 365 export workflow to create the HTML and associated files. For the detailed export steps, see how to export a design as a website.
Keep the exported files together
Do not rename, omit, or reorganise files until you understand how the HTML references its images. A missing asset or changed path can cause broken images after import. Keep an untouched copy of the original export so you can return to a known package if the destination tool changes a file.
If you need a ZIP archive, create it from the complete exported folder rather than selecting only the HTML file. The receiving provider may expect the relative file structure to remain intact.
Choose the import method required by your provider
Depending on the email marketing service, you may need to use one of these approaches:
- Upload one compressed ZIP archive containing all files exported from Mail Designer 365.
- Upload the HTML file and a separate ZIP archive containing the images.
- Copy and paste the HTML source, then upload the images through the provider's media workflow.
- Upload the HTML and image files individually while preserving their expected paths.
Use the method documented by the destination service. Do not mix instructions from different providers, because their template editors, image hosting, and validation rules can differ.
Review images and links after import
Open the imported template inside the destination tool and check every image. Confirm that images are publicly reachable and not linked to a private local file. Review the desktop and mobile layouts for changed spacing, widths, or crops.
Click every important link and verify the final destination. Preserve approved tracking parameters and make sure the receiving platform has not added a conflicting destination. Check buttons, linked images, unsubscribe behaviour, and required sender information according to the provider's rules.
Do not use Mailchimp export instructions in reverse
This page describes exporting a design from Mail Designer 365 and importing it into another compatible tool. It does not explain how to export an existing Mailchimp campaign or template. Those are different workflows controlled by Mailchimp and should use Mailchimp's current documentation.
Troubleshoot a custom HTML import
- Images are missing: verify that all image files were uploaded and that their paths remain valid.
- The layout changes: check whether the destination editor rewrites or restricts custom HTML.
- The provider rejects the package: compare the archive structure and file types with its import requirements.
- Links are incorrect: inspect the imported destination rather than relying only on the original design.
Send a test before launching the campaign
Send a test message through the destination platform. Review it in common desktop and mobile email clients, test images-on and images-off behaviour, and click every primary action. If the imported result differs materially, correct the Mail Designer 365 source or adjust the destination workflow, then export and test again.
How Can We Help?