
Configuring SMTP email accounts

By Other Sharing Options

Go to Mail Designer 365 > Settings

Choose SMTP Accounts and click on the + in the bottom left corner to configure a new SMTP account:


Enter your email address and password in the fields provided:


Note that for custom/internal email accounts (i.e a work account), your network administrator may have to provide you with the information which you can enter by ticking Enter custom server settings:


Click Next to set up the rest of your account's settings:


Tip: Click the Test button to check your mail server is reachable.


Converting email templates to JPEG or PNG file

By jstawska Other Sharing Options

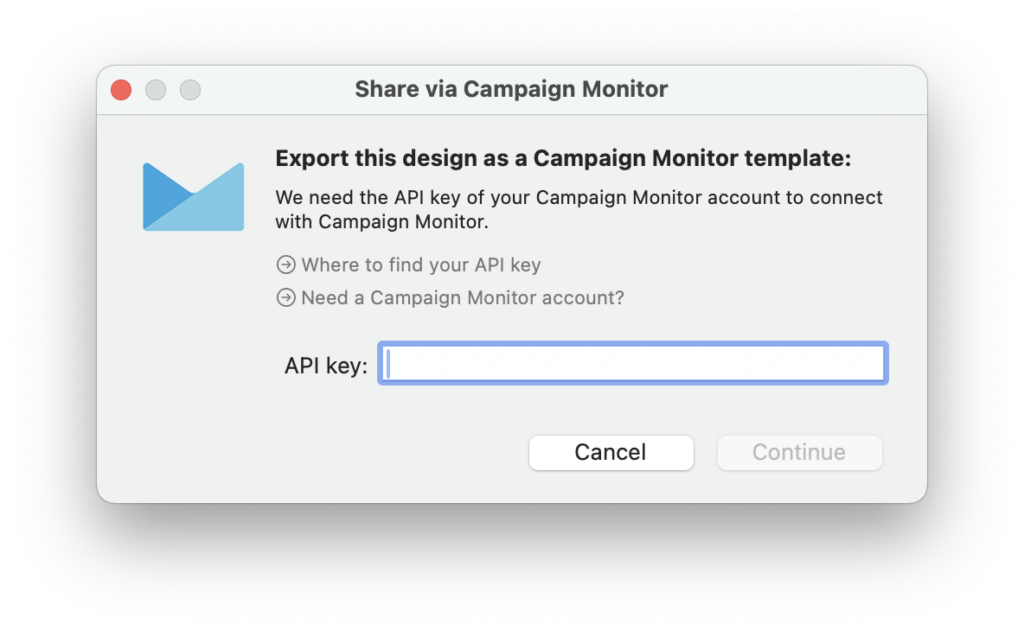
Converting an Email Template to PNG

Mail Designer 365 allows you to directly export your email newsletter as a PNG file, giving you an alternative, high quality option to share your designs with your audience – for example on your website, on social media or printed.

How it works:

Let's say you've created an email template to advertise a promotion you're running in your online store. The email has gone out and now you want to export the design so you can use the visuals for other platforms.

exporting an email design as a png

You can export this email design as a png to share on other platforms

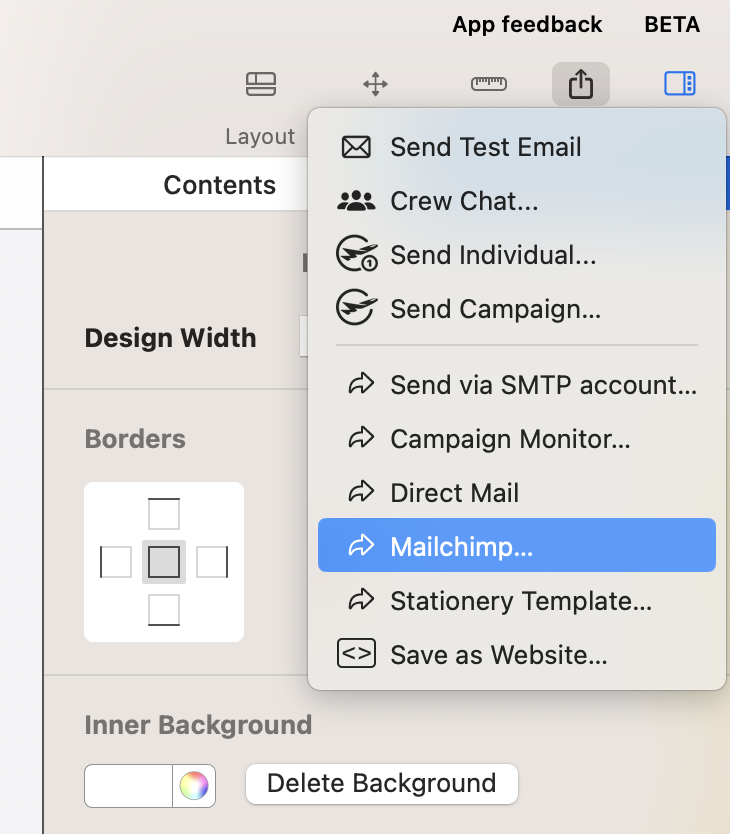
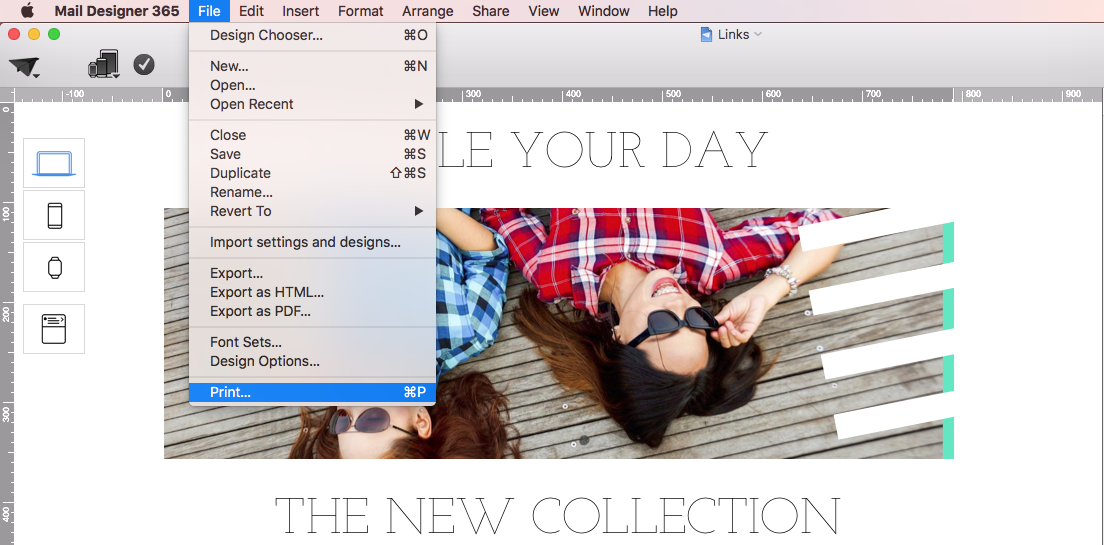
You can export your Mail Designer 365 email template as a PNG file by choosing File > Export and choosing the version of your design you'd like to save:

export as a png via the app menu

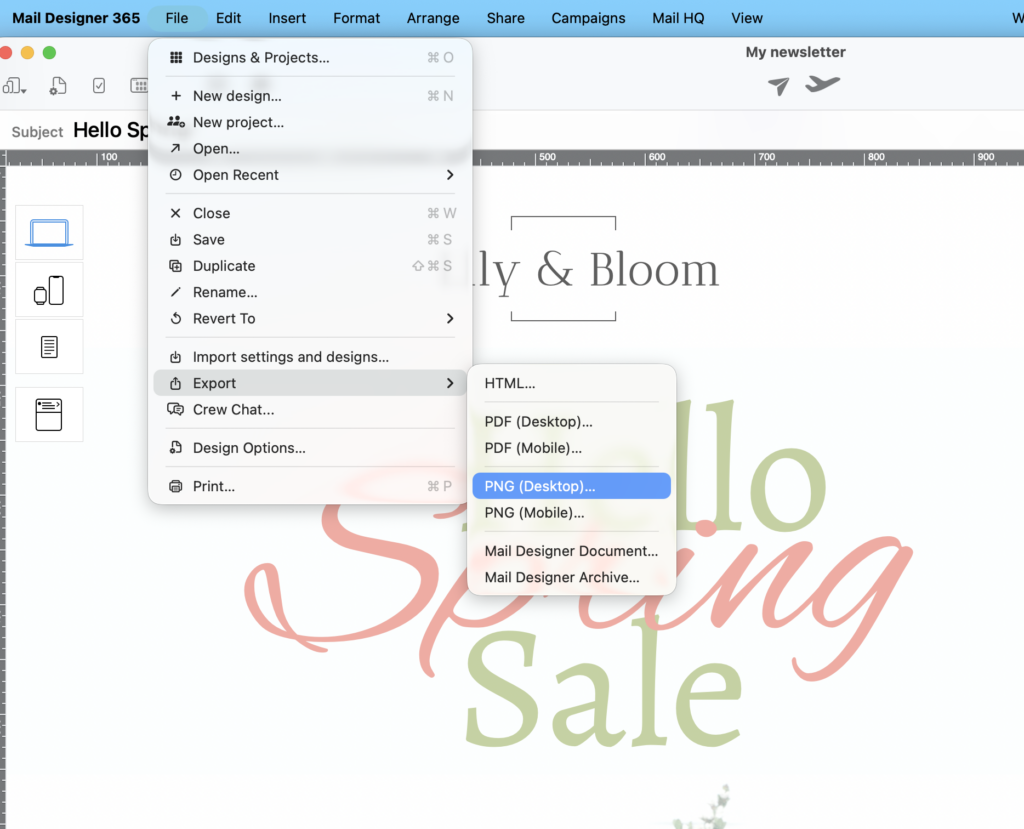
Select File > Export to export as a PNG

Optimizing Your Design for Other Platforms

Mail Designer exports your design at its exact canvas width. If you are repurposing an email for social media or a website, you should consider adjusting the measurements in the editor before exporting to ensure it looks its best once uploaded.

As a guide, here are the suggested dimensions for some of the most popular platforms:

Platform Suggested Size (WxH) Recommended Version
Instagram / LinkedIn Posts 1080px x 1350px Desktop
Blog Headers 1200px – 1600px (Width) Desktop
Facebook Cover 820px x 312px Desktop
Standard Email 600px – 800px (Width) Desktop (375px for Mobile)

How to Check Your Dimensions Before Exporting

To make sure your design fits the recommended sizes above, you can check your current dimensions directly in the Mail Designer editor:

  • Design Width: This is set in the Document settings in the sidebar. To change your design width, go to the sidebar and enter your desired pixel width before hitting export:
    Adjust the design width before exporting

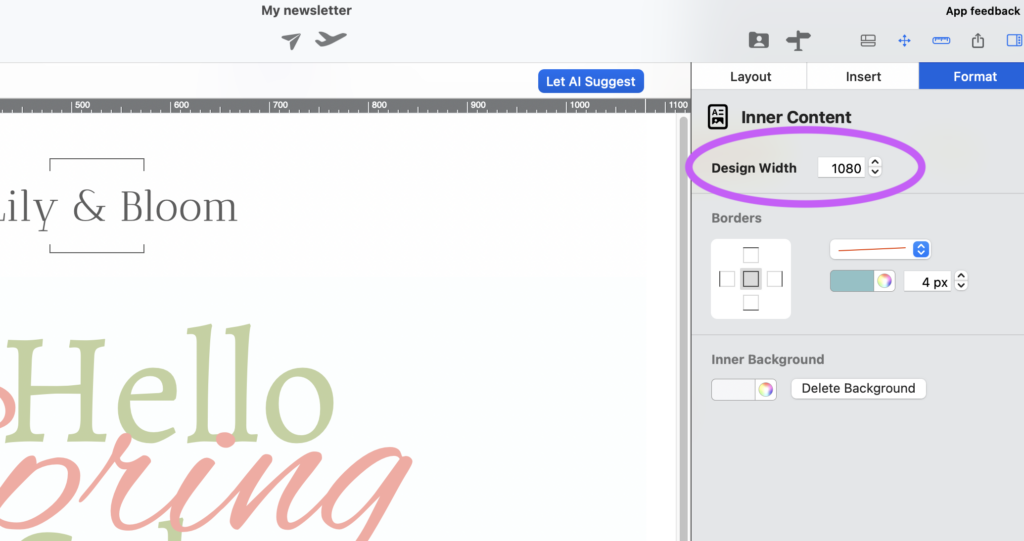
    Adjust the design width here before exporting to optimise for other platforms

  • Height: Look at the Ruler on the left side of your canvas. The total height is determined by the number of blocks you have added.

Measurement Tip: If your design is currently 800px wide and you want it to be 1080px for Instagram (4:5 ratio), your height should be roughly 1350px. Simply resize or remove blocks until you hit that mark on the ruler!

Use the ruler to control the height of your design

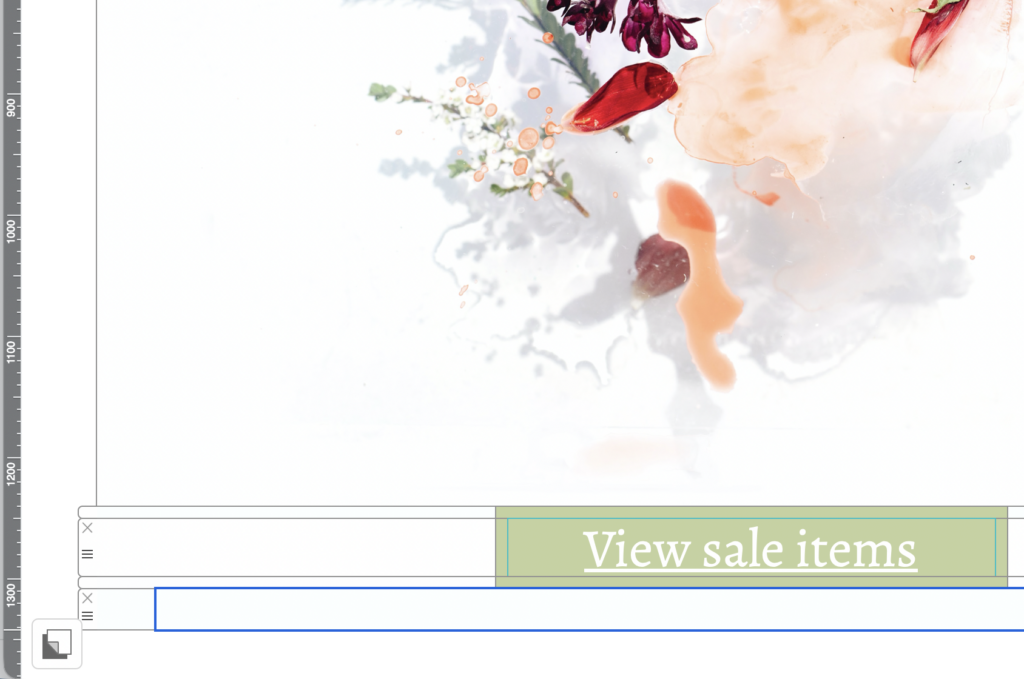
Use the ruler to check the design height

Once your dimensions look good, go to File > Export > PNG (Desktop) to save your high-resolution design.

Which format should I choose?

PNG vs JPEG

While PNG is perfect for logos and sharp text, a JPEG is often better for repurposing your designs for social media or blog headers because it offers a much smaller file size without sacrificing visual quality.

Use Case Best Format
Instagram / Facebook Posts JPEG (Faster uploads)
Website Hero Banners JPEG (Better SEO/Loading)
Logos & Icons PNG (Supports transparency)
Print Materials PNG (Maximum detail)

Note: JPEG does not support transparency. If your design has a transparent background, converting it to JPEG will turn those areas white.

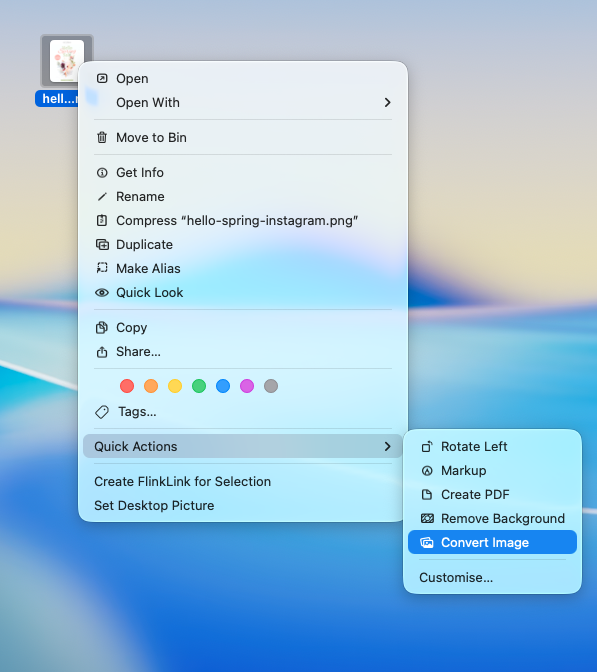
How to Convert PNG to JPEG (macOS)

On a Mac, you can convert your new export in seconds without opening any extra apps:

  1. Locate your exported PNG file in Finder.
  2. Right-click the file (or highlight multiple files to batch-convert).
  3. Select Quick Actions > Convert Image:
    Convert your exported PNG into a JPEG

    Convert your exported PNG into a JPEG

  4. Select JPEG as the format and choose Actual Size to keep your design crisp.
    Select JPEG format
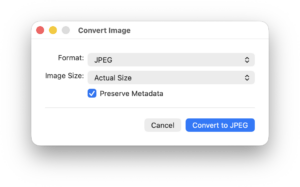
  5. Click Convert to JPEG.


Formatting when uploaded to Mailchimp

By Team equinux Other Sharing Options

Is your email design being displayed incorrectly?

Usually, the edit mode in Mailchimp will display your Mail Designer 365 email design inaccurately. If you come across this problem, don't worry. Mailchimp's editor view does not read the more advanced designs you can create with Mail Designer 365 properly. Your email design is still safe and intact.

After uploading your design to Mailchimp, open your template in the Preview mode rather than the Editor view. Mailchimp's preview  mode will show you your design as it's supposed to look.

You can find Mailchimp's preview mode by clicking "Preview and Test" from the upper right corner of the Mailchimp website. Then, choose "Enter preview mode." The format of your email design should now look the same as it does in Mail Designer 365.


Using placeholders with Campaign Monitor

By Team equinux Other Sharing Options

With Campaign Monitor, you can use placeholders within your email design. Placeholders will automatically insert personalized details into your email. If you personalize your campaigns, then recipients will feel a more direct connection with your brand.

To use Campaign Monitor placeholders:

‣ Go to a text area within your design
‣ Choose Insert > Campaign Monitor
‣ Choose the placeholder you would like to add

You can insert a placeholder into your text. Remember, information from your Campaign Monitor account will then replace the placeholder.

Campaign Monitor placeholders:


Exporting a design to Campaign Monitor

By Team equinux Other Sharing Options

As well as offering integrated sending features in Mail Designer 365 Delivery Hub, Mail Designer 365 also offers direct integration with Campaign Monitor.

In order to export your Mail Designer 365 email design to Campaign Monitor, go to Share > Campaign Monitor:

You’ll then be asked to enter your Campaign Monitor API key:

How to generate your API key:

‣ Sign in to your Campaign Monitor account

‣ Go to Settings > API & integrations

‣ Scroll down to API Key where you will find your account's unique API key

‣ Paste this into Mail Designer in the field provided

Good to know: Mail Designer 365 can store your API key in your keychain, so you should only need to set this up once.

Once you have added your API key, click Export to send your design to Campaign Monitor.

Using placeholders with Mailchimp

By Team equinux Other Sharing Options

With Mailchimp, you can use “placeholders” or “merge tags” in your email design. These are helpful for creating content. With their help, you will be able to insert your personalized details into your emails automatically.

To use Mailchimp placeholders

‣ Go to a text area within your design

‣ Right-click and choose "Insert" > "Mailchimp"

‣ Choose the placeholder you would like to add:

Adding a Mailchimp placeholder in Mail Designer 365

This will add a placeholder into your text. Remember, this will later be replaced with information from your Mailchimp account.

For more information about Mail placeholders:


Exporting a design to Mailchimp

By Other Sharing Options

As well as offering integrated sending features in Mail Designer 365 Delivery Hub, Mail Designer 365 also offers direct integration with Mailchimp.

In order to export your Mail Designer 365 email design to Mailchimp, go to Share > Mailchimp:

You’ll then need to enter your Mailchimp API key:

To generate your API key, follow these steps:

Go to the Mailchimp website and sign in to your Mailchimp account. Then, click the icon to go to your account settings and choose Extras > API keys:

Here you can create a new API key for Mail Designer 365:

Copy and paste the API key into Mail Designer 365 in the field provided. Mail Designer 365 can store your API key in your keychain, so you only need to set this up once.

Once you have added your Mailchimp API key to Mail Designer 365, click Export to share your design to Mailchimp.


Print your document

By Other Sharing Options

How to print

Mail Designer 365 makes it easy to print your design in case you want to hand it directly to your customers. Print a document by choosing ”File" > "Print...” from the top menu bar or using the keyboard shortcut ⌘ + P.


Privacy Settings / Datenschutz-Einstellungen