Email Preview Text: Inbox Preview Guide

By Team equinux Plain Text, Preview your Design

Email Preview Text in Mail Designer 365

Email preview text is the short snippet many inboxes display beside or below the subject line. It gives recipients extra context before they open the message. In Mail Designer 365, the Inbox Preview lets you edit the subject and preview text together and compare their appearance on different device previews.

Use the preview text to add useful information rather than repeat the subject line. Keep every promise accurate and consistent with the email content.
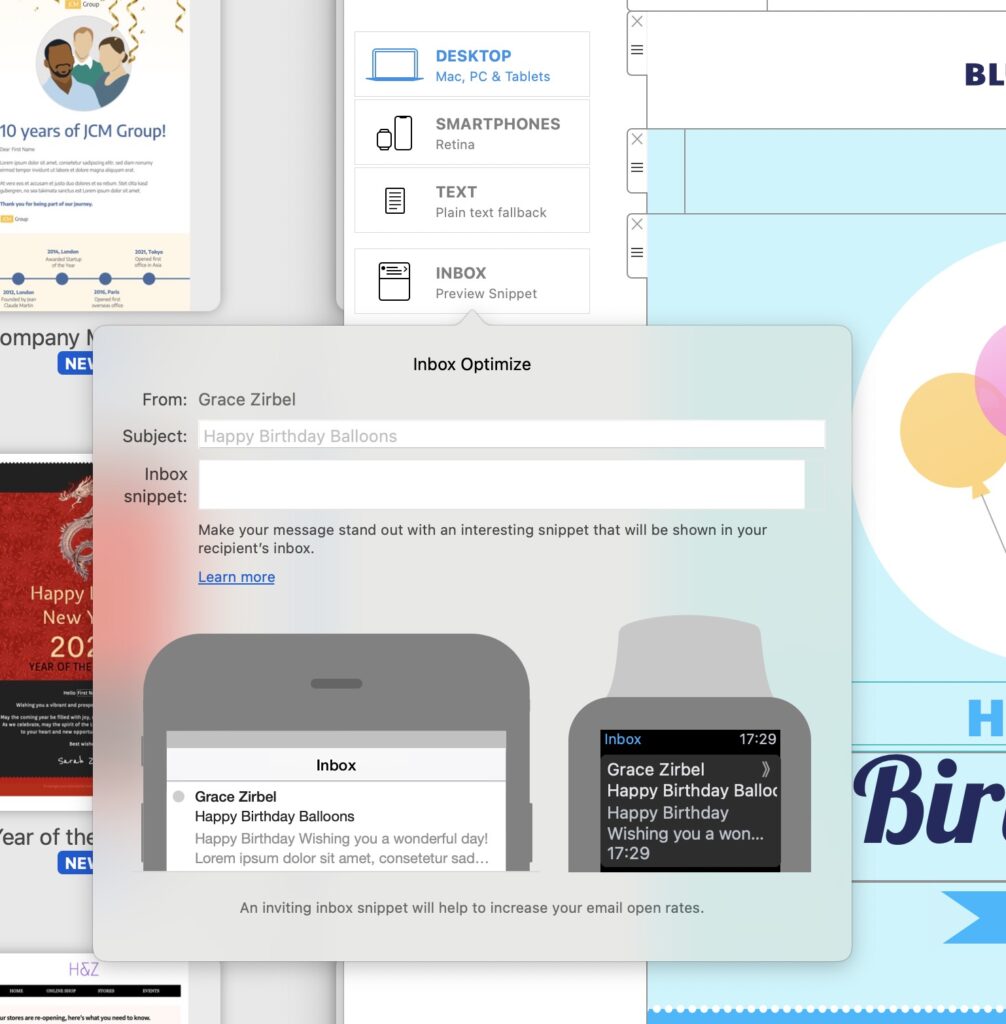
Edit email preview text in the Mail Designer 365 inbox preview

Open the Inbox Preview

  1. Finish the main newsletter content and check its links and images.
  2. Click the Inbox Preview icon on the left side.
  3. Use the window that opens to edit the subject line and preview text.
  4. Review the phone and smartwatch previews.
  5. Adjust the wording when important information is cut off or repeated.

Coordinate Preview Text and Subject Line

Read the subject and preview text as one combined inbox message. The subject should communicate the main reason to open the email. The preview text can add a supporting detail, deadline, audience cue, or next step.

Avoid copying the subject verbatim. Repetition uses limited inbox space without giving the recipient more information. Also avoid placing unrelated promotional language in the preview text when the email serves a support, confirmation, or account purpose.

Write Useful Email Preview Text

  • Lead with the detail that matters most after the subject.
  • Use natural language that matches the sender and campaign.
  • Keep names, dates, prices, and availability accurate.
  • Avoid unnecessary capitalization and excessive punctuation.
  • Do not rely on a fixed visible length across every inbox.

Different inboxes and screen sizes can display different amounts of text. Put essential wording near the beginning, then use the device previews to identify obvious truncation problems.

Use the Phone and Smartwatch Previews

Compare the available previews after entering the final subject and snippet. A phrase that looks complete on a wider inbox can be shortened on a smaller display. Check whether the visible opening still makes sense when the remaining words are hidden.

The preview is a planning aid, not a guarantee that every recipient will see identical spacing or length. Send a real test message to representative inboxes before the campaign.

Avoid Unwanted Preview Content

When an email has no deliberate preview text, an inbox may use other early message content. This can expose navigation wording, image alternative text, or utility copy instead of the intended campaign context. Add a purposeful snippet and inspect a received test to confirm the result.

Test the Inbox Preview Before Sending

  1. Review the subject and preview text for accuracy.
  2. Check phone and smartwatch views in Mail Designer 365.
  3. Send the message to test inboxes.
  4. Inspect the inbox list before opening the email.
  5. Confirm that the subject, sender, and snippet work together.

Repeat the test after changing either the subject or preview text. A strong pair should set the correct expectation without hiding the email's actual purpose.

Troubleshoot Email Preview Text

The Preview Text Is Cut Off

Move the most important detail earlier and remove repeated words. Do not try to force every inbox to display the same number of characters.

The Inbox Shows Different Copy

Confirm that the intended preview text was saved, then send a fresh test. Check the beginning of the email for other text that an inbox might choose as a snippet.

The Subject and Preview Repeat Each Other

Keep the stronger phrase in the subject and use the preview text for a supporting detail. Review both fields together in the Inbox Preview.

Email Preview Text Checklist

  • The subject states the main message.
  • The preview text adds new, accurate context.
  • Important wording appears near the beginning.
  • Phone and smartwatch previews were checked.
  • A received test displays an appropriate inbox snippet.

For related campaign instructions, browse the Mail Designer 365 Knowledge Base.
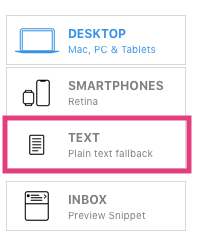
Create a Plain Text Email Template in Mail Designer 365

By Hans-Peter Plain Text

A plain text email template gives recipients a readable version of your message without images, layout styling, or rich formatting. Mail Designer 365 creates a plain text version from the desktop design and lets you edit it separately when the automatically generated text needs adjustment.

Plain text is useful for recipients or email clients that do not display the HTML design. It also provides a simple fallback for devices and viewing preferences where formatted email is unavailable. Keep the message concise, preserve essential links and contact details, and make sure the text still communicates the campaign purpose on its own.

Open the plain text email preview

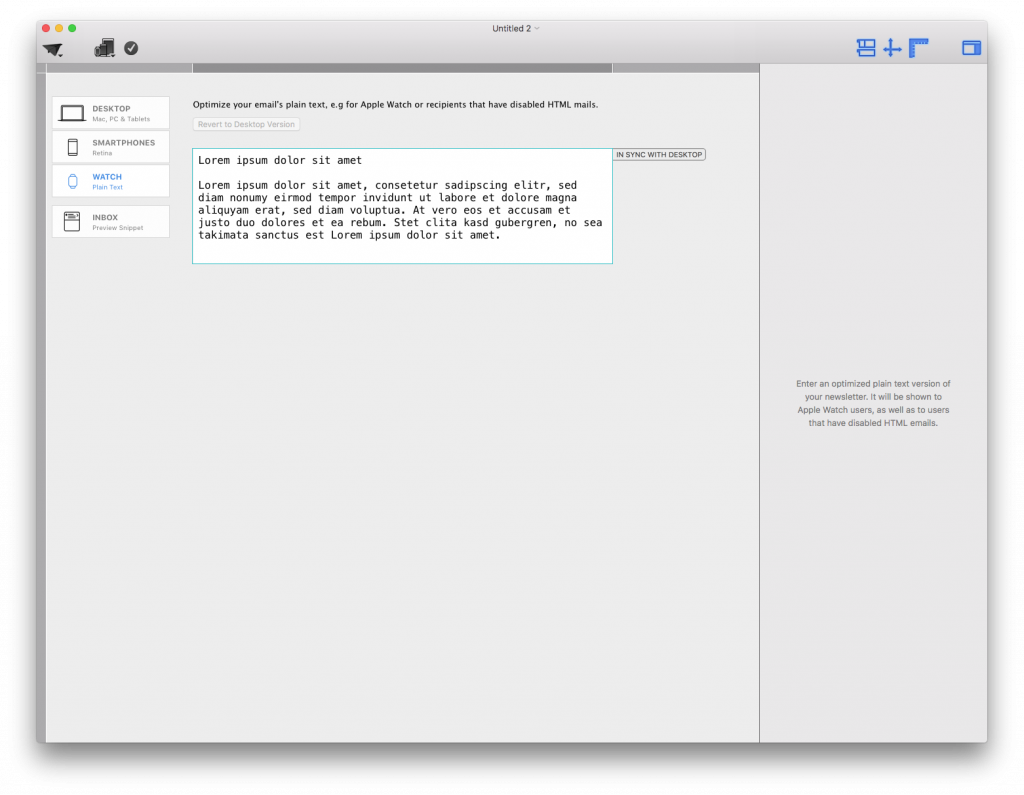
Open the preview controls and click the watch button to display the plain text version of the current Mail Designer 365 design.

Watch button used to open the plain text email preview

The preview shows the message without rich formatting. Read it from beginning to end before editing. Check whether headings, paragraphs, links, and calls to action appear in a logical order when the visual layout is removed.

Plain text version of a Mail Designer 365 email template

Understand the synced plain text version

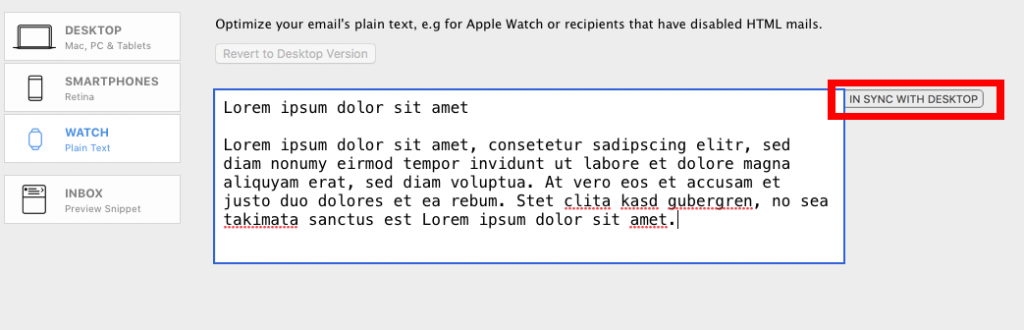
At first, the plain text version is automatically synchronized with the desktop design. The label on the right shows IN SYNC WITH DESKTOP. Changes to the source design can therefore be reflected in the generated text while the versions remain connected.

In Sync with Desktop label for the plain text version

Use the synced version when the generated reading order and wording already work. If you only need to correct the HTML design, make that change first and then inspect the synchronized plain text again.

Detach the plain text version for editing

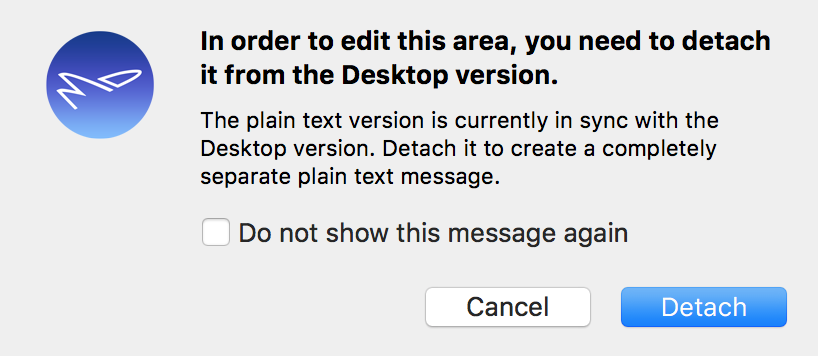
Click inside the plain text box when you need to change the fallback independently. Mail Designer 365 displays a notification explaining that editing will detach the plain text version from the desktop version.

Notification shown before detaching the plain text version

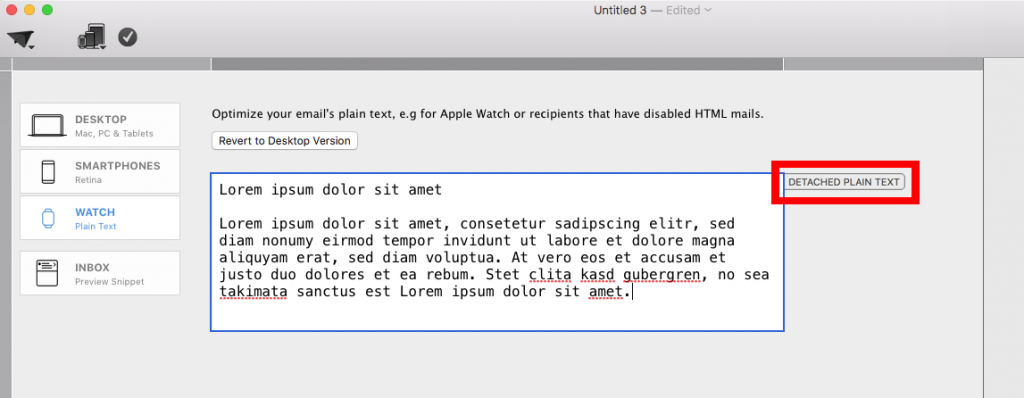
Choose Detach to start editing. The label changes to DETACHED PLAIN TEXT, confirming that this version can now differ from the desktop content.

Detached Plain Text label after enabling independent editing

Edit the plain text email template

Rewrite the text only where necessary. Preserve the main message, sender identity, important dates, contact information, and primary call to action. Because plain text does not provide visual buttons, use clear wording around each destination and keep full web addresses readable.

Use blank lines to separate major sections, but avoid long runs of empty space. Replace image-only information with a short text equivalent, and remove decorative captions that no longer make sense without their image. If an HTML heading becomes ordinary text, consider a simple descriptive line that still establishes the section.

After detaching, future changes to the desktop version may not automatically update the edited plain text. Add the plain text version to your campaign checklist and compare it with the final desktop copy before every send.

Revert to the desktop version when needed

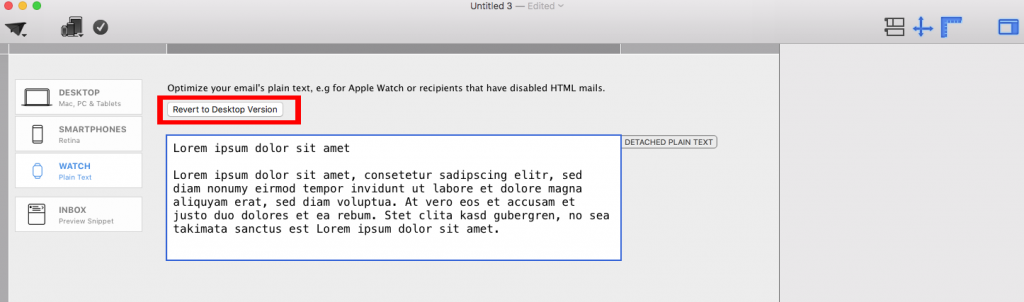
If the custom plain text version is no longer useful, choose Revert to Desktop Version. This returns the fallback to the text generated from the desktop design. Review the result again because your manual plain text changes will no longer be the active version.

Revert to Desktop Version control for plain text email

Plain text email status after reverting to the desktop version

Test the plain text version before sending

  • Read the complete message without referring to the designed HTML version.
  • Confirm that essential information and required legal text are present.
  • Check every web address and make sure the destination is public and correct.
  • Remove image-dependent instructions such as “click the button below” when no button appears.
  • Send a test message and inspect both the HTML and plain text presentations where possible.

For more campaign setup guidance, browse the Mail Designer 365 Knowledge Base.
Privacy Settings / Datenschutz-Einstellungen