
This Campaign Monitor email design guide explains how to export a completed Mail Designer 365 design directly to Campaign Monitor. The integration sends the email layout to your Campaign Monitor account so you can continue the sending workflow there instead of rebuilding the design.
Mail Designer 365 also provides integrated sending through the Delivery Hub. Choose the route that matches the account, contact, and reporting workflow your team intends to use.
Prepare the Campaign Monitor email design
Complete the layout before connecting the account. Review desktop and mobile versions, confirm that images are correctly cropped, check every link, and make sure essential text remains editable rather than embedded in a graphic.
If your Campaign Monitor campaign needs personalization, use the dedicated guide for Campaign Monitor placeholders. Provider-specific placeholders should be prepared for the destination platform rather than copied from another service.
Start the Campaign Monitor export
Open the finished design in Mail Designer 365 and choose Share > Campaign Monitor. This opens the integration workflow for the current document.
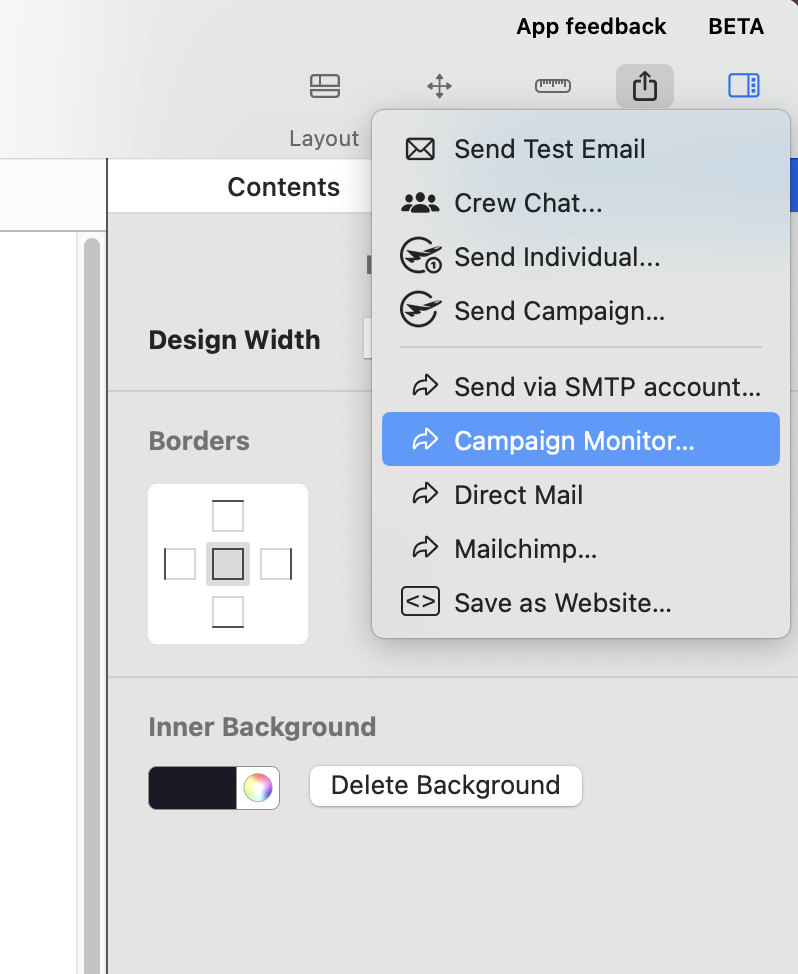
Confirm that you selected Campaign Monitor, not Mailchimp or a general HTML export. Each destination has its own connection and placeholder requirements.
Enter the Campaign Monitor API key
The first connection asks for the API key associated with your Campaign Monitor account. Paste the key into the field shown by Mail Designer 365.
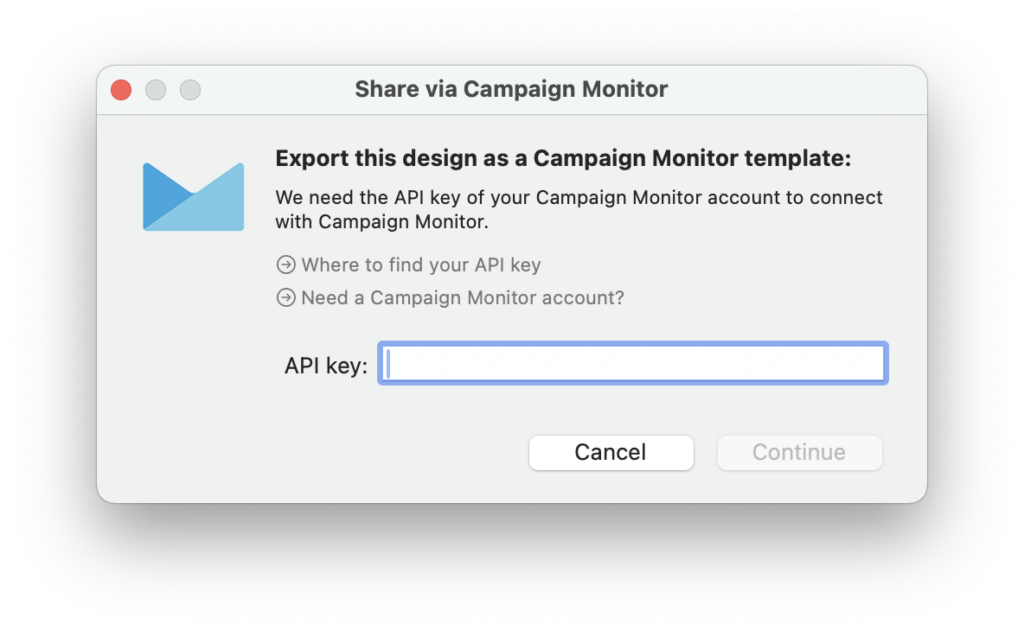
Treat the API key as an account credential. Do not place it in an email, screenshot, shared document, or public support request. Mail Designer 365 can store the key in your macOS Keychain so you normally need to configure the integration only once for that Mac user.
Find the API key in Campaign Monitor
- Sign in to the intended Campaign Monitor account.
- Open Settings.
- Choose API & integrations.
- Scroll to the API Key section.
- Copy the account’s API key and return to Mail Designer 365.
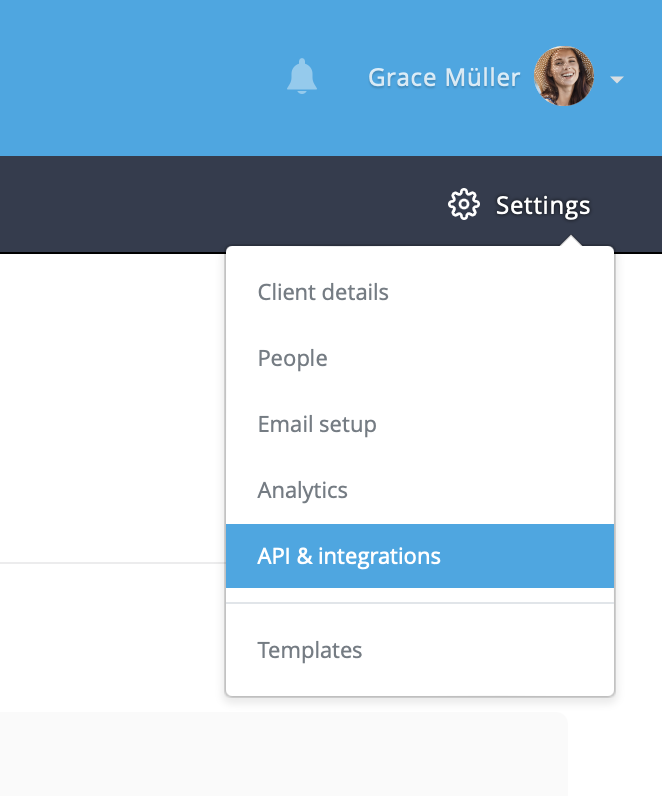
Make sure the key belongs to the account where the design should appear. If your organization uses several Campaign Monitor accounts, verify the account name before continuing.
Export the email design
After adding the API key, click Export. Keep Mail Designer 365 open until the transfer finishes. Then sign in to Campaign Monitor and locate the imported design before making campaign-specific changes.
The export moves the prepared email design into the destination workflow. Contacts, audiences, sending permissions, scheduling, and final campaign settings still need to be reviewed in Campaign Monitor.
Check images, links, and placeholders
Open the imported design and confirm that every image loads from the expected location. Click all buttons, linked images, and text links to verify their destinations. Check tracked URLs and remove any temporary test links.
Review personalization tokens separately. A Mailchimp merge tag or a Mail Designer Delivery placeholder is not automatically the correct Campaign Monitor syntax. Send a Campaign Monitor test to a record that contains representative contact data and confirm that the personalized values render correctly.
Review desktop and mobile output
Use Campaign Monitor’s preview and test tools after the import. Compare the result with the Mail Designer 365 desktop and mobile previews. Pay particular attention to image crops, table widths, button spacing, text wrapping, and background colors.
Send test messages to more than one email client when possible. The export can be structurally correct while a specific client still renders a section differently, so a delivered test is more reliable than preview alone.
Troubleshoot Campaign Monitor export issues
If the connection fails, verify that the API key was copied completely and belongs to the correct account. Re-enter it through the supported integration field rather than sharing or exposing it elsewhere. If the design does not appear, confirm that the export completed and that you are viewing the same Campaign Monitor account used for the connection.
If images are missing, return to Mail Designer 365 and verify the source image areas and export readiness. If links or placeholders are incorrect, fix them in the appropriate destination workflow and send another test. This Campaign Monitor email design guide is complete only when the imported campaign has passed content, link, personalization, desktop, and mobile checks.
How Can We Help?