Rounded corners in a Mail Designer 365 email design

Rounded Corners Web Design for Email

By Hans-Peter Graphics and Other Objects

How to Create Rounded Corners in Email Design

Rounded corners web design techniques help you build friendly buttons, text boxes, and visual callouts in a newsletter. Follow these steps in Mail Designer 365 to create the effect and keep it consistent across desktop and mobile layouts.

Text boxes with rounded corners are often used to create customized buttons. They can also add dimension and visual structure to a newsletter.

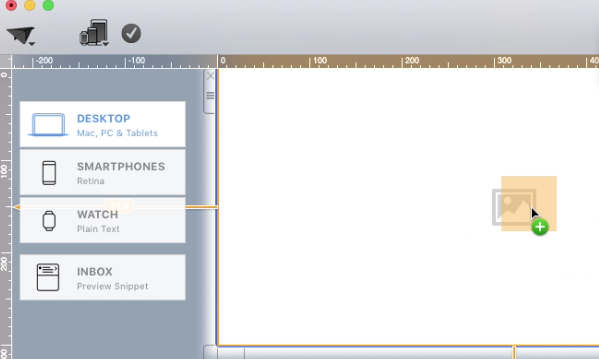
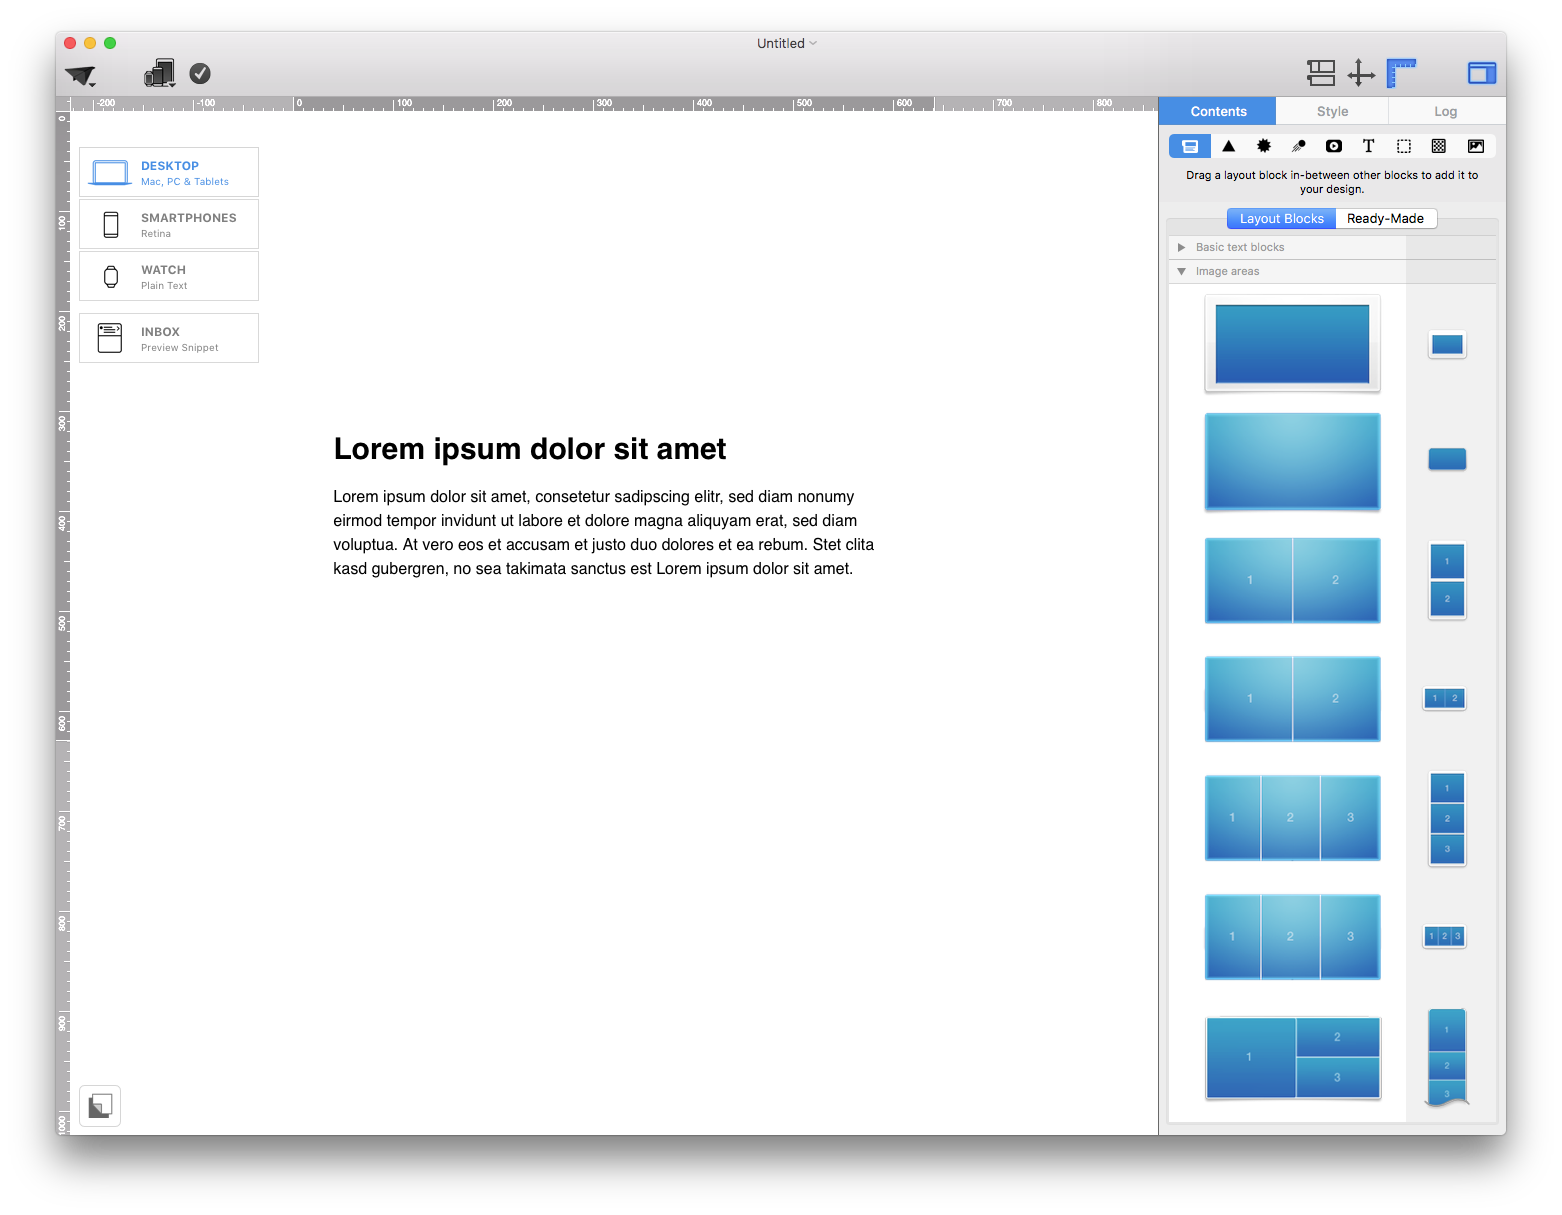
Open Mail Designer 365 on your computer. If there isn't one already, drag an image area into your design. You will find image areas under "Contents." Then, click the layout blocks button (the first button under "Contents") and scroll down to the image areas.
Mail Designer 365 rounded-corner email design screenshot


Once you have added an image area, go ahead and drag a square shape into your email design.

Mail Designer 365 rounded-corner email design screenshot

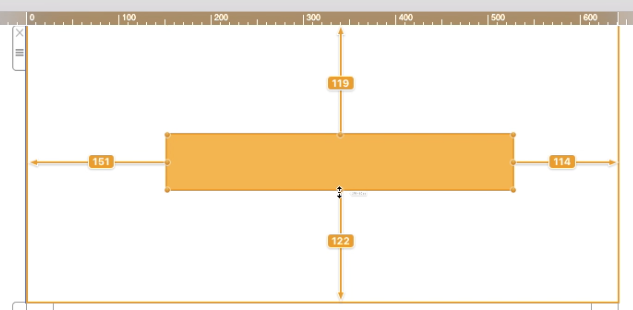
Adjust the size of your shape by dragging the size controls of the shape.
Mail Designer 365 rounded-corner email design screenshot

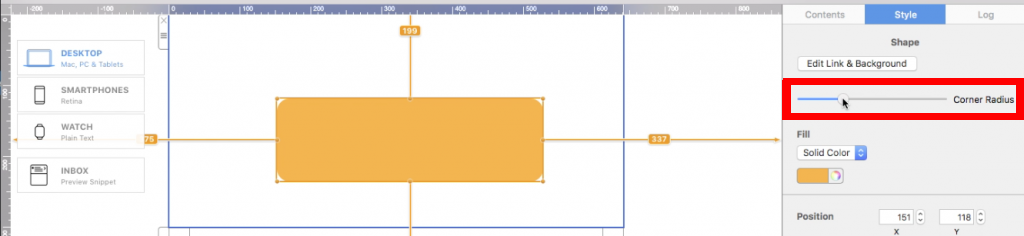
On the right side, you can round the corners of your shape by adjusting the corner radius.
Mail Designer 365 rounded-corner email design screenshot

After you have decided how round you want the corners to be, adjust the shape again if needed.
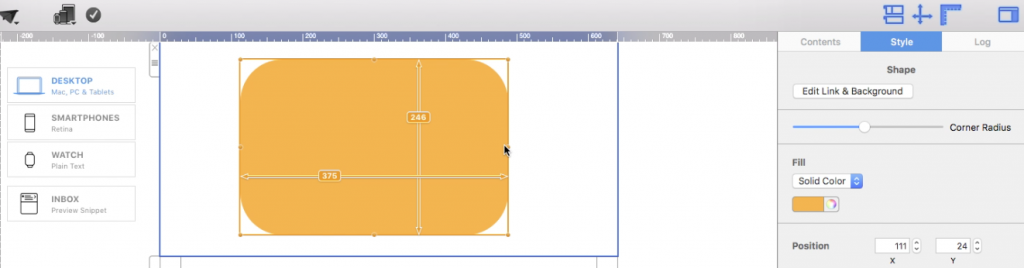
Mail Designer 365 rounded-corner email design screenshot

When you get the look that you want, click "Contents" on the right side.
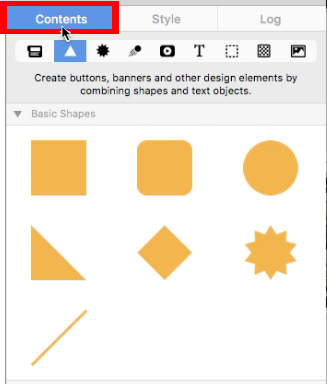
Mail Designer 365 rounded-corner email design screenshot

Then, click on the text object button.
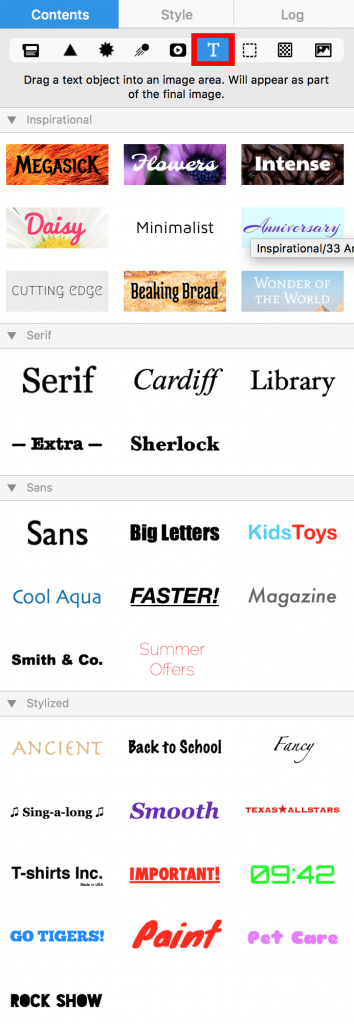
Mail Designer 365 rounded-corner email design screenshot

Choose your text object and drag it into the same image area as the shape.
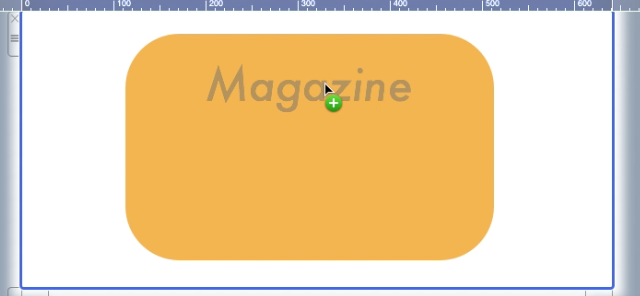
Mail Designer 365 rounded-corner email design screenshot

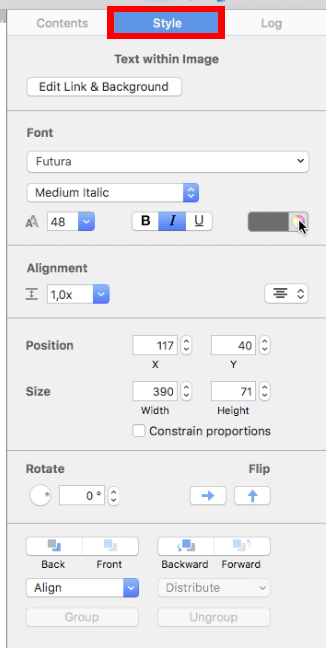
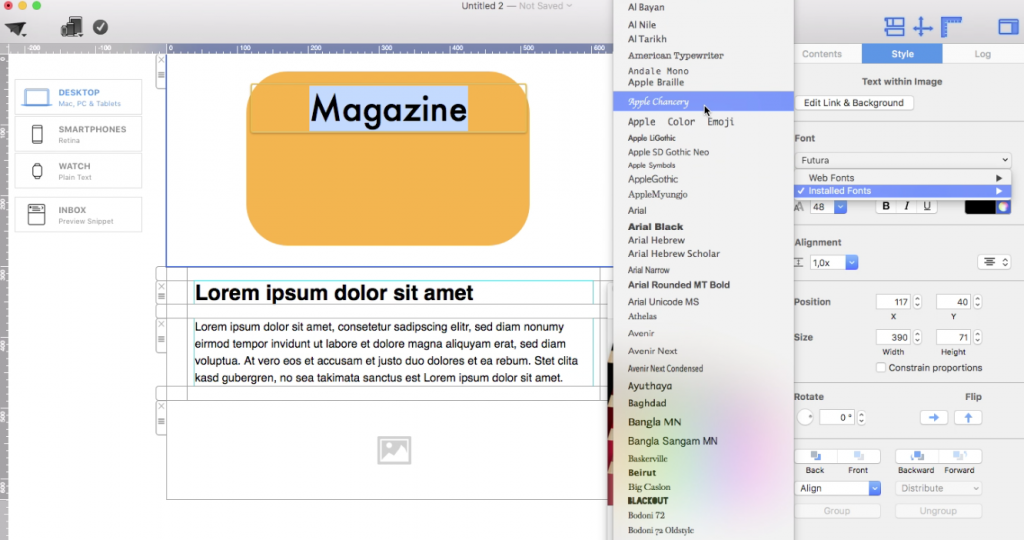
If you decide that you do not like the look of your text object, you can customize the font, color, style, size, and weight. You can do this by double-clicking on the text. Mail Designer 365 will automatically open the style tab on the right, where you can make all of your adjustments.
Mail Designer 365 rounded-corner email design screenshot

Mail Designer 365 rounded-corner email design screenshot

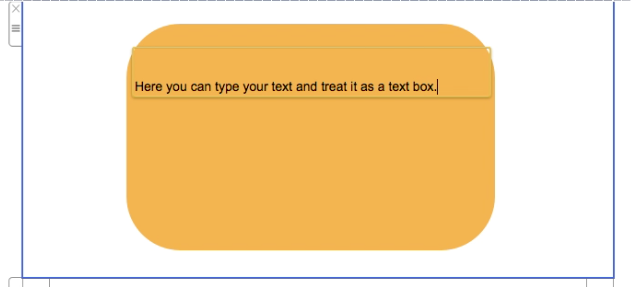
To edit your text, double-click the text and type your message.
Mail Designer 365 rounded-corner email design screenshot

Create Multiple Rounded Text Boxes

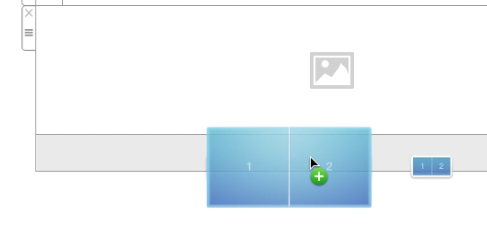
Choosing layout blocks with multiple image areas will make it easier for you to edit individual boxes. In this example, we are going to use two image areas. Drag a layout block with two image areas into your email template.
Mail Designer 365 rounded-corner email design screenshot

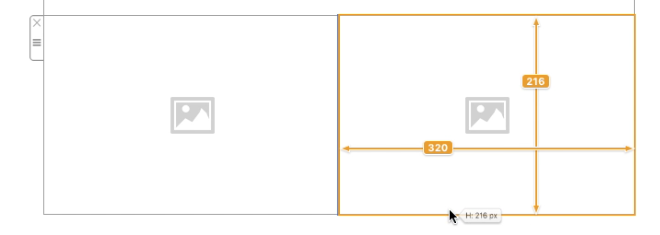
Then, adjust the size of the image areas. Just drag the outline of the image area.
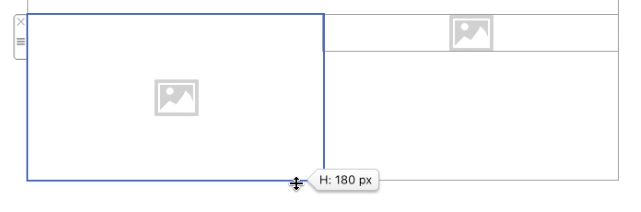
Mail Designer 365 rounded-corner email design screenshot

Mail Designer 365 rounded-corner email design screenshot

Afterwards, add a shape into an image area.
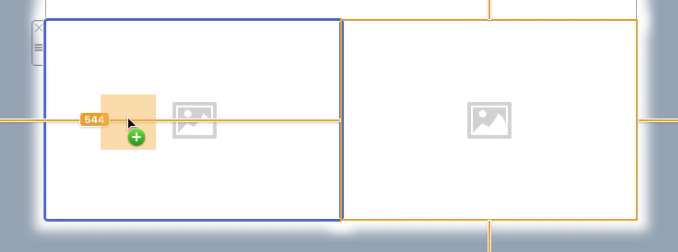
 

Mail Designer 365 rounded-corner email design screenshot

Feel free to adjust the size of the shape.
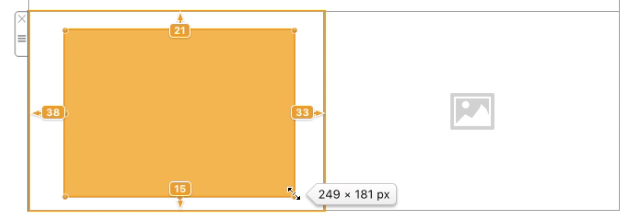
Mail Designer 365 rounded-corner email design screenshot

Adjust the corner radius of the shape by double-clicking on the shape and moving the corner radius slider on the right.
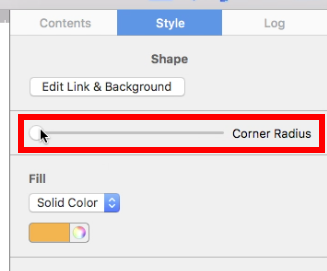
Mail Designer 365 rounded-corner email design screenshot

Change the color of the shape under the "Fill" section.
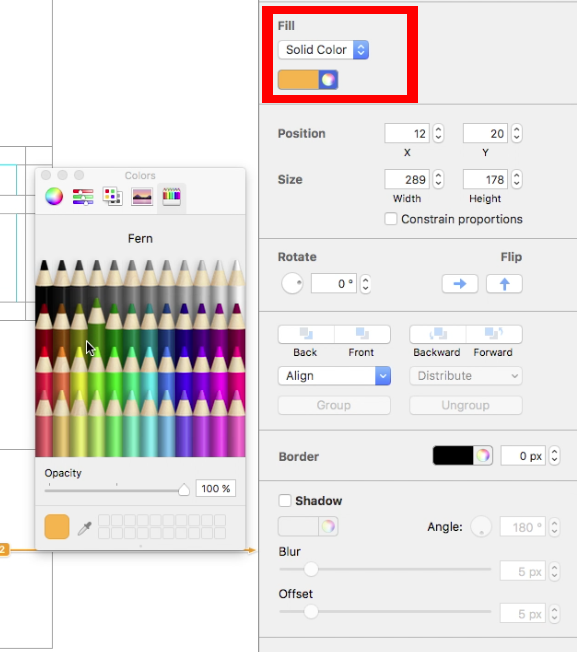
Mail Designer 365 rounded-corner email design screenshot


Repeat the same process for the second image area.
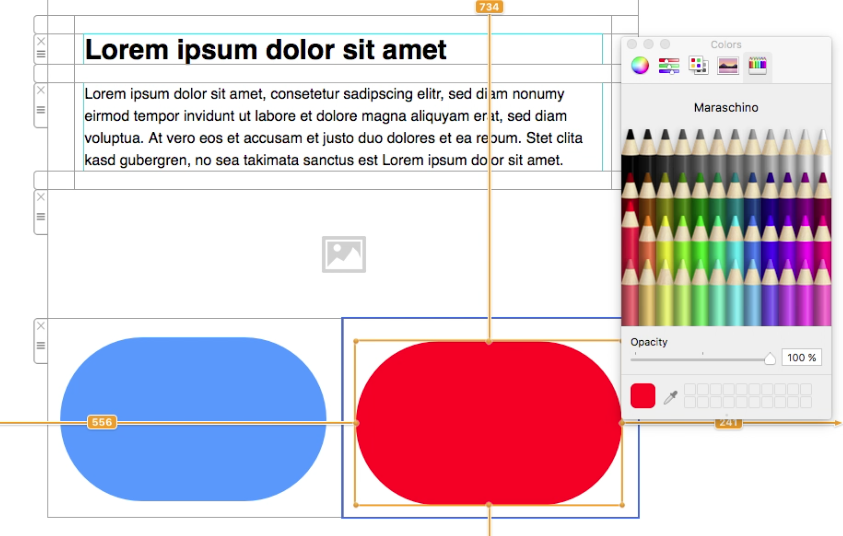
Mail Designer 365 rounded-corner email design screenshot


Click the "Contents" section and then choose the text object (T) icon.

Mail Designer 365 rounded-corner email design screenshot

Drag a text object into each image area.
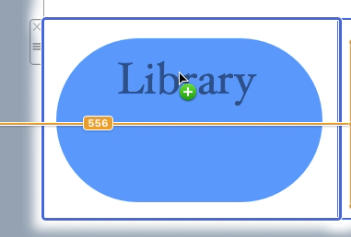
Mail Designer 365 rounded-corner email design screenshot

Here is what it looks like after dragging a text object into each image area:
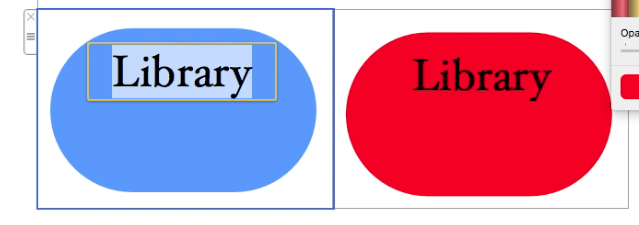
Mail Designer 365 rounded-corner email design screenshot

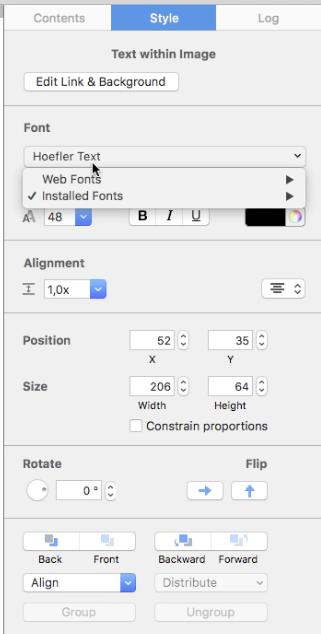
Feel free to adjust the font style, font size, font color, font weight, etc. to fit your needs. Each text area can be customized.
Mail Designer 365 rounded-corner email design screenshot

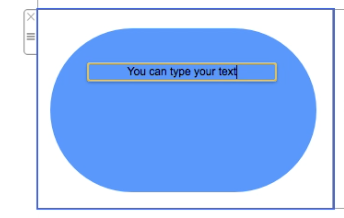
To edit your message, double-click on the text object and type your message.
Mail Designer 365 rounded-corner email design screenshot

Customize the Finished Rounded-Corner Design

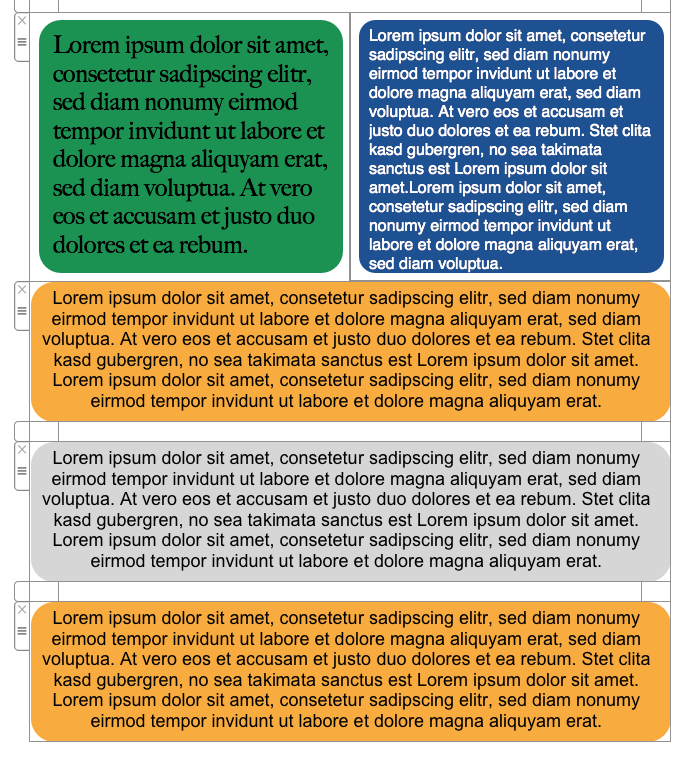
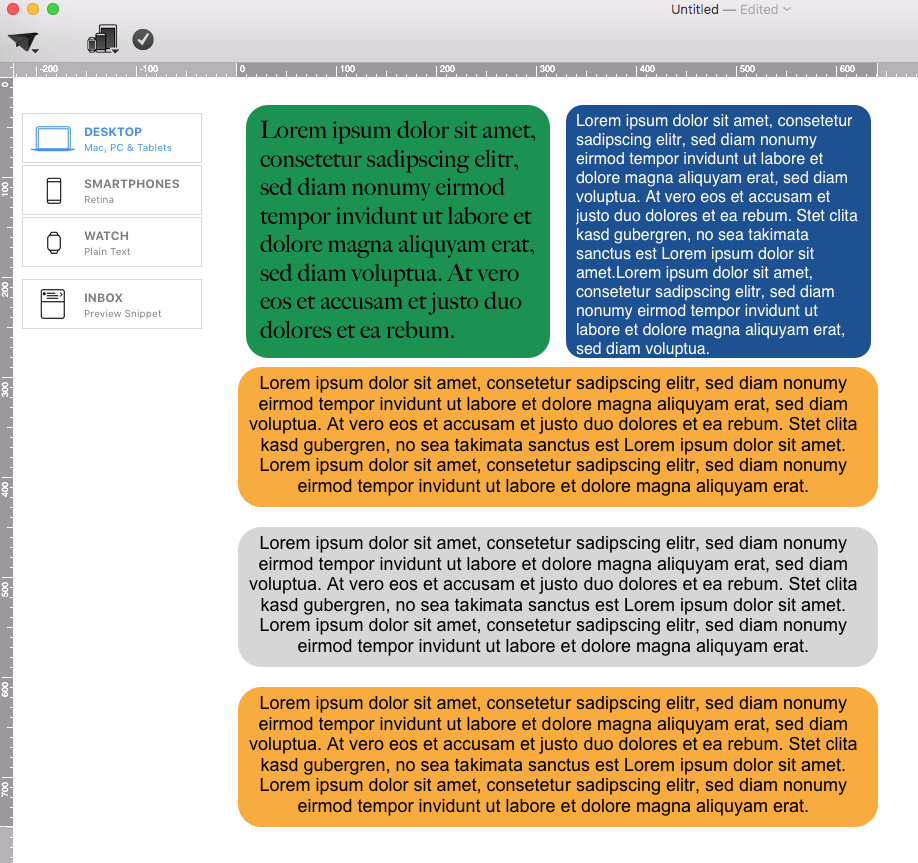
Here is an example where we added several examples of creating the effect of text boxes with rounded corners within one email template:
Mail Designer 365 rounded-corner email design screenshot

Mail Designer 365 rounded-corner email design screenshot


Why Rounded Corners Work in Email Design

Rounded corners web design can make buttons, labels, and content cards feel more approachable while preserving a clear visual hierarchy. In an email, use the effect selectively: one consistent corner radius for primary buttons and related callouts looks more intentional than several competing radii.

Choose a Consistent Corner Radius

Start with a modest radius and preview the result at the actual size used in your newsletter. A small radius creates a restrained card effect, while a larger value creates a pill-shaped button. Keep the shape, text, and surrounding spacing balanced. If several elements have the same role, apply the same radius so subscribers can recognize the pattern quickly.

Make Rounded Text Boxes Readable

Use strong contrast between the text and its background. Leave enough padding around every label, avoid squeezing long copy into a button, and keep important wording as live text whenever the design allows it. If text is placed inside an image area, include the essential message elsewhere as accessible text and add a useful image description.

Preview and Test Your Email

Check the desktop and mobile versions before sending. Confirm that the rounded shape does not crop the label, that line breaks remain intentional, and that buttons are easy to tap. Send a test message to the inboxes your audience uses most. Email clients render design details differently, so a real test is more reliable than relying on the canvas alone.

Rounded-Corner Checklist

  • Use one radius consistently for elements with the same purpose.
  • Keep text contrast and padding comfortable.
  • Check the design in desktop and mobile layouts.
  • Use clear link text and an adequately sized tap target.
  • Send a test email before publishing the campaign.


Create Objects with Text in Mail Designer 365

By Hans-Peter Graphics and Other Objects

Objects with text combine a graphic shape and editable lettering in one reusable design element. In Mail Designer 365, you can add a ready-made object, replace its sample wording, and adjust the typography without rebuilding the artwork from scratch.

What are objects with text?

Some graphics in the Contents library include an editable text layer. These elements are useful for labels, badges, short calls to action, announcements, and decorative headings. The background graphic keeps its shape while the wording can be adapted to your campaign.

Choose a text object when you want a compact visual message that remains easy to customize. For longer copy, links, or paragraphs, a regular text area is usually more flexible. See the guide to editing a text area for that workflow.

Add an object with text

  1. Open the Contents section in Mail Designer 365.
  2. Choose Graphics and browse for an object that contains sample wording.
  3. Drag the object into an image area in your email design.
  4. Position and resize it so the complete shape remains visible.

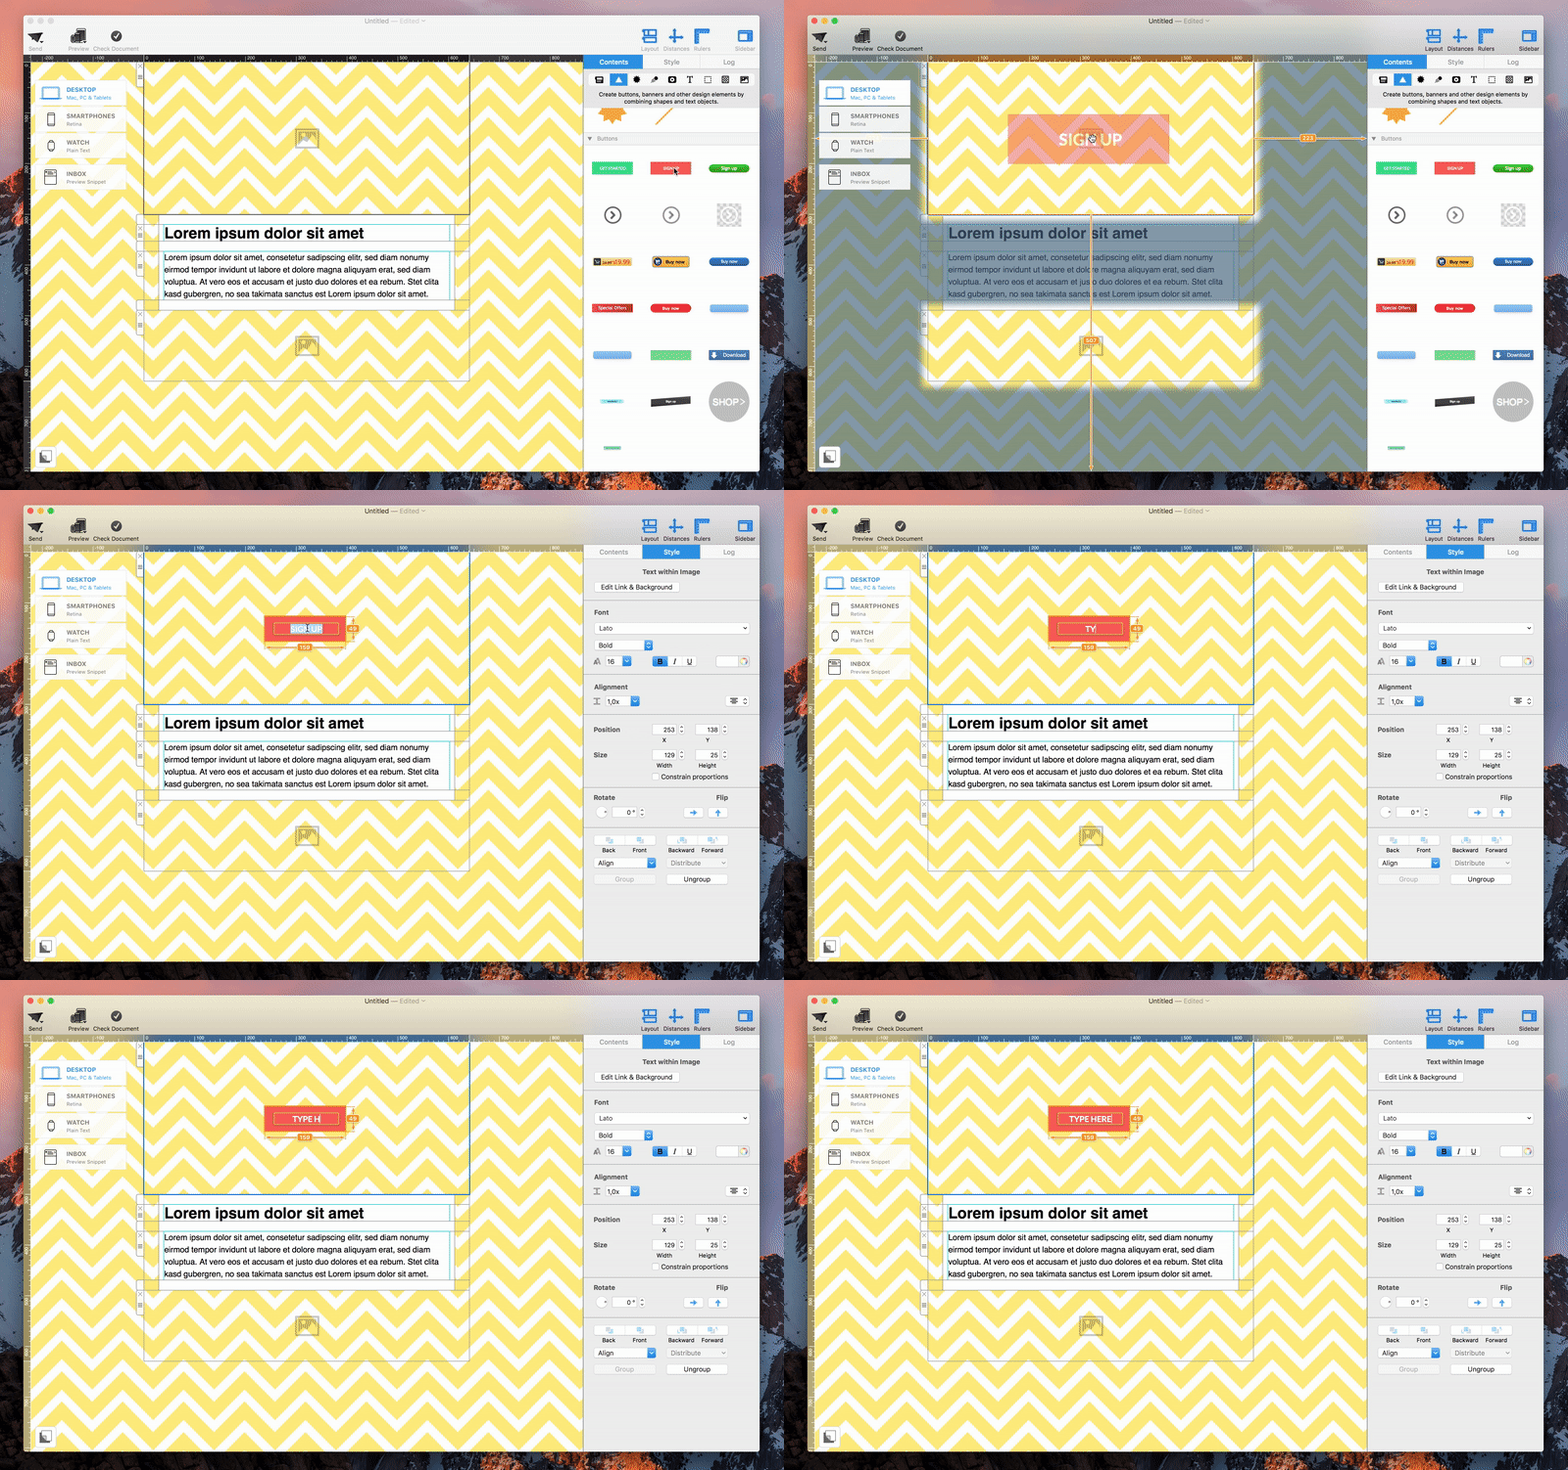
The red “Sign Up” graphic is one example of an object with editable wording. Insert it into an image area before changing the text.

Drag an object with text from Graphics into an image area

Edit the wording and typography

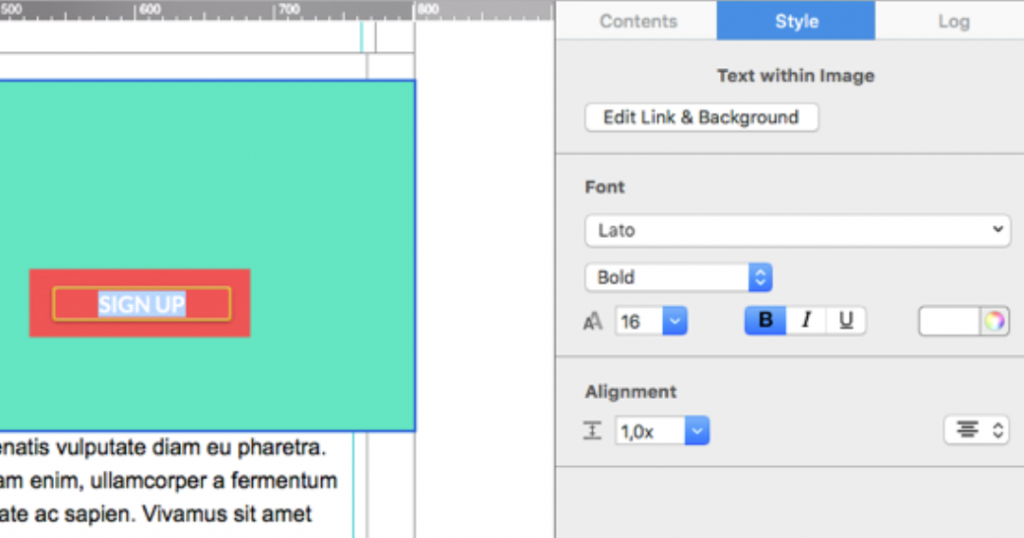
Double-click the sample wording in the object, then type your own short message. Select the text when you want to change its font, size, style, color, or alignment. Keep the wording concise so it fits comfortably inside the graphic at desktop and mobile widths.

Edit the wording and font inside a Mail Designer text object

The animation below shows the basic workflow: select the object, activate its text layer, replace the wording, and review the finished result.

Animation showing how to replace text inside a graphic object

Keep text readable inside the graphic

Use strong contrast between the lettering and its background. If the object has a busy texture or bright color, choose a simple font and avoid thin weights. Leave enough padding around the text so letters do not touch the edge of the shape.

Check capitalization, punctuation, and line breaks before finalizing the object. A short phrase such as “Shop Now” or “Register Today” is often easier to scan than a complete sentence. If your message wraps awkwardly, reduce the font size slightly, widen the object, or shorten the wording rather than squeezing characters together.

Resize and arrange the object

Resize the object proportionally when possible so the original artwork does not look stretched. After resizing, click the text again and confirm that it is still centered and that no letters are clipped. If several elements overlap, use the arrangement controls to move the object forward or backward.

For more information about adding and organizing graphic elements, follow the guide to adding and duplicating graphics and shapes.

Check desktop and mobile layouts

Open both layout previews and inspect the object at realistic widths. A design that fits on desktop may become too small to read on a phone. Make sure the object does not cover other content and that surrounding spacing remains balanced.

If the graphic contains an essential call to action, verify that the image area or associated element uses the intended destination link. Send a test email and check the rendered result in at least one desktop and one mobile email client. Image scaling can differ between clients, so this step is more reliable than reviewing the canvas alone.

Troubleshoot common problems

If double-clicking does not activate the wording, confirm that you selected a graphic designed with editable text rather than a flat image. If the text disappears, check its color, layer order, font size, and position inside the object. Undo the last change if the element was accidentally moved or resized.

When a long translation no longer fits, create a language-specific version of the object with shorter copy and appropriate typography. Do not reduce the text until it becomes unreadable. Finally, test the finished objects with text in the complete email so their visual weight supports the surrounding headline, body copy, and call to action.

Pixel Precise Editing in Mail Designer 365

By Hans-Peter Graphics and Other Objects

Pixel precise editing in Mail Designer 365

Pixel precise editing gives you exact control over the size, position, and rotation of design elements in an email layout. Dragging an object with the mouse is fast for broad adjustments, but entering a numerical value is more reliable when several items must align, a button needs a specific size, or a graphic must sit at an exact coordinate.

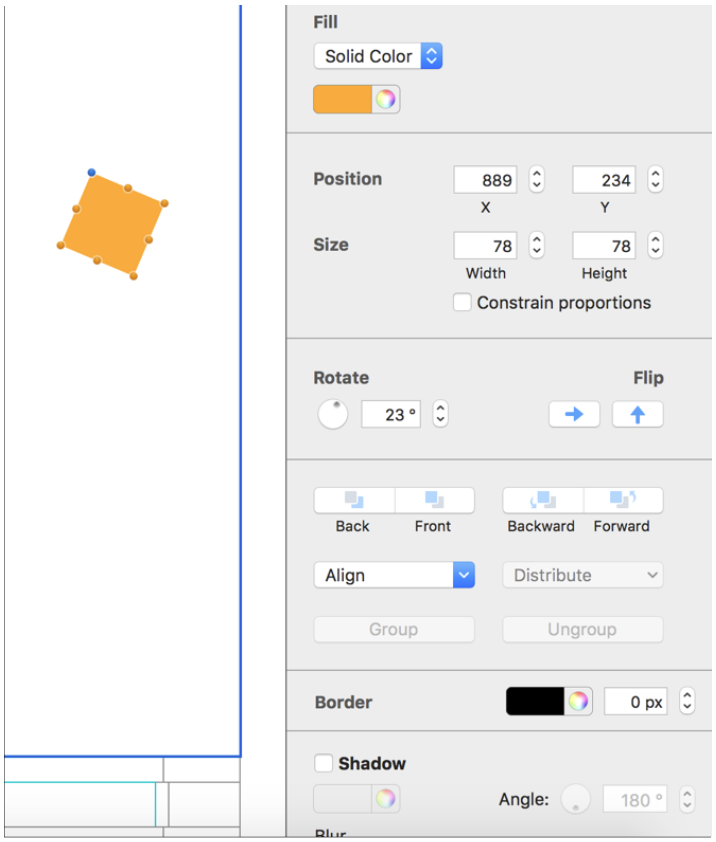
Mail Designer 365 provides precise controls for supported elements such as shapes, images, and buttons. Select an element on the design canvas and use the fields in the inspector sidebar to replace approximate dragging with exact values.

How to enter an exact position

Select the element you want to move. In the sidebar, locate the horizontal and vertical position fields. Enter the required value for each coordinate and confirm the change. The element moves to that measured position without the small variations that can occur when dragging.

Exact coordinates are particularly helpful when building repeated cards, product rows, or a set of call-to-action buttons. If multiple objects should begin at the same horizontal point, give them the same position value. Before changing a coordinate, note the current value so you can restore it if the new placement does not work.

Set an exact width and height

Use the width and height fields to resize the selected object numerically. This is useful for creating matching image tiles, equal buttons, or consistent decorative shapes. If the object has a control that preserves its proportions, keep that option enabled when you want the width and height to scale together. Disable proportional scaling only when stretching the element is intentional.

When resizing an image, start with a source file that contains enough pixels for the intended display size. Enlarging a small source can make it look soft. After entering the dimensions, inspect the crop and focal point to make sure important content remains visible.

Control rotation with a measured value

For objects that support rotation, type an angle instead of rotating by eye. A value of zero returns the element to its normal orientation. Reusing the same angle across several accents creates a deliberate, consistent visual style. Small rotations can add energy, but readability should remain the priority for buttons and text-bearing graphics.

Pixel precise editing fields for element size position and rotation in Mail Designer 365

A practical pixel precise editing workflow

  1. Select the shape, image, or button on the design canvas.
  2. Open the relevant element controls in the sidebar.
  3. Record the current position, dimensions, and rotation if you may need to undo the change manually.
  4. Enter one exact value at a time and review the result on the canvas.
  5. Repeat the required value for other elements that should match.
  6. Check desktop and mobile versions before sending a test email.

Tips for consistent email layouts

Use a small set of repeated dimensions rather than giving every object a different size. Consistency makes the design easier to scan and simplifies future edits. Exact values work best together with Mail Designer 365 alignment and distribution tools: use alignment for relationships between several objects, then use numerical fields for the final measured adjustment.

Remember that email layouts must also adapt to smaller screens. A desktop position or width may not suit the mobile version, so review both views after precise changes. Avoid placing critical information so close to an edge that it becomes difficult to read or tap.

Troubleshooting exact element values

If a field does not appear, confirm that the correct element itself is selected rather than the surrounding layout block. If an image changes shape unexpectedly, restore proportional scaling and enter only one dimension. If two objects still look misaligned despite matching values, compare their visible content, borders, and shadows because these can affect perceived alignment.

For related controls, see the alignment and distribution tools guide. Finish by opening the preview and sending a test email so your pixel precise editing remains clear in real desktop and mobile inboxes.

Rotating Objects in Mail Designer 365

By Hans-Peter Graphics and Other Objects

Rotating objects in Mail Designer 365 lets you angle shapes, graphics, image masks, and text areas for a more dynamic email layout. Select the element first, switch from resizing to rotation with the Command key, and use the angle indicator to control the result.

Select the object you want to rotate

Click the graphic, shape, mask, or text area in the image area. Selection handles appear around the element so you can resize or rotate it.

Select an object in a Mail Designer image area

Moving a normal corner handle changes the size of the selected object. Check the cursor before dragging so you do not resize the element when you intend to rotate it.

Resize handles shown on a selected email design object

Rotate an object with Command-drag

Hold the Command key and move the pointer over a corner resize control. The cursor changes to a rotation icon. Keep Command pressed, click the handle, and drag to rotate the object freely.

Command-drag a corner handle to rotate an object

Use small movements when you need a subtle angle. A strong rotation can add energy to a badge or decorative shape, but it may reduce readability when applied to long text or important information.

Read the rotation angle

While dragging, Mail Designer 365 displays the number of degrees applied to the object. Use this label to create a deliberate angle or repeat a similar rotation on another element.

Rotation cursor active on a selected graphic object

Degree label displayed while rotating an object

If several decorative elements should feel consistent, note the angle and apply a matching value visually. Then check alignment and spacing again because the rotated edges may extend beyond the original area.

Rotate a text area

Select the text area, hold Command, and drag a corner when the rotation cursor appears. Keep the angle modest enough for readers to scan the message comfortably.

Rotate a selected text area in Mail Designer 365

Avoid rotating paragraphs, legal text, or essential instructions. Short labels and decorative words are better candidates. After rotation, verify that no letters are clipped and that the text remains large enough on mobile devices.

Rotate text and a shape together

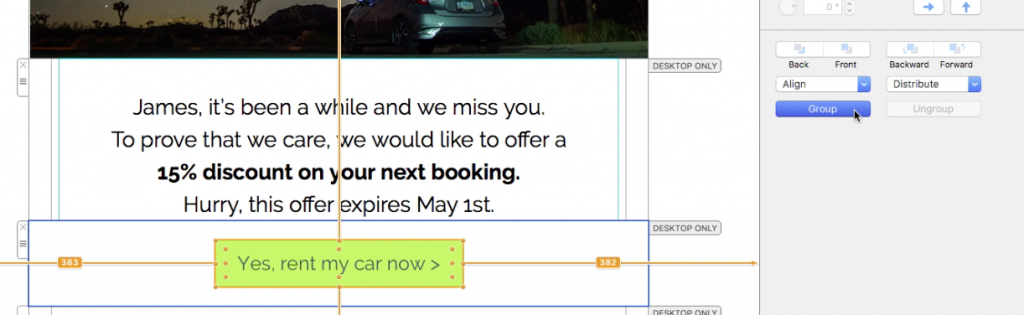
When text belongs with a graphic, group both elements before rotating them. Hold Command and click the shape and text area so both are selected.

Select a shape and text area together

Choose Group in the sidebar. Grouping preserves the relationship between the elements while they move and rotate.

Group selected text and shape elements

Hold Command and drag a corner handle on the group. The cursor changes to the rotation icon just as it does for a single object.

Activate rotation for a grouped shape and text area

Both elements now rotate together without changing their relative placement.

Grouped text and shape rotated together

For more grouping details, see how to group design elements. If rotated objects overlap, use the guide to move objects to the front or back.

Check desktop and mobile layouts

Preview both layouts after rotating objects. Confirm that angled edges remain inside the image area, text stays readable, and the object does not cover nearby buttons or content. A rotation that looks balanced on desktop may need repositioning in a narrower mobile arrangement.

Send a test email and inspect the rendered result in desktop and mobile email clients. Pay attention to image scaling, transparent edges, text clarity, links attached to rotated objects, and the spacing around the group.

Troubleshoot rotation problems

If dragging resizes the object, undo the change and hold Command before using the corner handle. If multiple elements rotate separately, group them first. If a rotated element is clipped, move it farther from the image-area edge or reduce its size.

When an angle feels inconsistent, use the displayed degree label as a reference and repeat the rotation carefully. Finish by checking all rotating objects within the complete campaign so their angle supports the hierarchy instead of distracting from the main message and call to action.

Resizing objects

By Hans-Peter Graphics and Other Objects

Editing objects

Mail Designer 365 allows you to manipulate your graphics and shapes in multiple ways.

Resizing an object

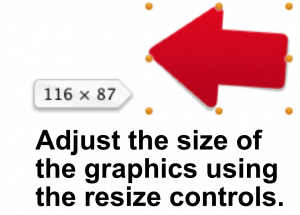
You can resize and adjust graphics using the resize controls. Click a graphic to see the resize controls.

Then drag the graphic to the size you would like it to be.

Resizing from the center

If you hold down the option key while resizing a graphic, it will be re- sized evenly from the center (i.e. it will be resized in from the edge you’re dragging as well as from the opposite edge).

Resizing without constraining proportions

Ordinarily, Mail Designer 365 preserves the proportions of a graphic when you resize it. However, you can also optionally choose to disregard the proportions while resizing.

Click and hold the resize controls of a graphic or image and press now the Command key to resize the graphic without preserving its proportions.


Add a video placeholder in Mail Designer 365

How to Add a Video Placeholder to an Email

By Team equinux Graphics and Other Objects

How to Add a Video Placeholder to an Email

A video placeholder gives recipients a visual preview that links to a video hosted on the web. Mail Designer 365 does not embed a playable video stream inside the message. Instead, it adds a linked preview object, which is more compatible with the way common email clients display campaign content.

Use a public video URL that recipients are allowed to open. YouTube links can automatically supply the video’s existing thumbnail; other destinations may require you to review or provide the preview image yourself.

Insert the Video Link Object

  1. Open the email design in Mail Designer 365.
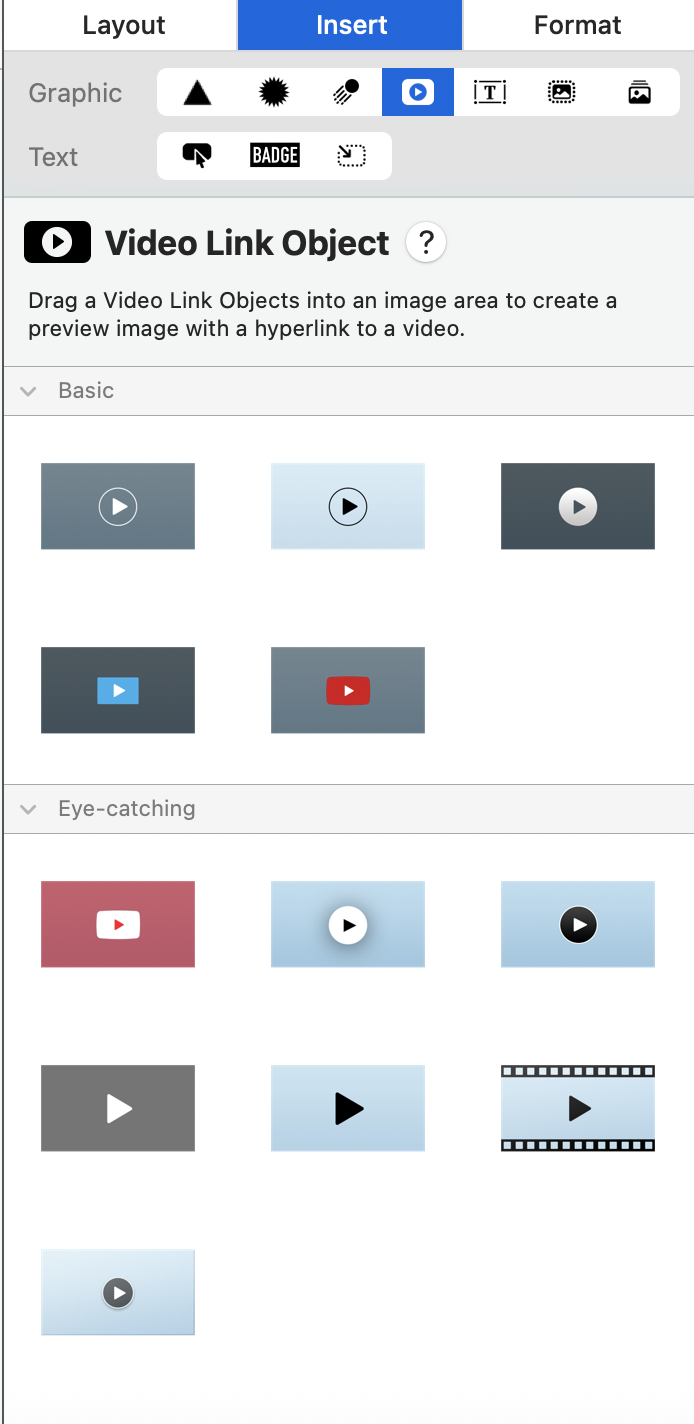
  2. Choose Insert and locate the video placeholder section.
  3. Select a Video Link Object and drag it into an image area.
  4. Position and size the object so the preview remains clear at desktop and mobile widths.

Choose a video placeholder from the Mail Designer 365 Insert menu

The surrounding text should explain why the video is relevant. A short heading and one sentence of context usually work better than relying on the thumbnail alone.

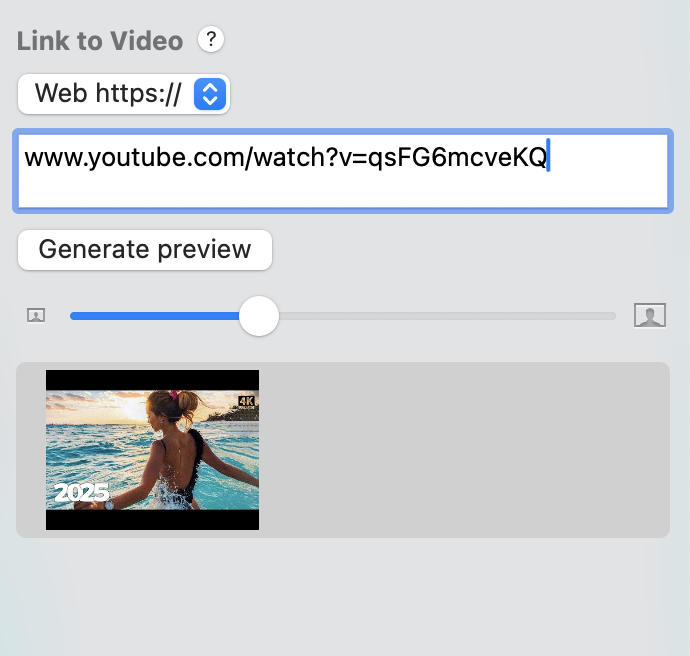
Add the Public Video URL

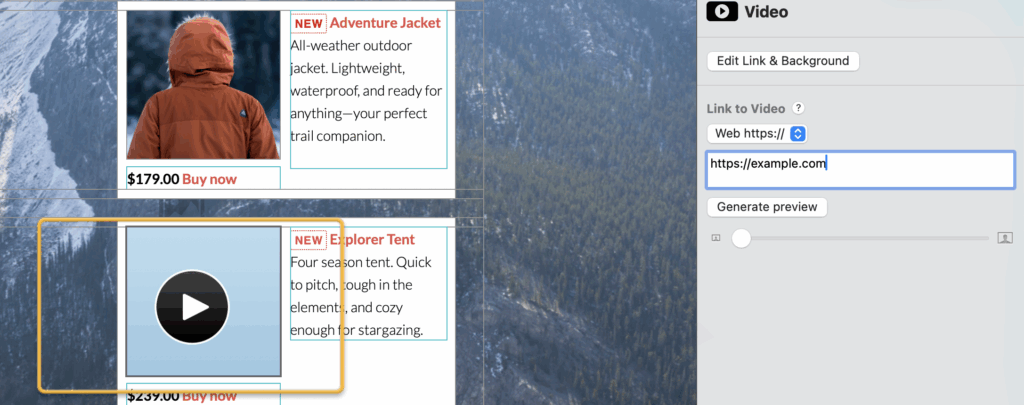
Select the video object and enter the full public URL, including https://. For example, paste the normal public YouTube page URL rather than a private editing or account-management address. The link must be reachable without access to your local Mac.

Enter a public video URL for the video placeholder

After adding the address, check that the video placeholder points to the intended destination. If the URL is incomplete, private, or mistyped, recipients may see the preview but reach an error page after clicking it.

Review the Video Thumbnail

For a supported YouTube video, Mail Designer 365 can generate a preview using the thumbnail already associated with the video. Make sure the thumbnail is recognizable at the displayed size and does not contain essential text that becomes unreadable on a phone.

YouTube video thumbnail preview in an email design

The preview should look clickable without making a false promise that the video plays directly inside every inbox. Supporting copy such as “Watch the tutorial” or “View the product demo” helps describe the action. Alternative text should also identify the purpose of the linked image for recipients who do not see images.

Test the Video Placeholder Before Sending

  • Preview both desktop and mobile versions of the email.
  • Send a test campaign to an actual inbox.
  • Click the thumbnail and confirm that the correct public video opens.
  • Check the landing page without being signed in, when practical.
  • Verify that the thumbnail, label, and surrounding copy remain readable when images are scaled.
  • Repeat the test after changing the URL or thumbnail.

Troubleshoot Common Video Link Problems

The Thumbnail Does Not Appear

Confirm that the video URL is public and correctly formatted. If the hosting platform does not provide a usable thumbnail, use an appropriate preview image and keep the video link attached to it.

The Link Opens the Wrong Video

Select the object, replace the saved URL, and send another test. Do not assume the editor preview alone proves that the final destination is correct.

The Preview Is Hard to Read on Mobile

Review the mobile layout, allow enough space around the object, and avoid placing long text inside the thumbnail. Keep the descriptive label in editable email text where it can reflow more reliably.

A well-prepared video placeholder combines a relevant preview, an accurate public link, clear supporting copy, and a successful click test from the delivered email.

Add an Animated GIF in HTML Email

By Team equinux Graphics and Other Objects

You can add an animated GIF in HTML email designs with Mail Designer 365 by choosing a built-in animated graphic or importing your own GIF into the Custom content folder. This guide explains both workflows and the checks to make before sending.

Add a built-in animated graphic

  1. Open the email design you want to edit in Mail Designer 365.
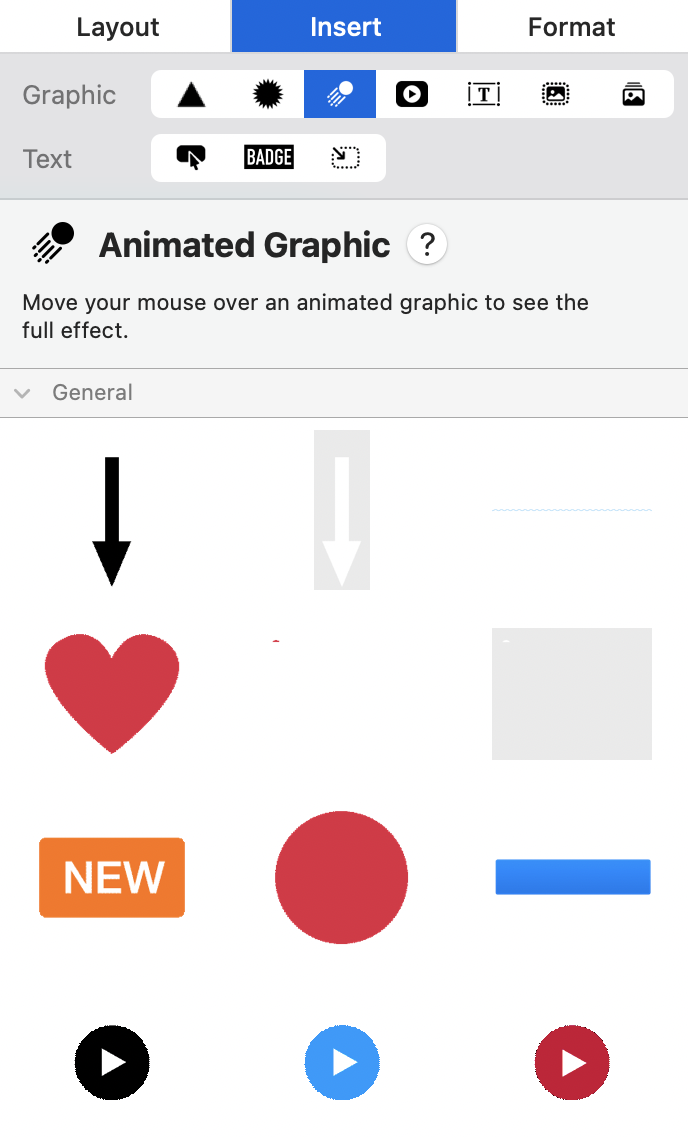
  2. Select the Insert area in the sidebar and browse the Animated Graphic subsections.
  3. Hover over a graphic to preview its movement before adding it.
  4. Drag the chosen animated graphic into an image area in a layout block.

Mail Designer 365 includes a selection of animated graphics that you can reuse in different designs. Choose an animation that supports the message instead of distracting from the headline or call to action.

Animated graphics browser in the Mail Designer 365 Insert sidebar

Add a custom animated GIF

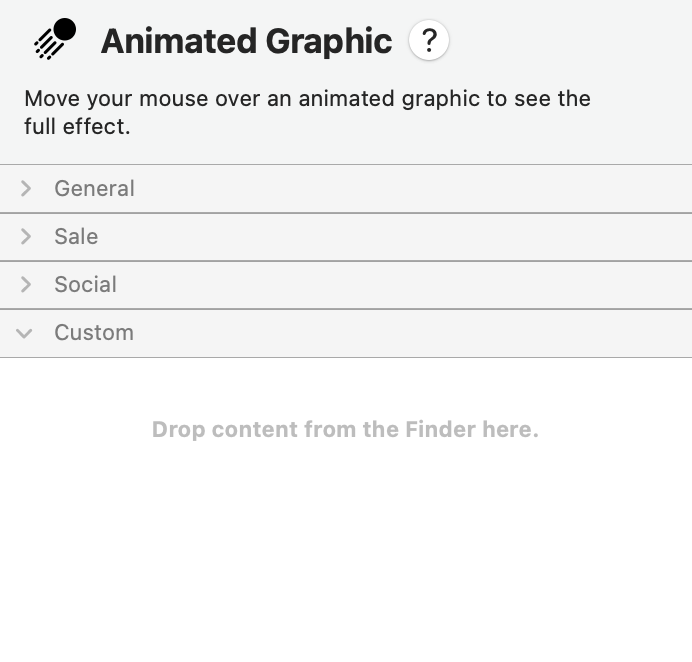
If you already have a GIF, drag it into the Custom content folder. The imported asset remains available for future designs, so use a clear filename that helps your team identify the approved version. Then drag the GIF from the Custom folder into an image area in a layout block.

Saving a custom animated GIF in the Mail Designer 365 Custom folder

Only one animation can be placed in each image area. To use another animation, add another image layout block and place the second asset there. Multiple moving elements can compete for attention, so keep the hierarchy clear.

Prepare an animated GIF for HTML email

Optimize the asset before importing it. Crop unused space, use only the frames needed to communicate the idea, and keep the dimensions appropriate for the image area. A large or long animation can increase message weight and take longer to load on a mobile connection.

Make the first frame useful on its own. Some inboxes or user settings may show only a static frame, and recipients can also have images disabled. The first frame should therefore contain the essential product, offer, or visual cue rather than an empty transition.

Use animation accessibly

Do not place essential instructions, prices, dates, or discount codes only inside the animation. Repeat the important information as live text in the email. Add concise alternative text that describes the purpose of the image. Avoid rapid flashing, intense strobing, or movement that makes nearby copy difficult to read.

If the GIF demonstrates a sequence, provide a short text summary or a link to an accessible web page with the same information. Use animation to support the content, not as the only way to understand it.

Good uses for animated graphics

  • Draw attention to a single sale or limited-time offer.
  • Show a short product feature or before-and-after state.
  • Demonstrate a simple step while keeping written instructions nearby.
  • Add restrained seasonal movement to a hero image.
  • Guide attention toward the primary call to action.

Test the animation before sending

Send a proof and open it in the desktop and mobile inboxes your audience commonly uses. Confirm that the GIF loads, loops as expected, scales correctly, and does not push other content out of position. Check the first frame, alternative text, dark-mode appearance, links, and overall message size.

Also view the proof with images disabled. The subject line, live copy, and call to action should still explain the campaign. If the animation is slow or dominates the email, reduce its dimensions or frame count and test again.

Troubleshooting animated GIFs

  • The GIF is static: confirm that the source file is an animated GIF and test the first frame as a fallback.
  • The asset cannot be reused: import it into the Custom content folder rather than placing a temporary file only once.
  • The image is cropped: check the image area proportions and adjust the source dimensions.
  • The message loads slowly: shorten the animation, remove unnecessary frames, or reduce its dimensions.
  • You need another GIF: add a separate image layout block because each image area supports one animation.

Use this workflow when adding an animated GIF in HTML email with Mail Designer 365. For Mailchimp-specific GIF steps, broader animation strategy, video email, or static-image editing, use the dedicated guide for that task.

How to Add and Duplicate Graphics and Shapes

By Team equinux Graphics and Other Objects

Mail Designer 365 includes artwork you can use to build more distinctive email designs. You can add shapes, borders, promotional graphics, and other visual objects to an image area, then position and reuse them as needed. This guide explains how to add objects and duplicate graphics and shapes without recreating them from scratch.

Choose an image area for graphics and objects

Graphics, shapes, masks, and styled text belong in image areas. Before adding an object, click the target image area and check that it has enough room for the artwork. Keep important copy and buttons in readable positions, and use decorative objects to support the message rather than cover it.

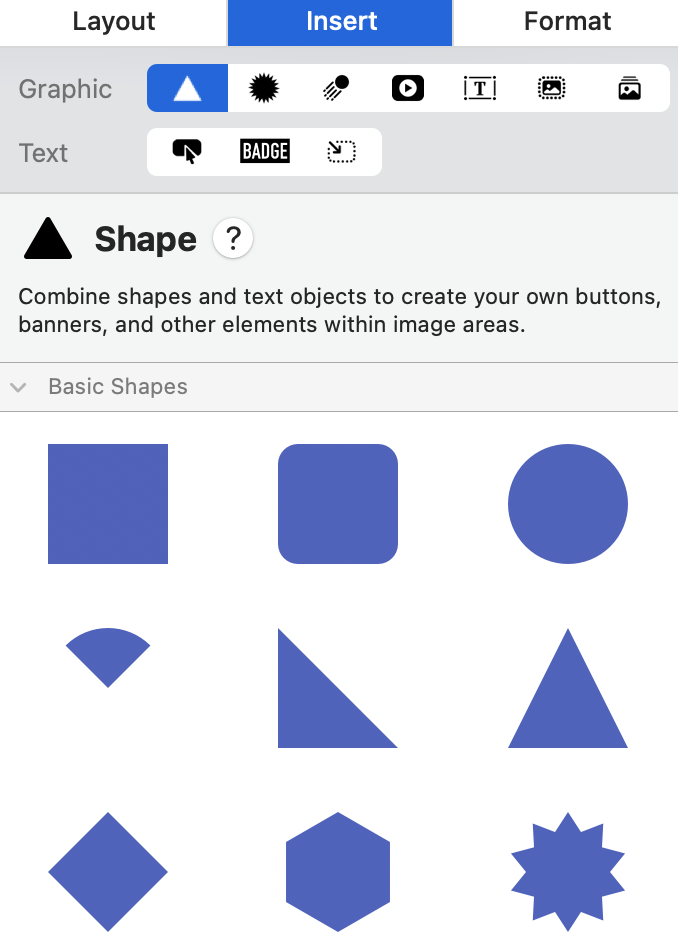
Open the Contents panel to browse the available graphics and shapes. The collection includes artwork for promotions as well as border and design elements that can help separate or highlight campaign content.

Add shapes and graphics to an email design

Choose a graphic or shape in the Contents panel, then drag it into an image area in the design. Watch the insertion position while dragging. After the object appears, select it to resize, move, or arrange it with the surrounding artwork.

Dragging a shape from the Contents panel into an email image area

Use a size and position that remain clear at the intended email width. If a shape is being used as a background accent, check that text placed over or near it maintains enough contrast.

Duplicate graphics and shapes with the menu

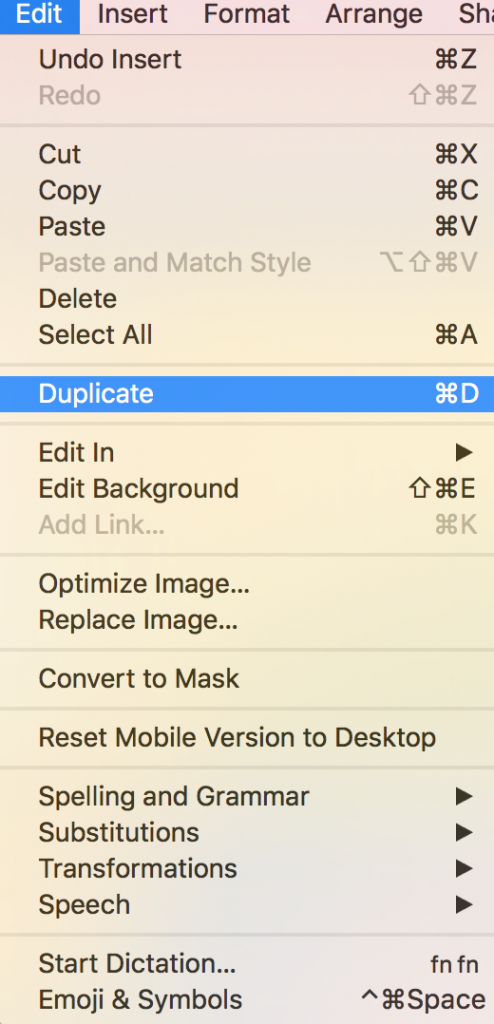
Duplicating an object is useful when several parts of a design need the same shape, icon, border, or styled element. Select the object first, then choose Edit > Duplicate from the menu bar. Mail Designer 365 creates a copy that you can move and edit independently.

Edit menu with the Duplicate command for a selected graphic

After duplicating, confirm which object is selected before changing its size or style. The copy may initially overlap the original, so move it carefully until both objects are visible.

Option-drag an object to duplicate and position it

You can also create and place a copy in one movement. Select the graphic, shape, or object you want to reuse.

Graphic object selected in a Mail Designer 365 image area

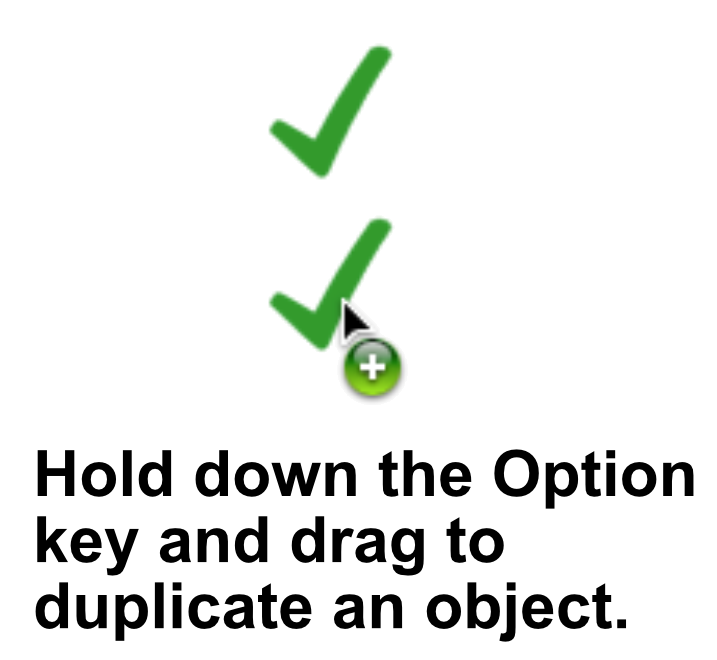
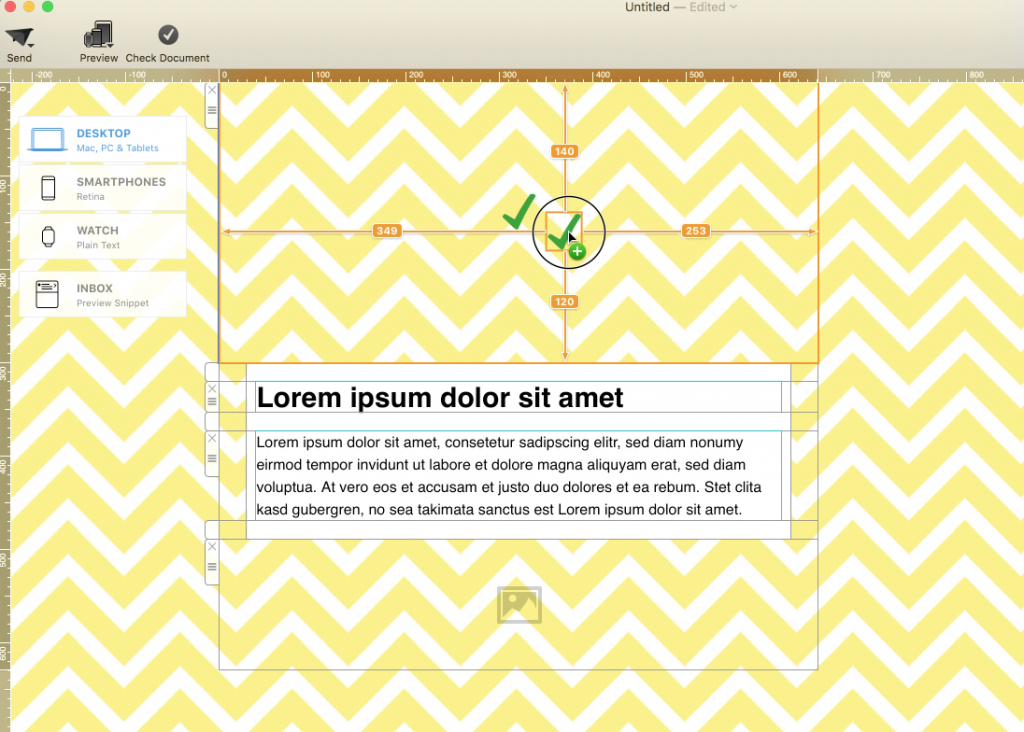
Hold the Option (⌥) key while dragging the selected object. Keep the key held as you move it to the intended position.

Dragging a selected graphic while holding the Option key

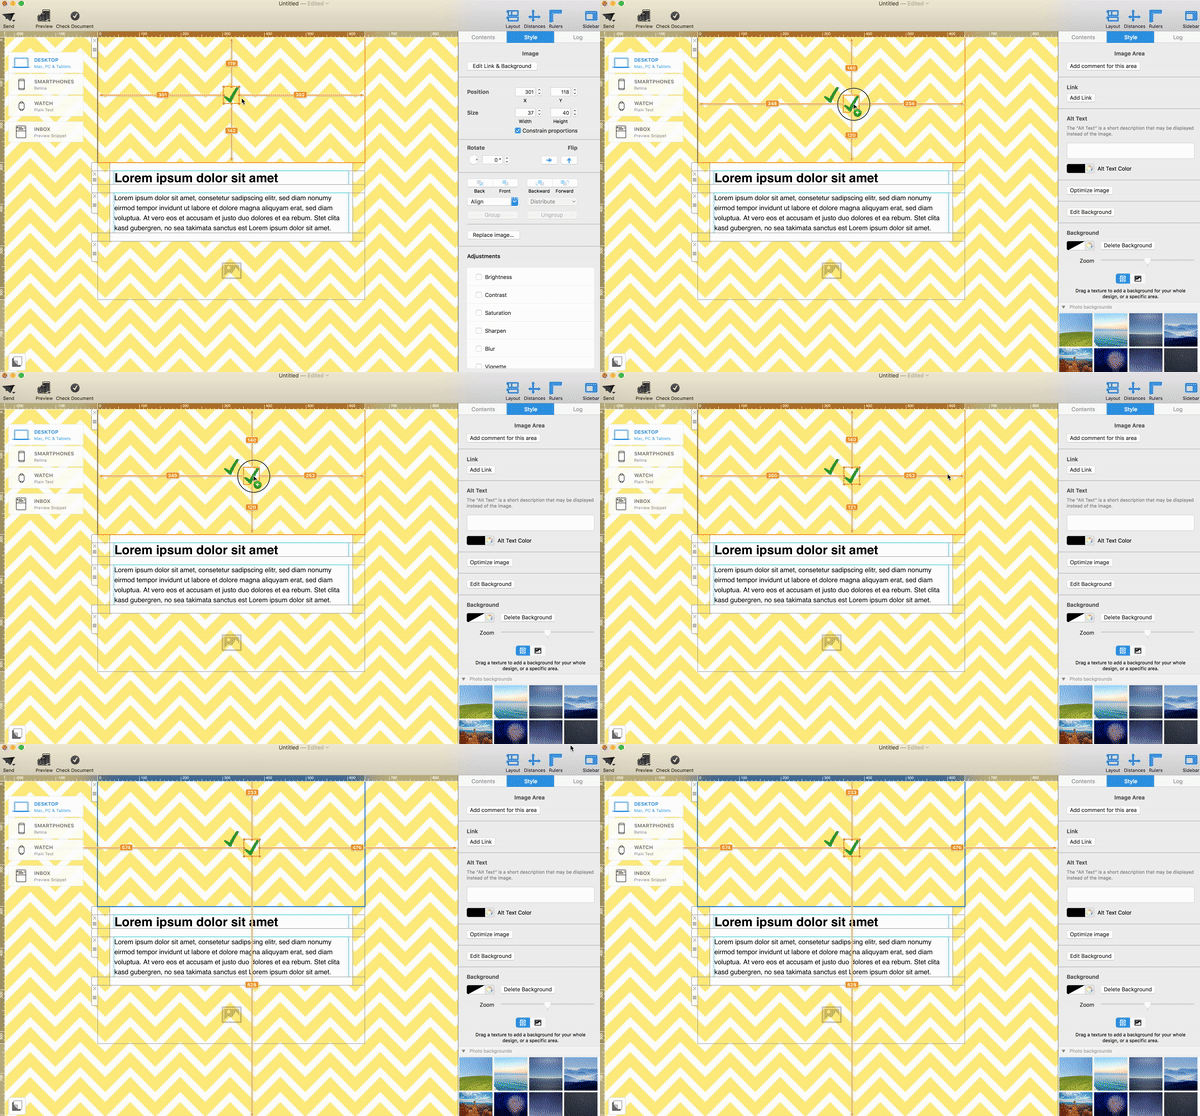
Release the object in the desired location to create the duplicate. The animation below shows the selection and Option-drag workflow.

Duplicating and positioning a graphic with Option-drag

Arrange and edit the duplicated object

A duplicated object begins with the same appearance as the original. Change its color, size, crop, or position only where the design requires it. If multiple objects overlap, make sure the intended element is selected before editing and check the visual order of the layers.

Repeated shapes can create a consistent pattern, but too many decorative elements may distract from the call to action. Compare spacing, alignment, and scale across every copy and remove any object that does not help the reader understand the message.

Troubleshoot object duplication

  • The object moves instead of copying: Undo the move, select it again, and hold Option before you start dragging.
  • The wrong element changes: Click the intended object directly and verify its selection handles before editing.
  • The duplicate is hidden: Move the copy away from the original and check whether another object is covering it.
  • The design looks crowded: Reduce the number of repeated objects or increase the space around important text and buttons.

Preview and test the email

Review the design at desktop and mobile widths. Confirm that graphics do not cover live text, buttons, or links and that the campaign still makes sense when images are disabled. Add concise alternative text to meaningful images, while purely decorative objects should not carry essential information.

Send a test email and inspect it in more than one email app. For more help with design elements, browse the Mail Designer 365 Knowledge Base.

Privacy Settings / Datenschutz-Einstellungen