
Nested Lists
With Mail Designer 365, you can apply different list styles within your email design to create more defined lists.
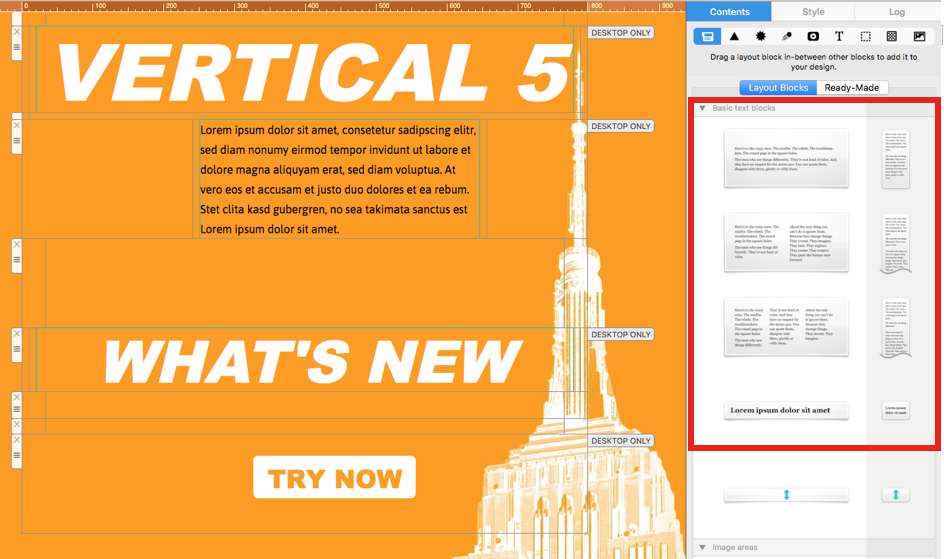
To get started, insert a text layout block into your design by dragging and dropping from the content menu in the sidebar.
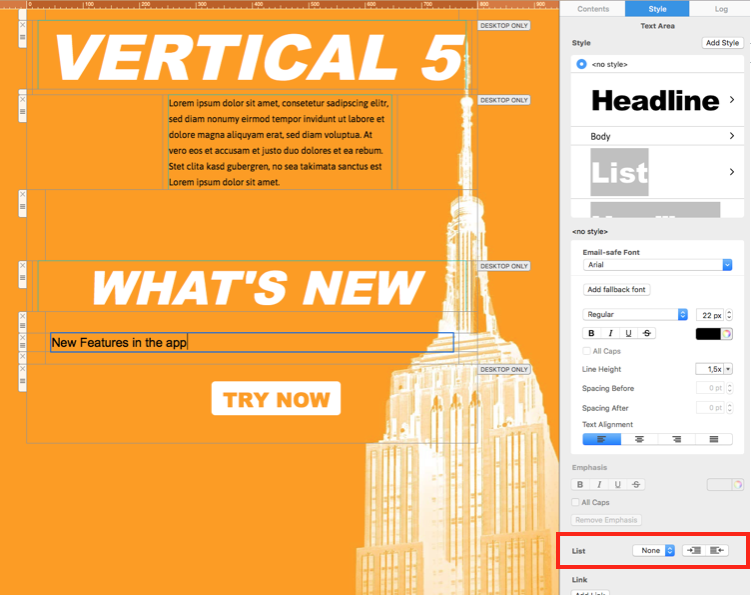
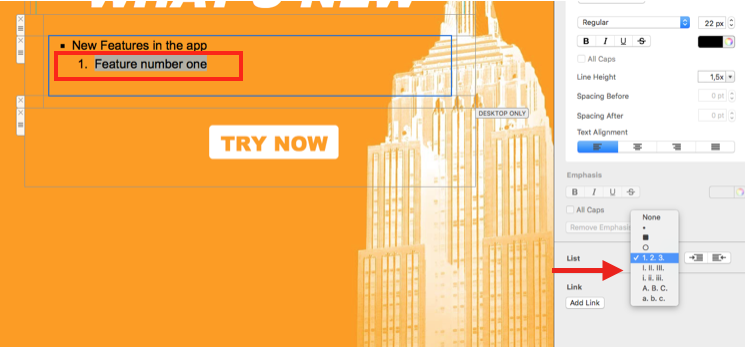
Type the first line of your list into the layout block. You should notice the list tool appear in the "Style" menu in the sidebar:
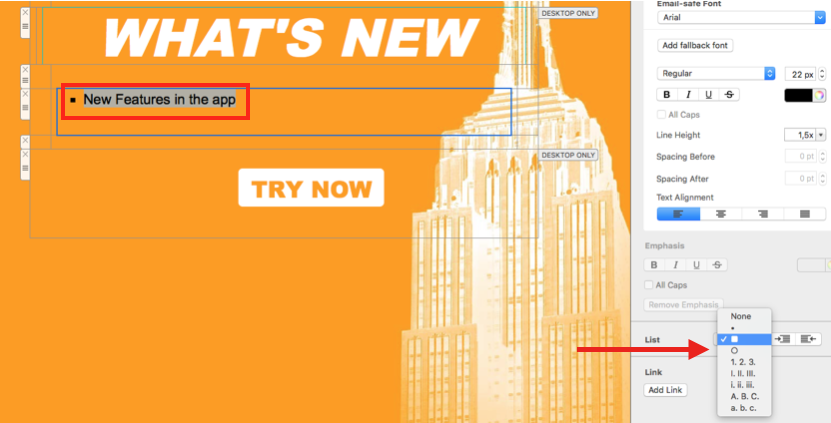
Highlight the text and choose a list style from the drop-down menu and click to apply it to the first line of your list.
To create an indentation, press Return to start a new line, and then press the Tab key. Alternatively, you can use the indent buttons in the "List" tool to indent left or right.
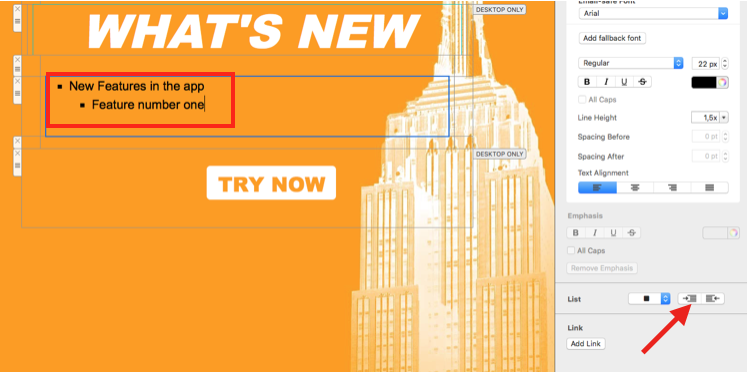
You can then highlight this line and choose a new list style to distinguish the nested item from the first level.
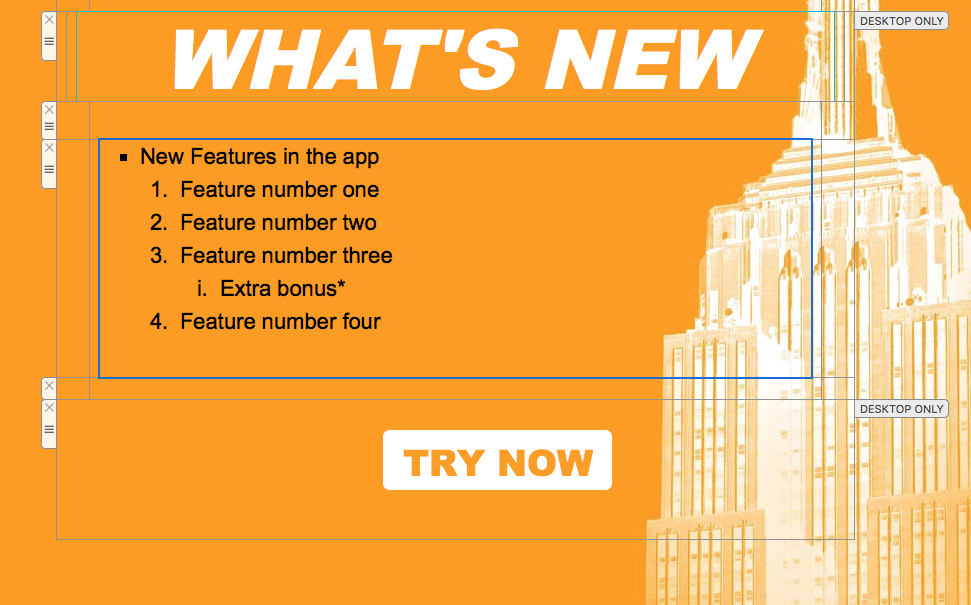
To include multiple list styles, continue to repeat the previous two steps:
Nested list formatting tips
- Use one consistent list style for each indentation level so readers can scan the hierarchy quickly.
- For a nested bullet list in email design, keep sub-items concise and avoid adding more levels than the message needs.
- Check spacing and line breaks in both desktop and mobile previews before sending.
- If an item is indented incorrectly, select it and use the left or right indent button in the List tool.
How Can We Help?