Monthly Archives

October 2018

More Great Fonts for Email Marketing

By Uncategorized

It's time for another font guide! Just over six months ago, we published a font guide full of awesome fonts that you can use for email marketing. Because variety is the spice of life, we've found loads more web fonts to help you get inspired for your email designs...

Before we start...
All of the fonts in this guide are Google fonts, which are automatically integrated into Mail Designer 365. However, if you want to download another Google font to use in Mail Designer 365 which isn't already on our list of web fonts, please take care. Additional fonts are hosted from your Mac's Font Book rather than online via Google and can be found in Mail Designer 365 under "Installed fonts." To avoid compatibility issues, it's better to only use external fonts in image areas, unless you know that your recipient has the font installed already (ie. for internal newsletters.)

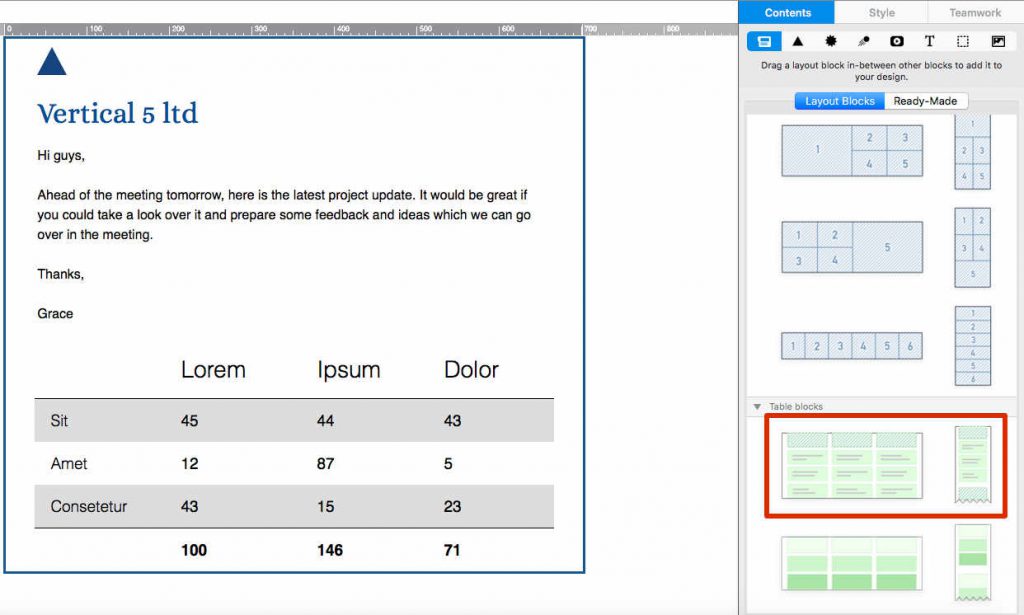
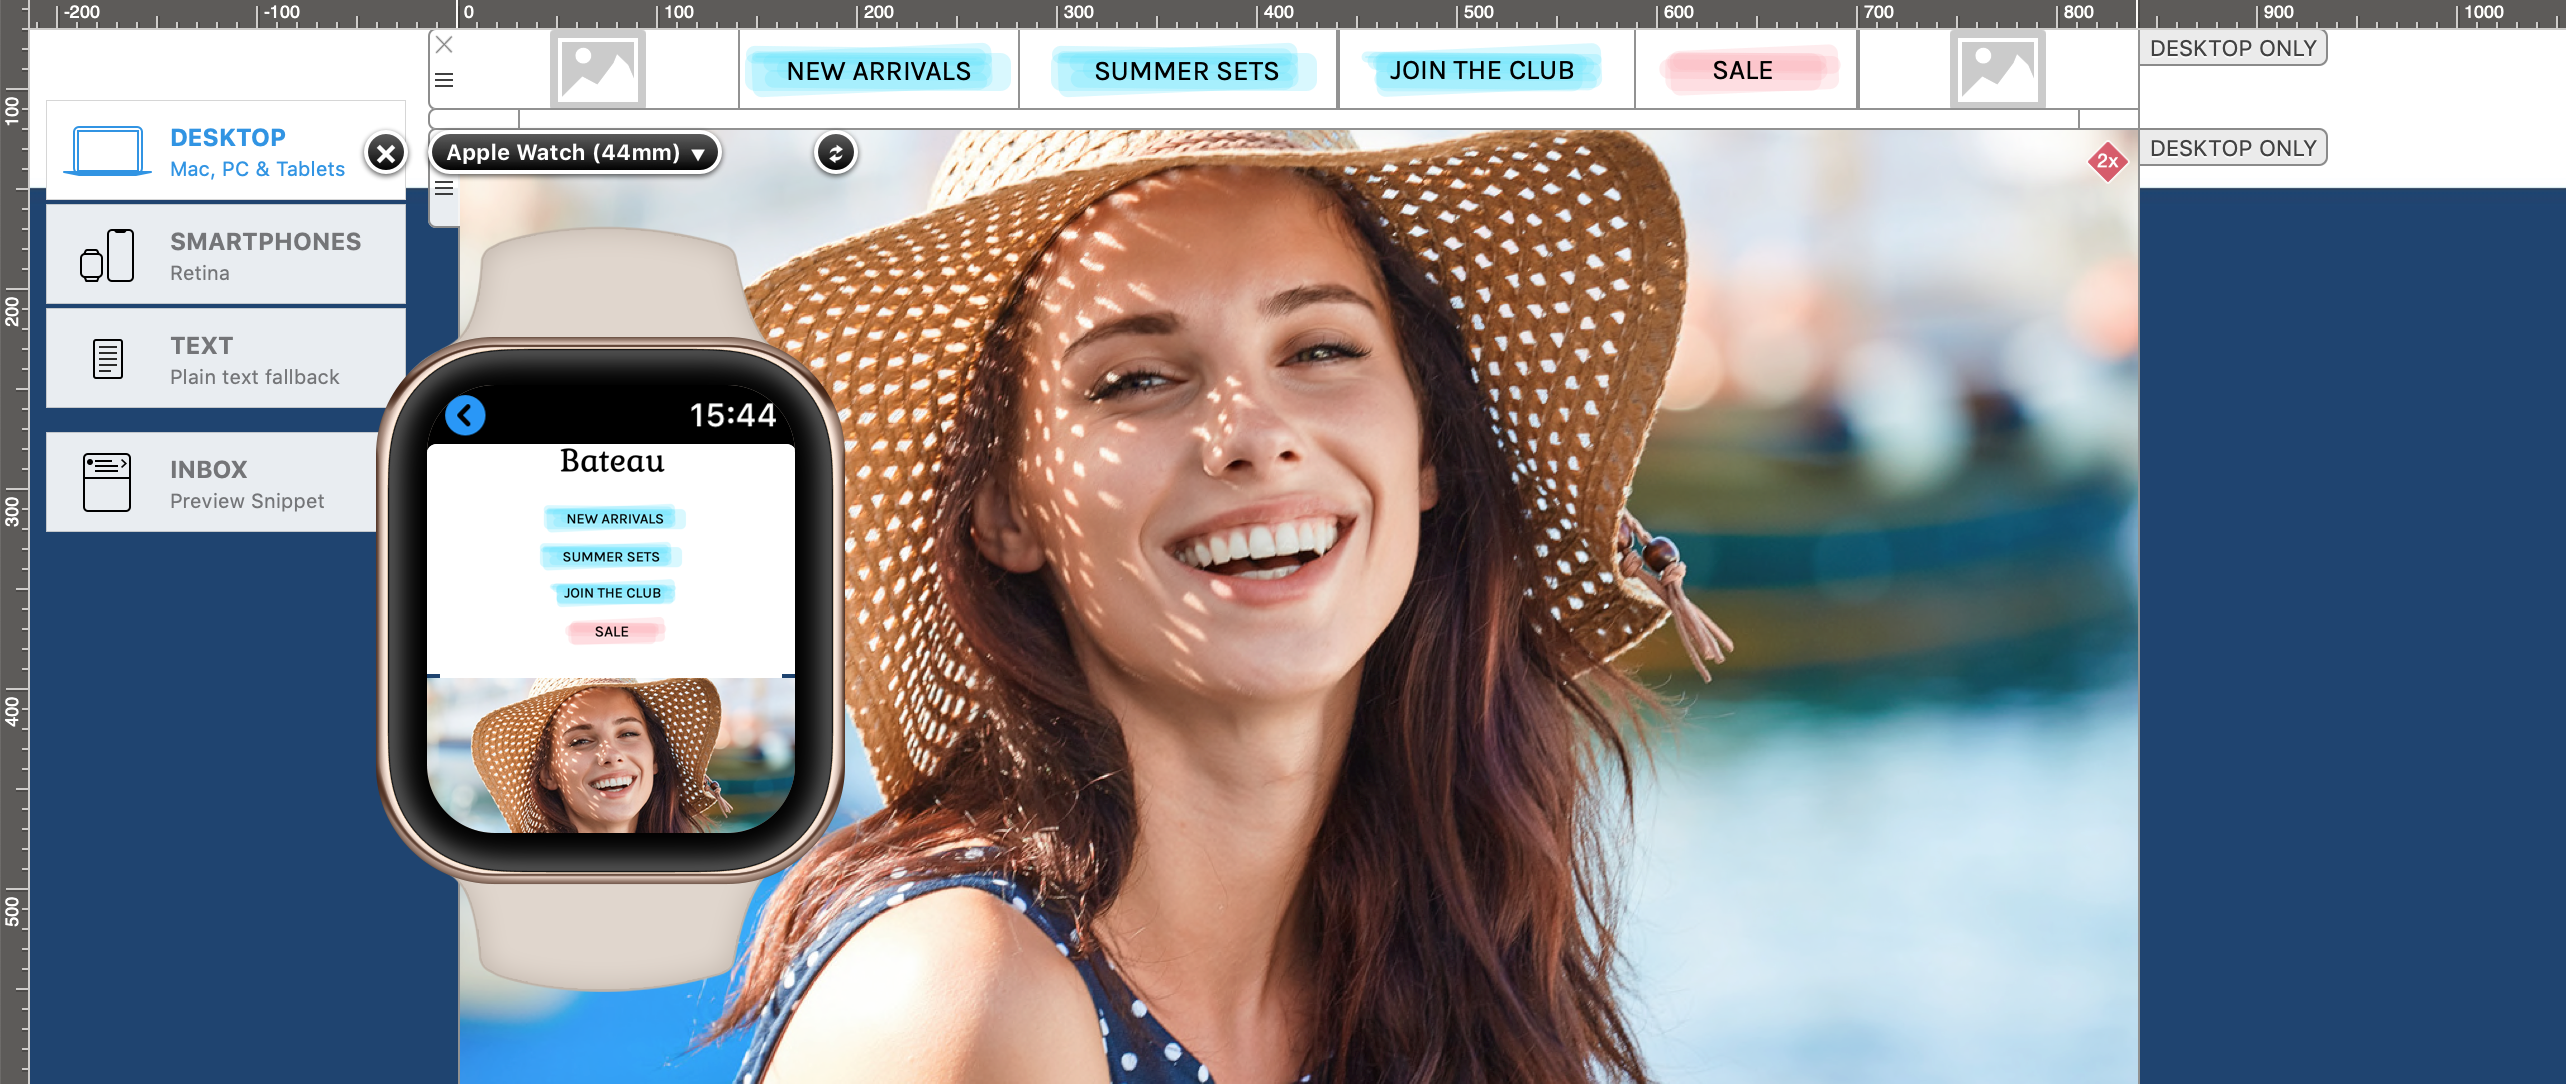
Important: Although web fonts are perfectly compatible with the leading email providers, we recommend that you set up an "email-safe" fallback font in Mail Designer 365 just to avoid any possible problems with how your email is displayed. You can find this option in the "Style" menu:

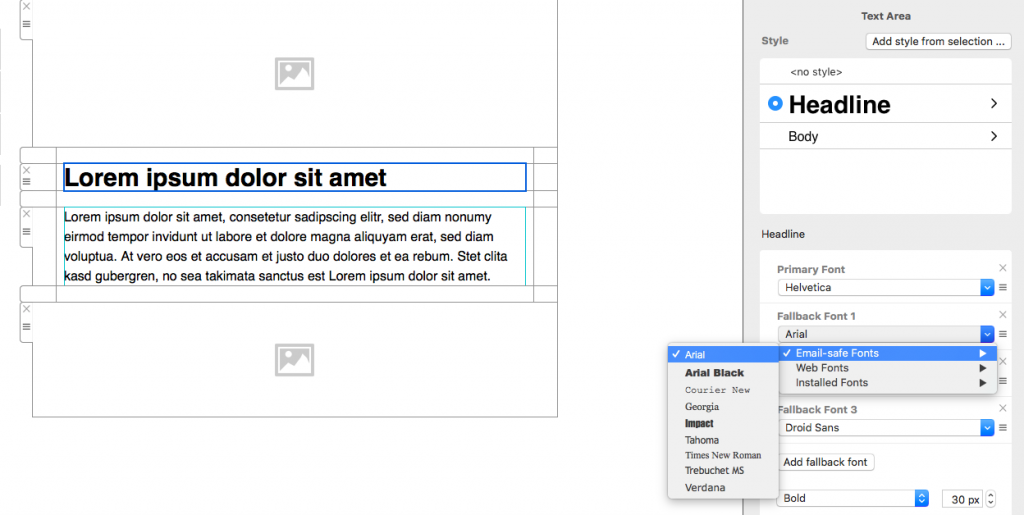
Add a fallback font to avoid any compatibility issues

Fonts for promotions

Sales, special offers, and promotions are all an integral part of the typical email marketing strategy. It's important to choose a standout font to help accentuate your promotional newsletter. As these fonts show, the more eye-catching the better, as your readers are more likely to be drawn in to the sales campaign...

The comic book style of Bangers catches the eye instantly

Lily Script One balances bold and feminine perfectly

The roundness of Fredoka One adds to its appeal

Fonts for CTAs

Every good email newsletter has at least one call-to-action (CTA.) The purpose of a CTA is to get readers to complete an action of your choice (e.g. visit your website.) For this reason, you need a strong, clear font to make your CTA button legible, as well as enticing to customers...

Changa One is a bold choice as well as being clear to read

Nobile is simple yet effective for a minimalistic style

Candal adds definition to your CTA

Fonts for professionals

For business professionals, a signature typeface is essential for email designs. As branding is more important than ever, it's good practice to choose a font to use as a basis for all business designs. Try and find a font with multiple weights so you can apply it to multiple areas of your design without it becoming monotonous. For modern firms, we recommend a sleek sans-serif font such as these...

Encode Sans Light is modern and stylish

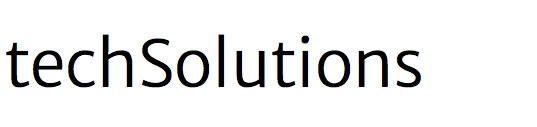
Merriweather Sans Light could be a good choice for tech firms

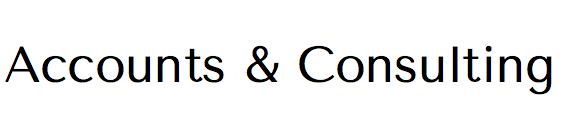
Tenor Sans appears classic and professional

Fonts with character

Many designers are on the hunt for unique fonts to give their emails a memorable edge. Particularly for new businesses looking to establish a brand, it could pay off to choose a more contemporary font to add some character to your designs. Here are some ideas...

Aguafine Script is a brush font with an attitude

Finger Paint is the perfect choice for a child oriented business

Julius Sans One is a stylish editorial style font

Fonts for the holidays

We weren't joking when we said there is a font for everything. Whether you are creating a one-off holiday email design for your colleagues, or need a special font to spice up your Halloween newsletter, there's a font for every use case. Here are some of our favorites...

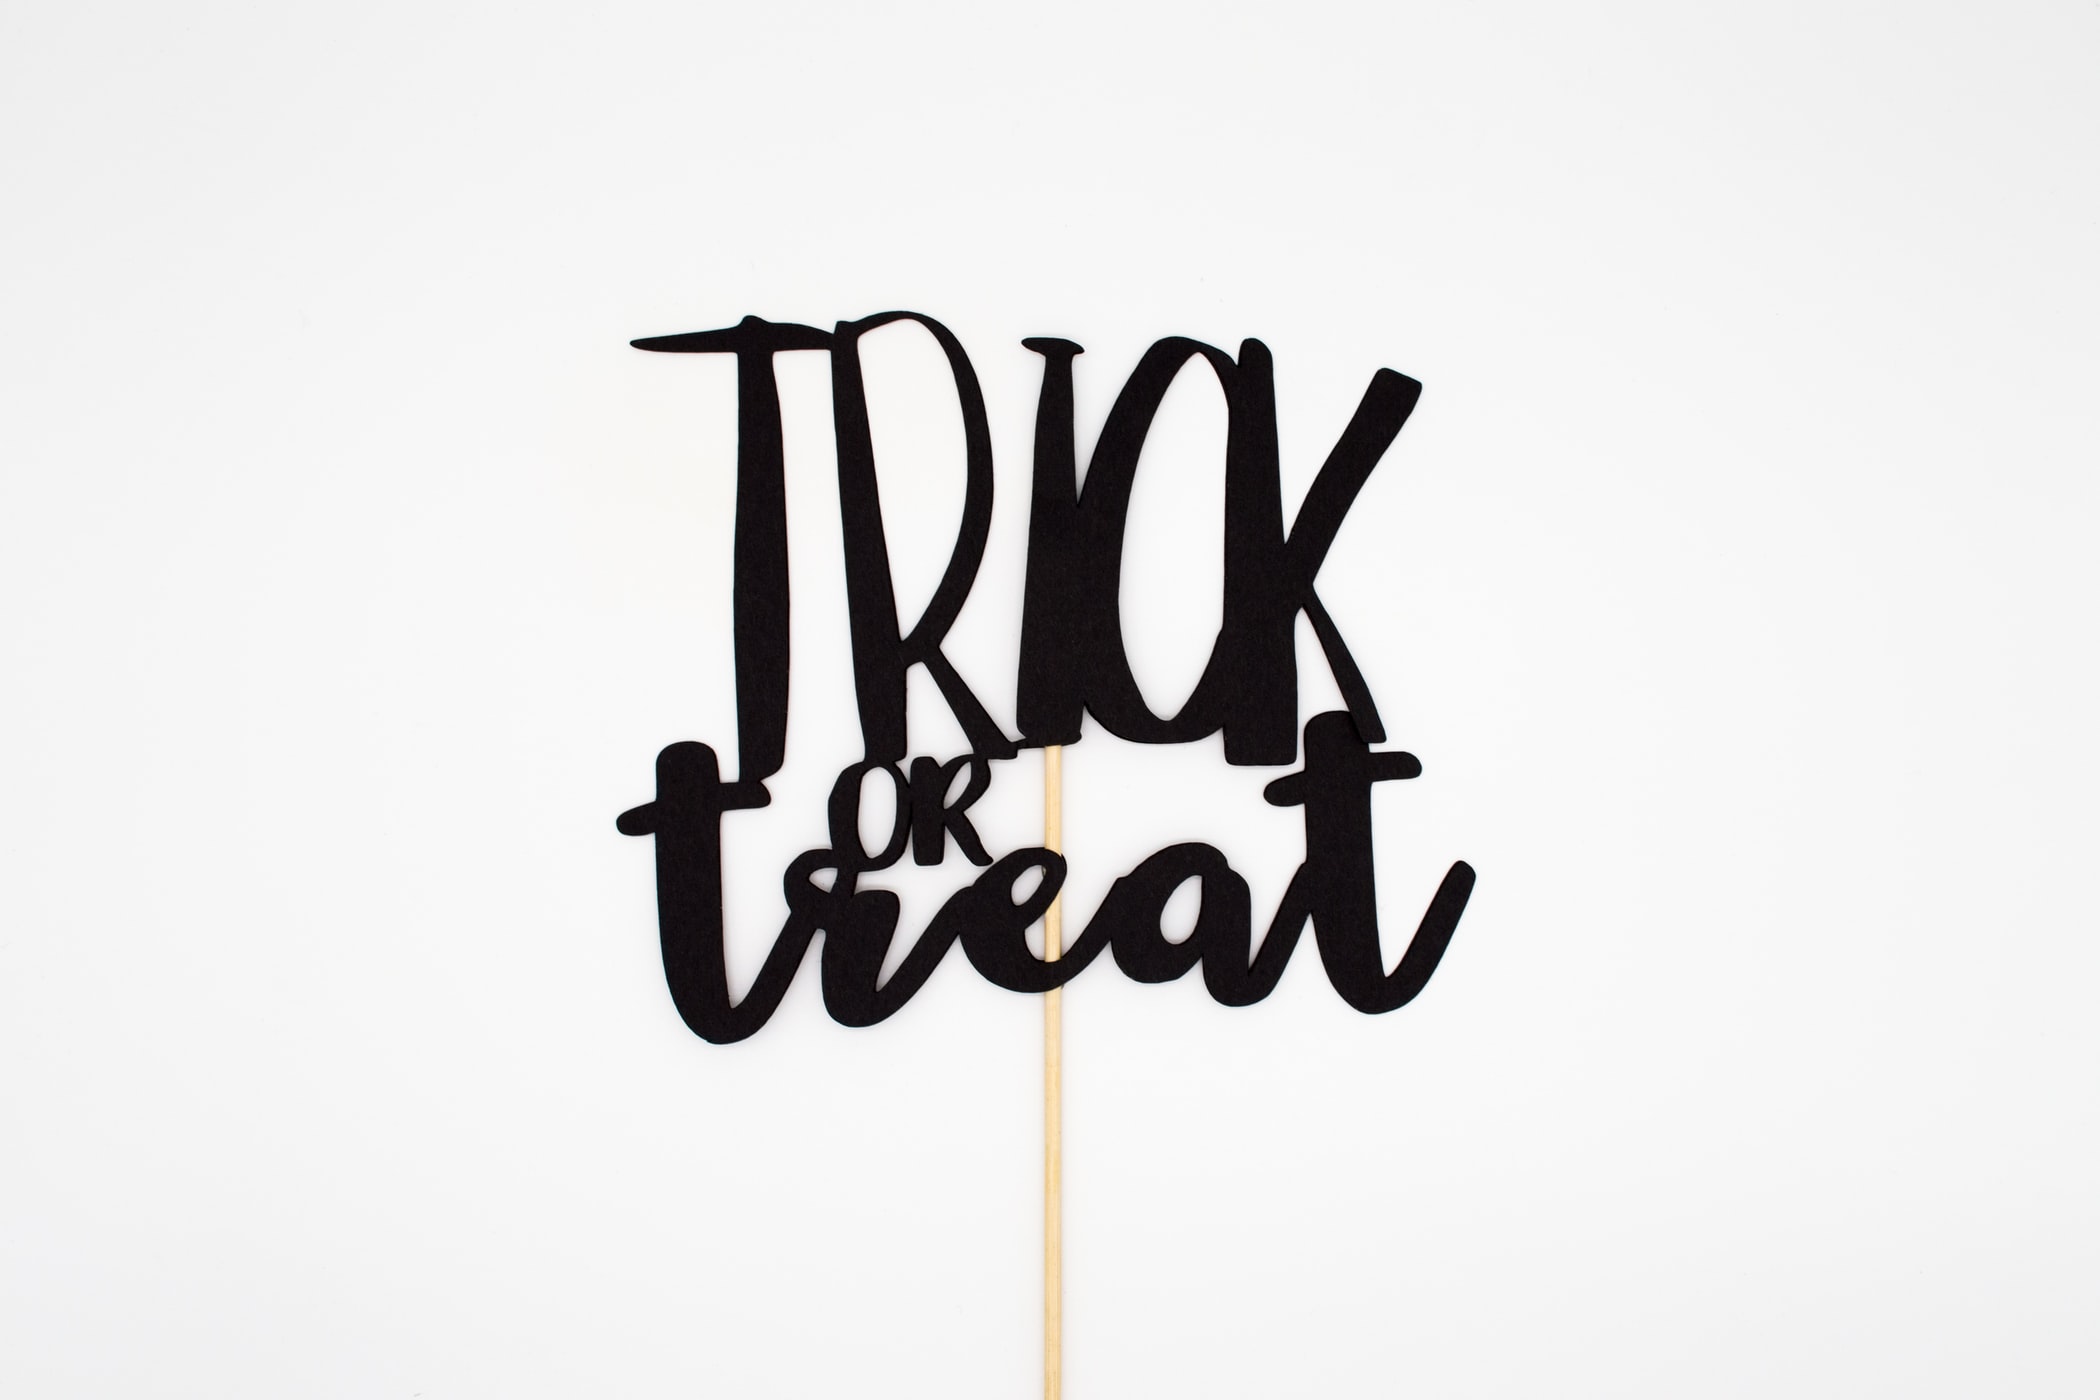
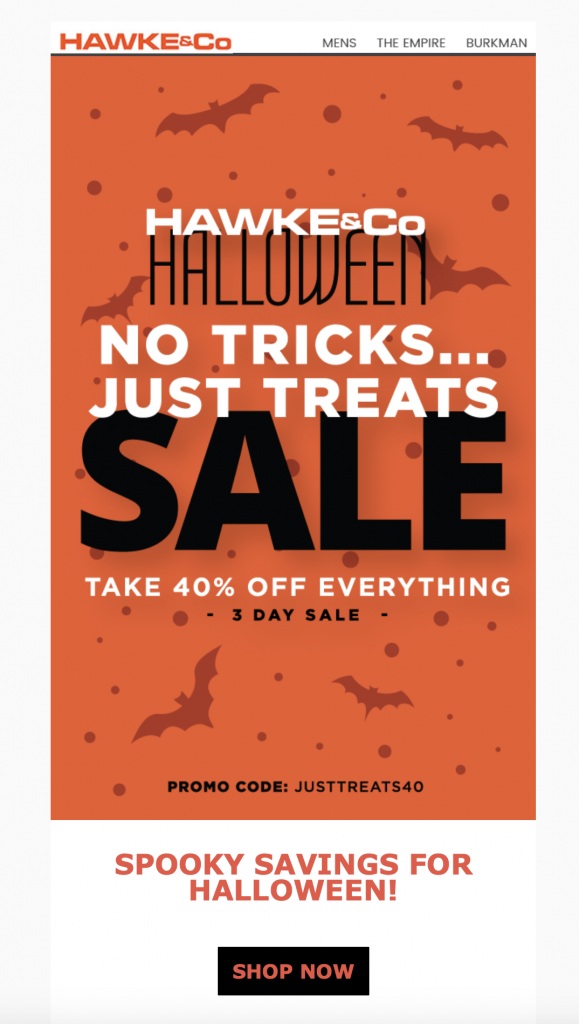
Butcherman is the perfect spooky font for your Halloween designs

Mountains of Christmas is a charming font for the holidays

We hope you enjoyed this continuation of our original font guide. We love fonts here at Mail Designer 365! If you have any cool examples of designs you've created using the web fonts in Mail Designer, send them our way, we'd love to see.

Until next time,

Your Mail Designer 365 Team

Give Mail Designer 365 a try today for free...

Mail Designer 365 helps you create stylish, professional HTML emails on your Mac. Download for free to see what you can achieve.


Try for free

Tried and Tested: Our Exclusive Insider Tips for Brilliant Sales Campaigns

By Uncategorized

For many marketers, "Black Friday" is one of the most important days in the email marketing calendar. Whether you're a seasoned email professional or just starting out with your own business, as the build up to the big day begins, it is definitely time to start thinking of how to structure your campaigns.

What is "Black Friday"?

Previously a day reserved for the USA, in recent years, "Black Friday" has gained traction across the world. The day after Thanksgiving is widely recognized as the official start of the Christmas shopping period and is a day where retailers everywhere compete with each other to offer great deals and lower than average prices.

"Black Friday" is seen by many as the official start of the holiday shopping period

Why should I get involved?

The day presents a huge sales opportunity for big and small businesses alike. With so many people looking to shop around and get the best deals, it's definitely a great thing to get on board with to gain more exposure for your business. It's also a great way to get sales up: in 2017, retailers in the US earned a record breaking $7.9 billion  just from one day, which was a roughly 18% increase from the year before!

Here are five of our best insider tips for creating super effective email campaigns for big sales events, including some examples of our previous campaigns over the years...

Getting started

Everything has to start somewhere and the same goes for your sales campaigns. Sit yourself down with your team to start brainstorming ideas for your promotional campaign to give you plenty of time to put it all together. Talk about which products you want to promote, which discounts you want to offer, and what you want to include in your campaign.

Check out sources like Pinterest and ReallyGoodEmails for inspiration. Here you can find great real life examples of successful campaigns. Once you've planned the basis of your campaign, you can get started on bringing it to life.

Use Pinterest for design inspiration

Really Good Emails is a great resource

Keep customers in the loop

Consumers often have a list of what they want to purchase and where they want to look for the best deals. Make sure your business is in the running by letting your customers know that you will also be having a big promotion. Send out your first teaser email a couple of weeks before the sale. This way you're letting customers know to check out your website on the big day.

In addition to an email, you can also use social media to your advantage. In the week leading up to "Black Friday", we used Twitter to let our followers know that we were having a sale.

Build an effective landing page

It's a good idea to build separate landing pages for big sales events. This makes it much easier for you to track your traffic outside of your normal website activity. At the same time, it is another opportunity to showcase all of your best deals in one place and can be linked in emails and on social media.

Your landing page should be vibrant enough to attract attention from your customers, and also provide a quick overview of what you have on offer. Some quick tips include:

  • Keep image sizes to a minimum. Large graphics may look pretty, but they take longer to load. You want to attract a lot of traffic, so make sure your website is loading fast and efficiently.
  • Make it mobile. Many consumers will be checking out offers on their smartphones. Make sure your landing pages are mobile responsive so they will shine on any device.
  • Include lots of keywords. The holidays are a competitive time for sales. Include as many product and sale related keywords as you can to attract your target audience.
  • Create a special theme or logo to distinguish your offers page from your normal website. It is important that regular customers recognize the promotion is a one-off.

Our landing pages all featured the Super Friday logo and a stylish black and red theme to help distinguish them from the main website:

Put together a press release

Sales are always a hot topic for journalists and bloggers. Even if you aren't a huge business, your deals will still spike interest from reporters looking to put together articles and shopping guides for consumers. Now your landing pages are ready, you can put together an official press release to send to any blogs or websites you think would find your deals interesting.

In this press release, you can go into more detail about what you are offering customers. The more information you provide, the more you will feature in their story. It's also a good idea to send this out a few weeks before your deals go live to give the writer time to prepare. Here's an example of the PR newsletter we built in Mail Designer 365 for our Super Friday campaign in 2017...

Our 2017 Super Friday press release


Create a sense of urgency

When the big day comes, you only have a set amount of time to convince customers that they should be looking at your offers. This can be achieved through a clever email marketing campaign which generates a sense of urgency.

Alongside an email announcing your sale is live, you should also send out at least one reminder email to encourage customers to check out your site before it's too late. Including countdown timers and time-sensitive phrases is a great way to create a sense of urgency. It is also good to make designs mobile responsive so your readers definitely won't miss out.

We sent out reminder emails to our customers to encourage them to shop our offers before they expire:

Use reminder emails to create a sense of urgency

Creating sales campaigns with Mail Designer 365

We hope these tips have inspired you to get to work on creating your sales campaigns for this year. If you don't know where to get started on your email campaigns, check out Mail Designer 365. With a huge range of design tools, advanced layout options, support for responsive designs and a drag and drop editor, Mail Designer 365 is the perfect place to create stand out email designs for your promotions.

Until next time!

Your Mail Designer 365 Team

Give Mail Designer 365 a try today for free...

Mail Designer 365 helps you create stylish, professional HTML emails on your Mac. Download for free to see what you can achieve.


Try for free

Creating Project Status Reports using HTML Tables

By Uncategorized

Project status reports are a super productive way to help you and your team keep track of an ongoing project or business venture. Although they are usually built using Excel or similar programmes, you can actually build a detailed project status report right inside an email.

Sounds complicated? It's definitely not! Here are our top tips on how you can use Mail Designer 365 to build a visually effective report which you can integrate into your email...

What to include in your report

The exact contents of your project status report will vary depending on what your project is and who is involved. In order for your report to be as effective as possible, you need to consider what it is that you want to communicate to the rest of your team. Here are some of the most important criteria associated with any project:

  • Financial status: Are you inside your planned budget? What is the total cost so far?
  • Progress made since the last report: Which actions have been taken? How does this compare to planned progress?
  • Risk assessment: Are there any new risks? How could they delay completion?
  • Outstanding tasks: What is yet to be completed? Will this delay completion of the project?
  • Timeline: What is the expected completion date? How does this differ to the planned completion date?

How to present your report

There are a number of popular ways of effectively presenting a project status report. Here are some key factors to include:
Color
Using color is a great way to make the information in your table more visually effective.You can use whatever color scheme you like to brighten up your report, but one popular choice is the traffic light system. Use green for the positive aspects of your project (e.g. what is going well), amber for the aspects which need improvement, and red for the things which need to be addressed urgently (e.g. risk factors.) Here is an example of a project status report using the traffic light system.

An example report using the traffic light system

Scope of the report
Depending on the length of your project, you may have to present the information in your report differently. Reports can be sent out weekly, monthly, quarterly, or, in some cases, as a one off. If possible, it is good to include some way of comparing progress with previous reports. You can do this by including a simple summary of the previous reports (e.g. the previous 3 months.)

Key information
As well as the evaluation criteria for your report, a well-presented report should also contain the key information about the project. Particularly in bigger businesses where multiple projects may be happening at once, it is useful to label the report correctly to avoid confusion for yourself and other team members. Most importantly you should include:

  • Project name and ID code (if applicable)
  • Date of report
  • Name of project manager
  • Target completion date

Example of key information for a project report

You can also include the following information if you feel it is relevant:

  • Project department
  • Project phase
  • Project budget
  • Priority level
  • Project sponsor
  • Costs so far
  • Start date of project

How to build your report in Mail Designer 365

Step One: Set up a table in Mail Designer 365

In Mail Designer 365, project status reports can be quickly built up using the tables feature. Go to "Contents" > "Layout Blocks" and scroll down to the bottom to find the table blocks. You can then drag and drop a block into your email design.

Drag and drop a table block into your design to get started

Step Two: Fill in your evaluation criteria

Double click on a table cell to edit text. You can insert as many components as you like depending on your needs. To adjust the amount of rows and columns, click on the table. This will open the style menu. Click on "Structure" and use the formatting tools to build up your table.

Add rows and columns for your evaluation criteria

Step Three: Add some color

We talked about the importance of using color in your report. Customize the color layout of your table by clicking on a cell and opening the "Color" section in the "Style" menu. Here you can change the color of one cell, or an entire column or row.

Adjust color settings to make your table more visually effective

There are several ways you can incorporate the traffic light system. We suggest using shapes, as this is visually effective and easy to copy and paste. In this example, we are using circles:

  • Set the cell content to image block. You can do this in the "Cell Content Type" section.
  • Head to the "Contents" tab in the sidebar, find "Shapes" and drag a shape into the cell.
  • Click on the shape to change the color according to the traffic light system.
  • Copy and paste the shape until you have filled up all of the criteria.

Use shapes to recreate the traffic light style

Step Four: Add information

The traffic light system is useful, but it is much better to have some written information included in the table to give your team some context. In the last column, you can write down your notes as to why each section has been graded red/amber/green. Make sure to change the cell content type for this column to text:

In the final column you can include written notes for your team

It's up to you how you present the key information about the project. We simply inserted another mini table above the main report with 2 rows and enough columns for the key information. This clearly labels the project report and gives your colleagues some context before they start reading.

For context, add a table with your key information above the report

Extra Tip: Save your table layout

Although setting up a table in Mail Designer 365 is super straightforward, it's not actually something you have to do each time you want to send a report out to your team. You can save your table layout so that all you have to do next time is edit the cell contents. To do this, go to the "Layout blocks" menu again, open the "Ready-Made" tab, then hold down the "cmd" key and click on the layout handle of your table(s) and drag it into the sidebar to save.

Save your table blocks in the ready-made blocks section for next time

Reports made easy with Mail Designer 365

 
Take the hassle out of building and sharing project status reports and do everything in one app. With Mail Designer 365 you can build brilliant HTML emails using drag and drop and create a report to rival Excel. Use the tables feature to build up a professional report which is fully integrated into your email and then send directly via the app from your own email address. No attachments, no fuss, just one app.
 

Give Mail Designer 365 a try today for free...

Mail Designer 365 helps you create stylish, professional HTML emails on your Mac. Download for free to see what you can achieve.


Try for free

Mail Designer 365 1.4.4 Update Guide

By Uncategorized
Hey Mail Designers - as promised, we have yet another brand new update for you! The Apple Watch preview tool in Mail Designer 365 now supports previews for HTML emails. This, along with more useful improvements, can be found in Mail Designer 365 version 1.4.4. Here's all you need to know about the latest update...

Read More

How watchOS 5 Will Transform Your Email Marketing Strategy

By Uncategorized
It's no secret that the number of people checking their emails on the go has significantly risen in recent years. One mobile device which has massively grown in popularity since its initial release in 2015 is the Apple Watch. With the recent release of watchOS 5, email creators and recipients alike are all breathing a collective sigh of relief. Finally, no more scrolling through long plain text emails...

We're taking a look at how the latest update could transform your email marketing strategy.

Read More

Privacy Settings / Datenschutz-Einstellungen