
Frequently Asked Questions
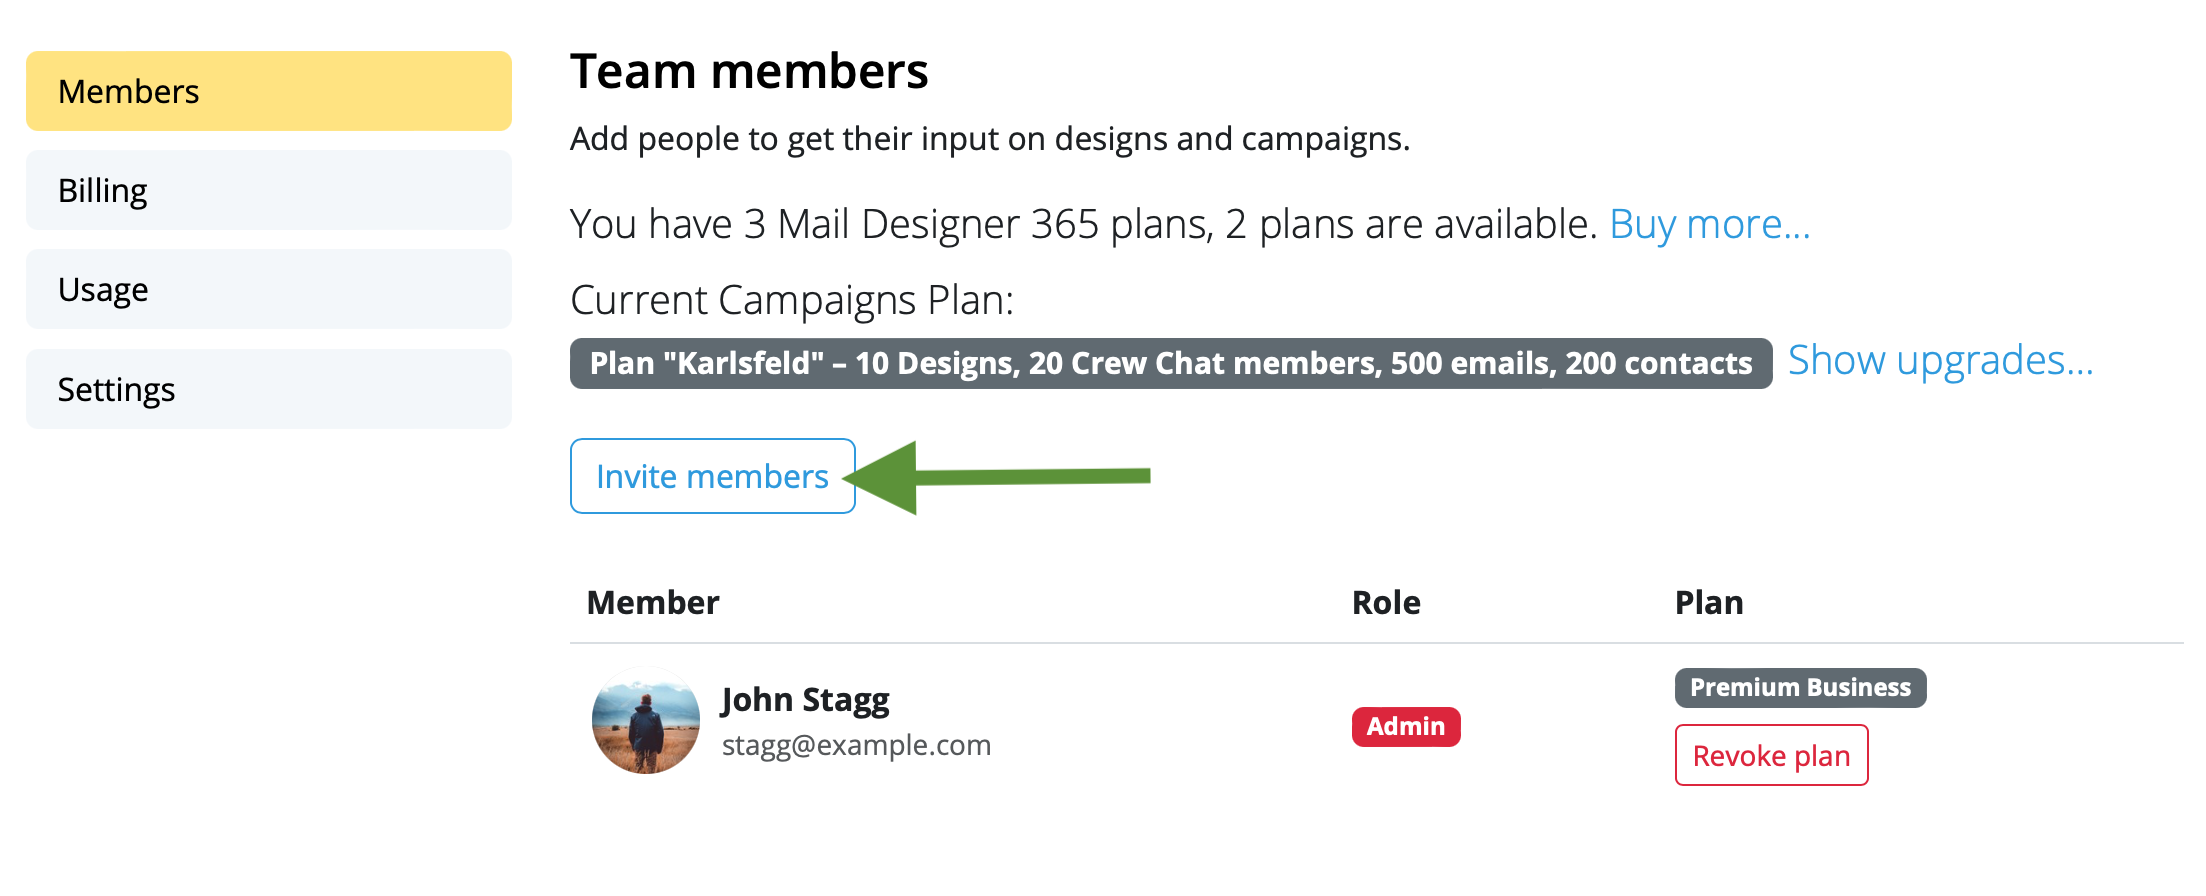
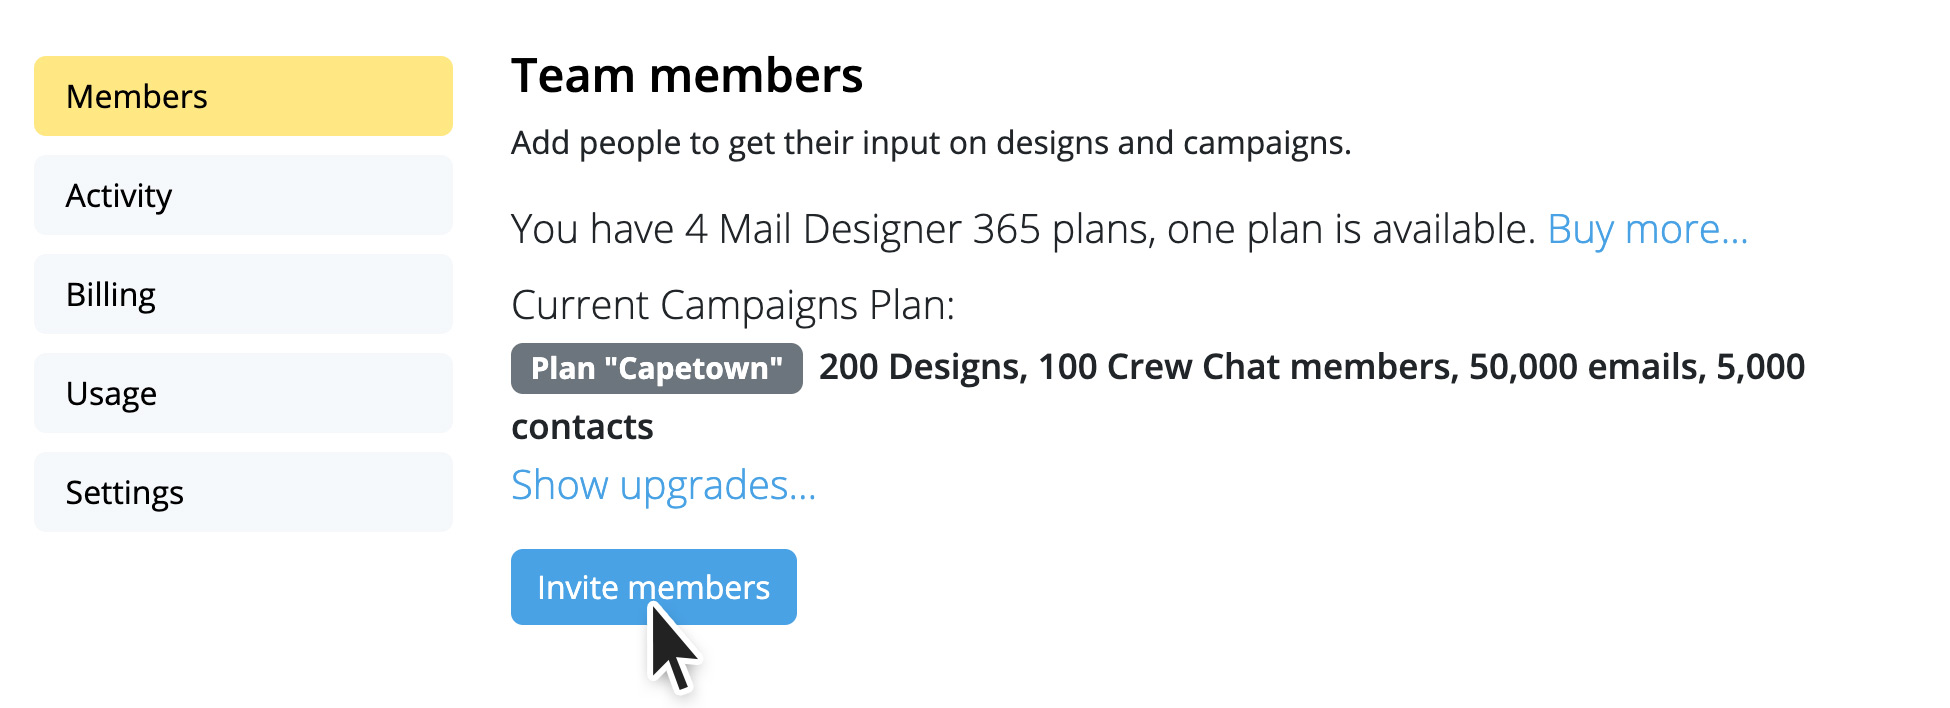
 From here, go to the "Members" tab and click "Invite members."
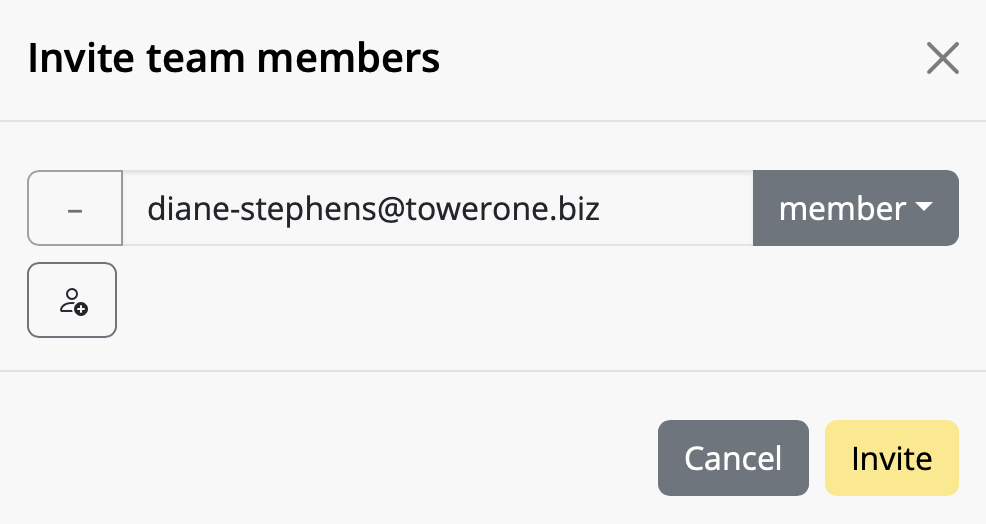
 Enter the email address(es) of the colleague(s) you want to invite to your team and click "Invite". You can invite up to 10 team members free!
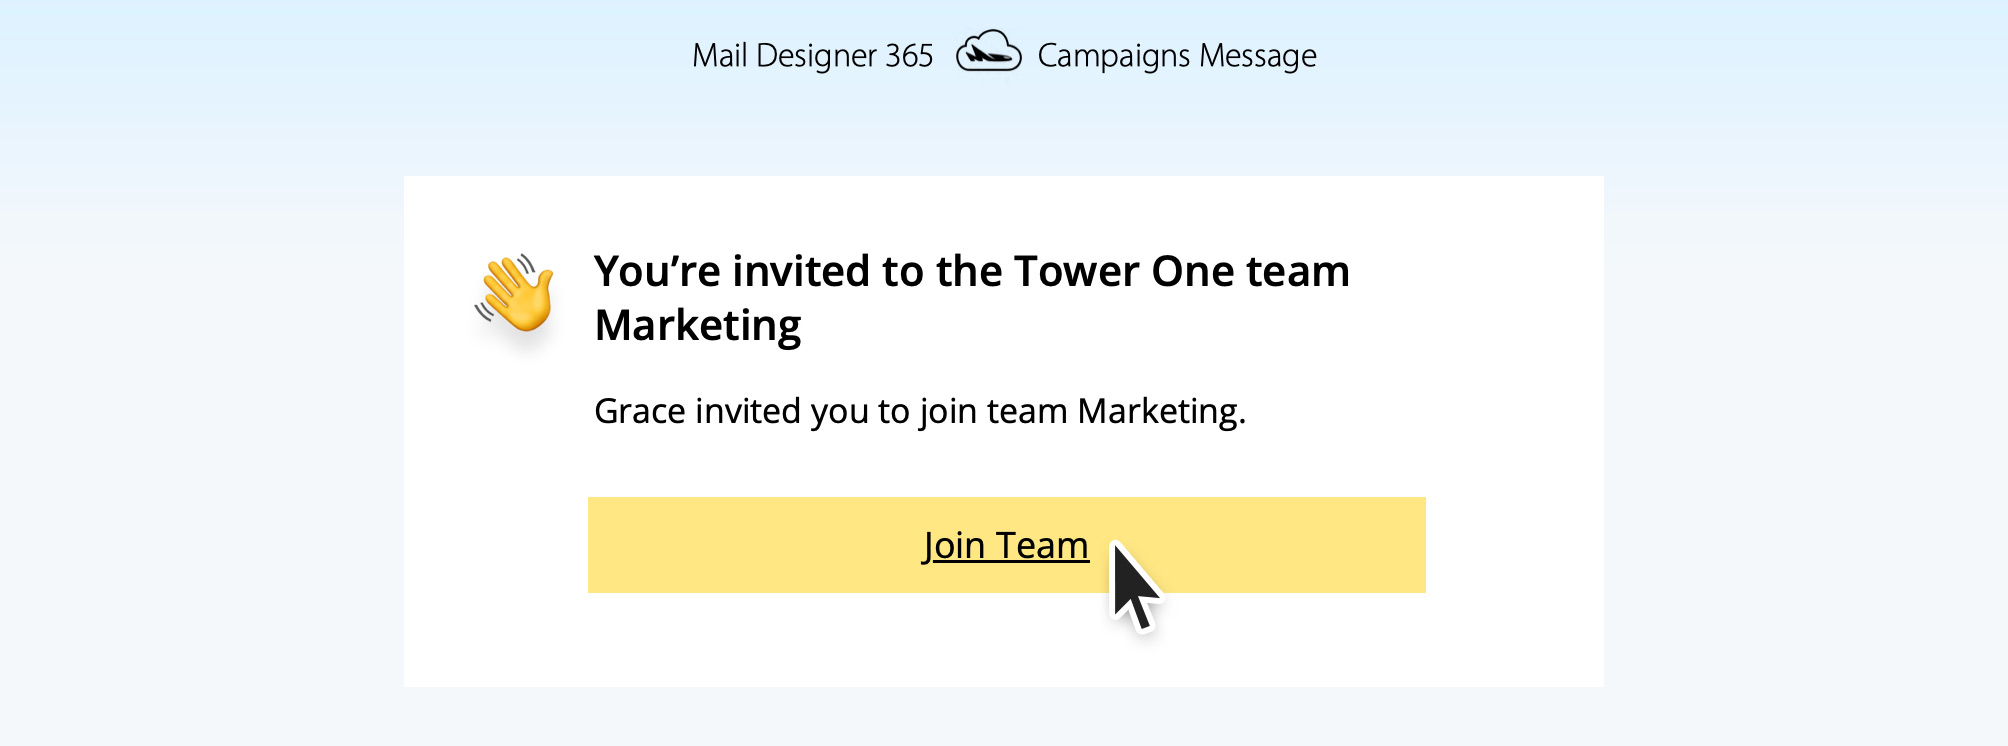
 Team members can accept your invitation by clicking on the link in the email.
Once you've invited new team members, start using Mail Designer 365 Campaigns to discuss, approve and schedule email campaigns for your audience. Try it out free!
Team members can accept your invitation by clicking on the link in the email.
Once you've invited new team members, start using Mail Designer 365 Campaigns to discuss, approve and schedule email campaigns for your audience. Try it out free!
Sending test emails
Mail Designer 365's Testmail service is designed for sending internal test emails to yourself or to your team – i.e. to preview how your finished email design will look in the inbox. Test emails will be sent from the Mail Designer 365 Testmail service via our secure servers.How it works
To get started, click the Test icon in the Mail Designer 365 toolbar.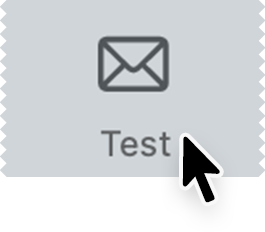 Now choose from the following test mail options:
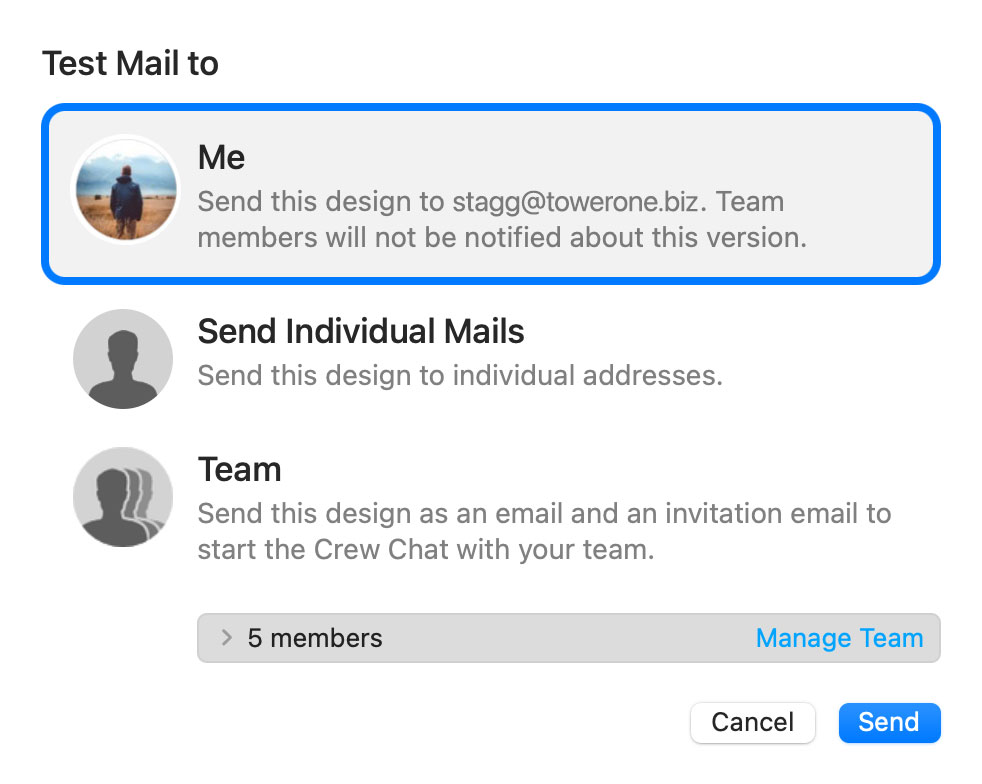
The latest version of your email design will be uploaded via TeamCloud and sent to the selected recipient(s):
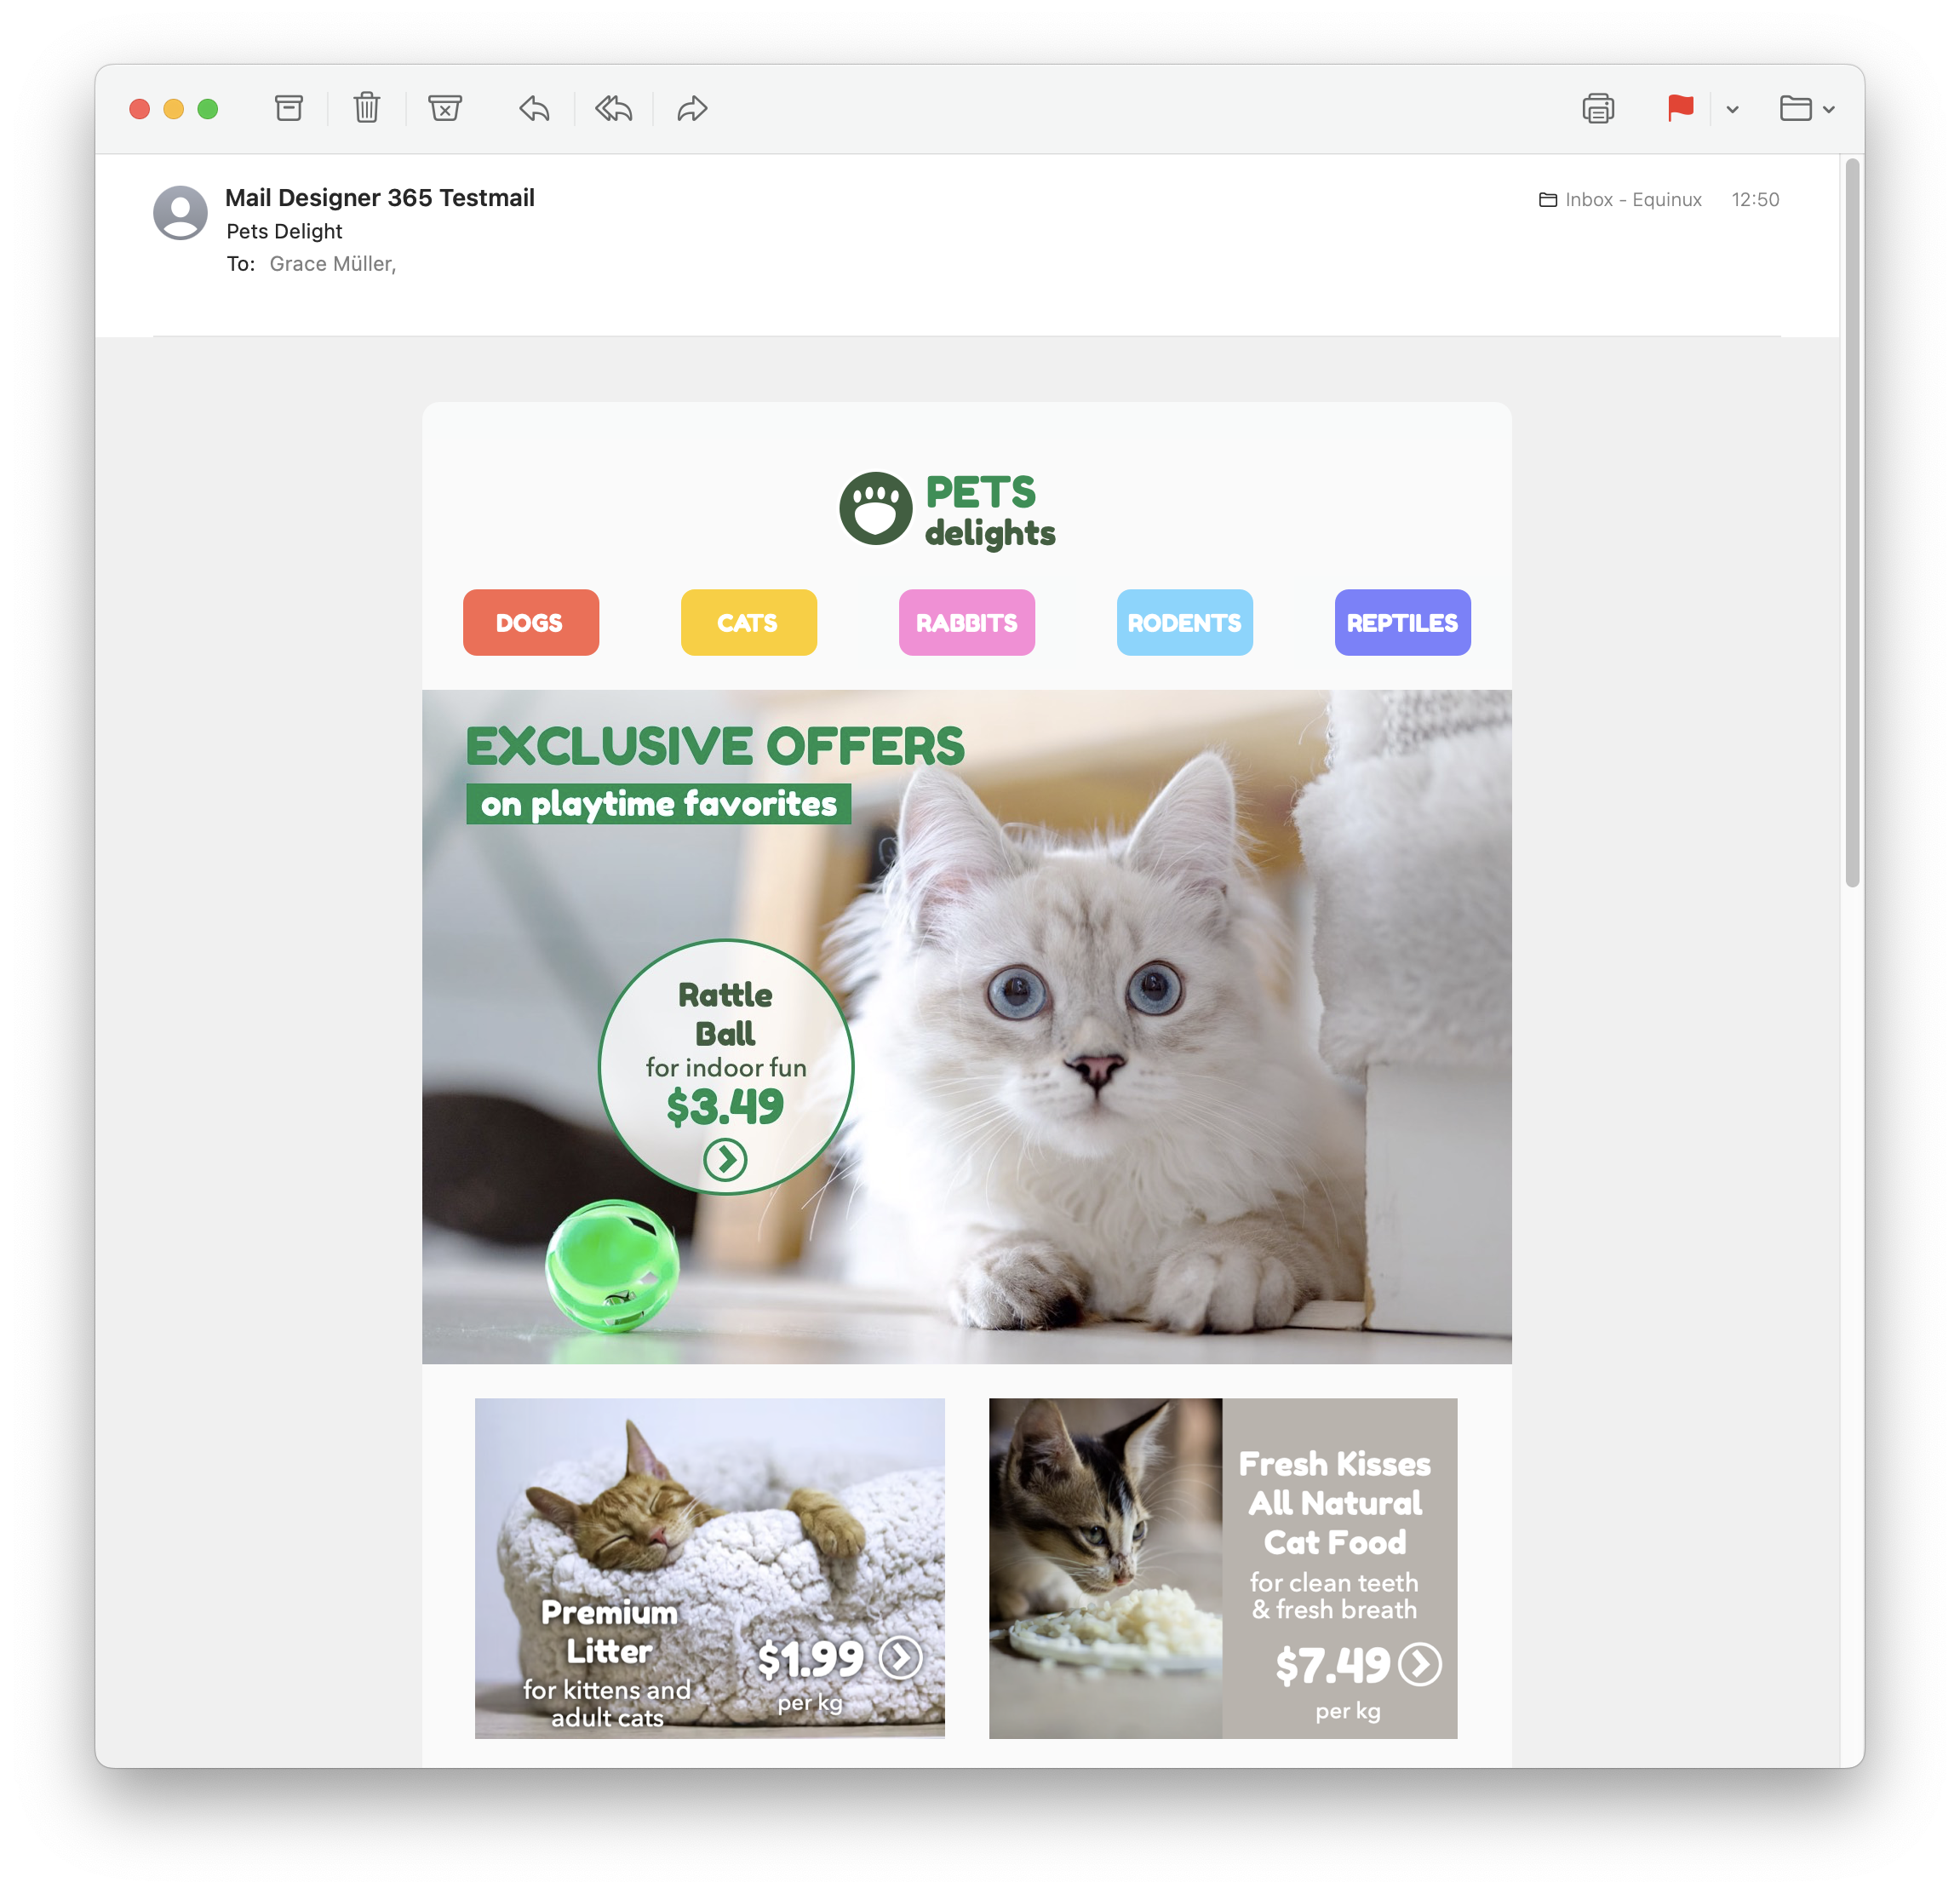
Sending individual emails
You also have the option to send your email design as a single email via Delivery Hub. This email will be sent from your own email address. This option is designed for external emails (i.e. sending emails to contacts who are not part of your Mail Designer 365 team) and replaces the legacy "Send via your email account" option.How it works
In this view you can add one or more recipients for your email (e.g. your client's email) and send them your design from your own email address.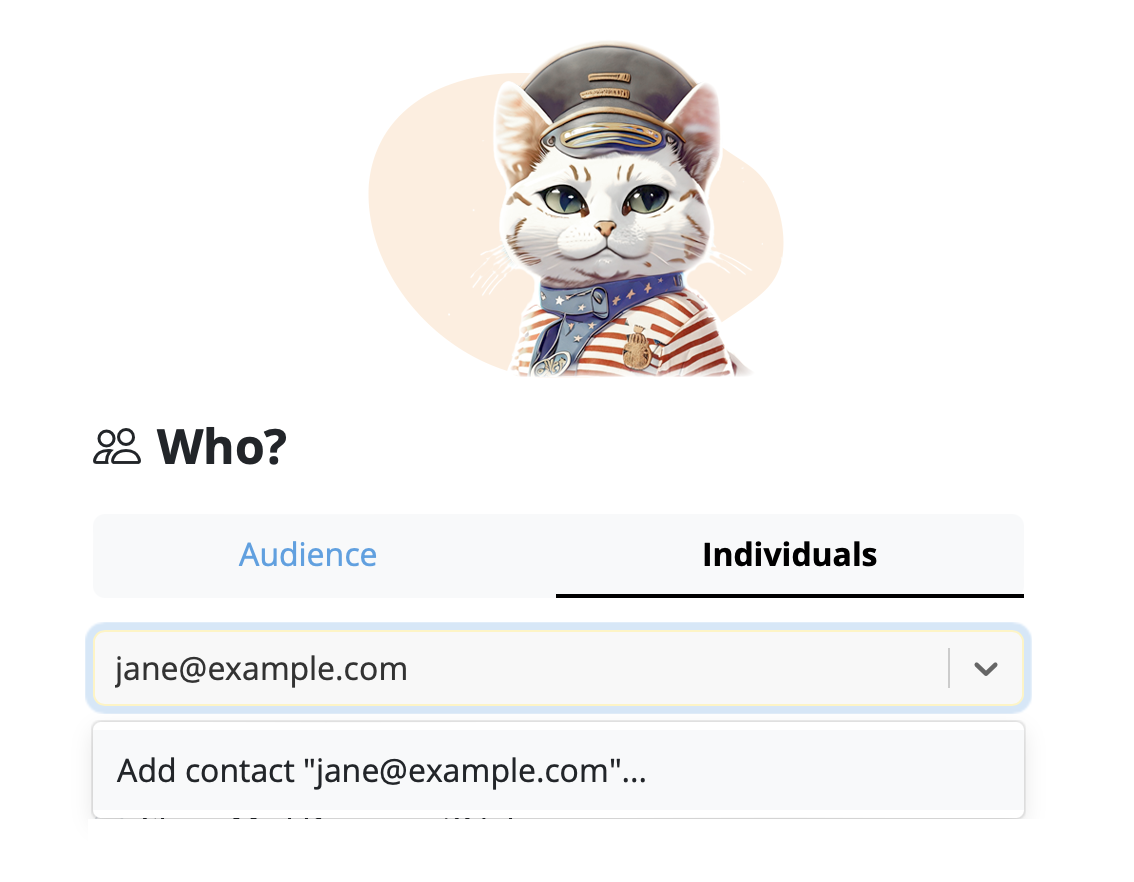
On the left of the setup window, you can choose your from address:
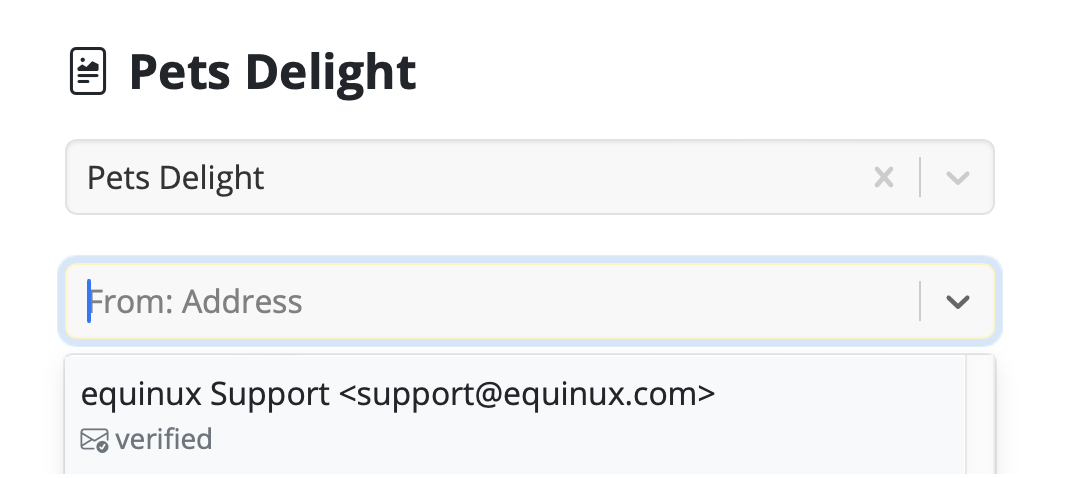
Tip: If you have not done so already, follow this guide to set up your "from address" for sending. Finally, send your email by clicking the green "Send" button. It will go directly to your recipient via your email server:
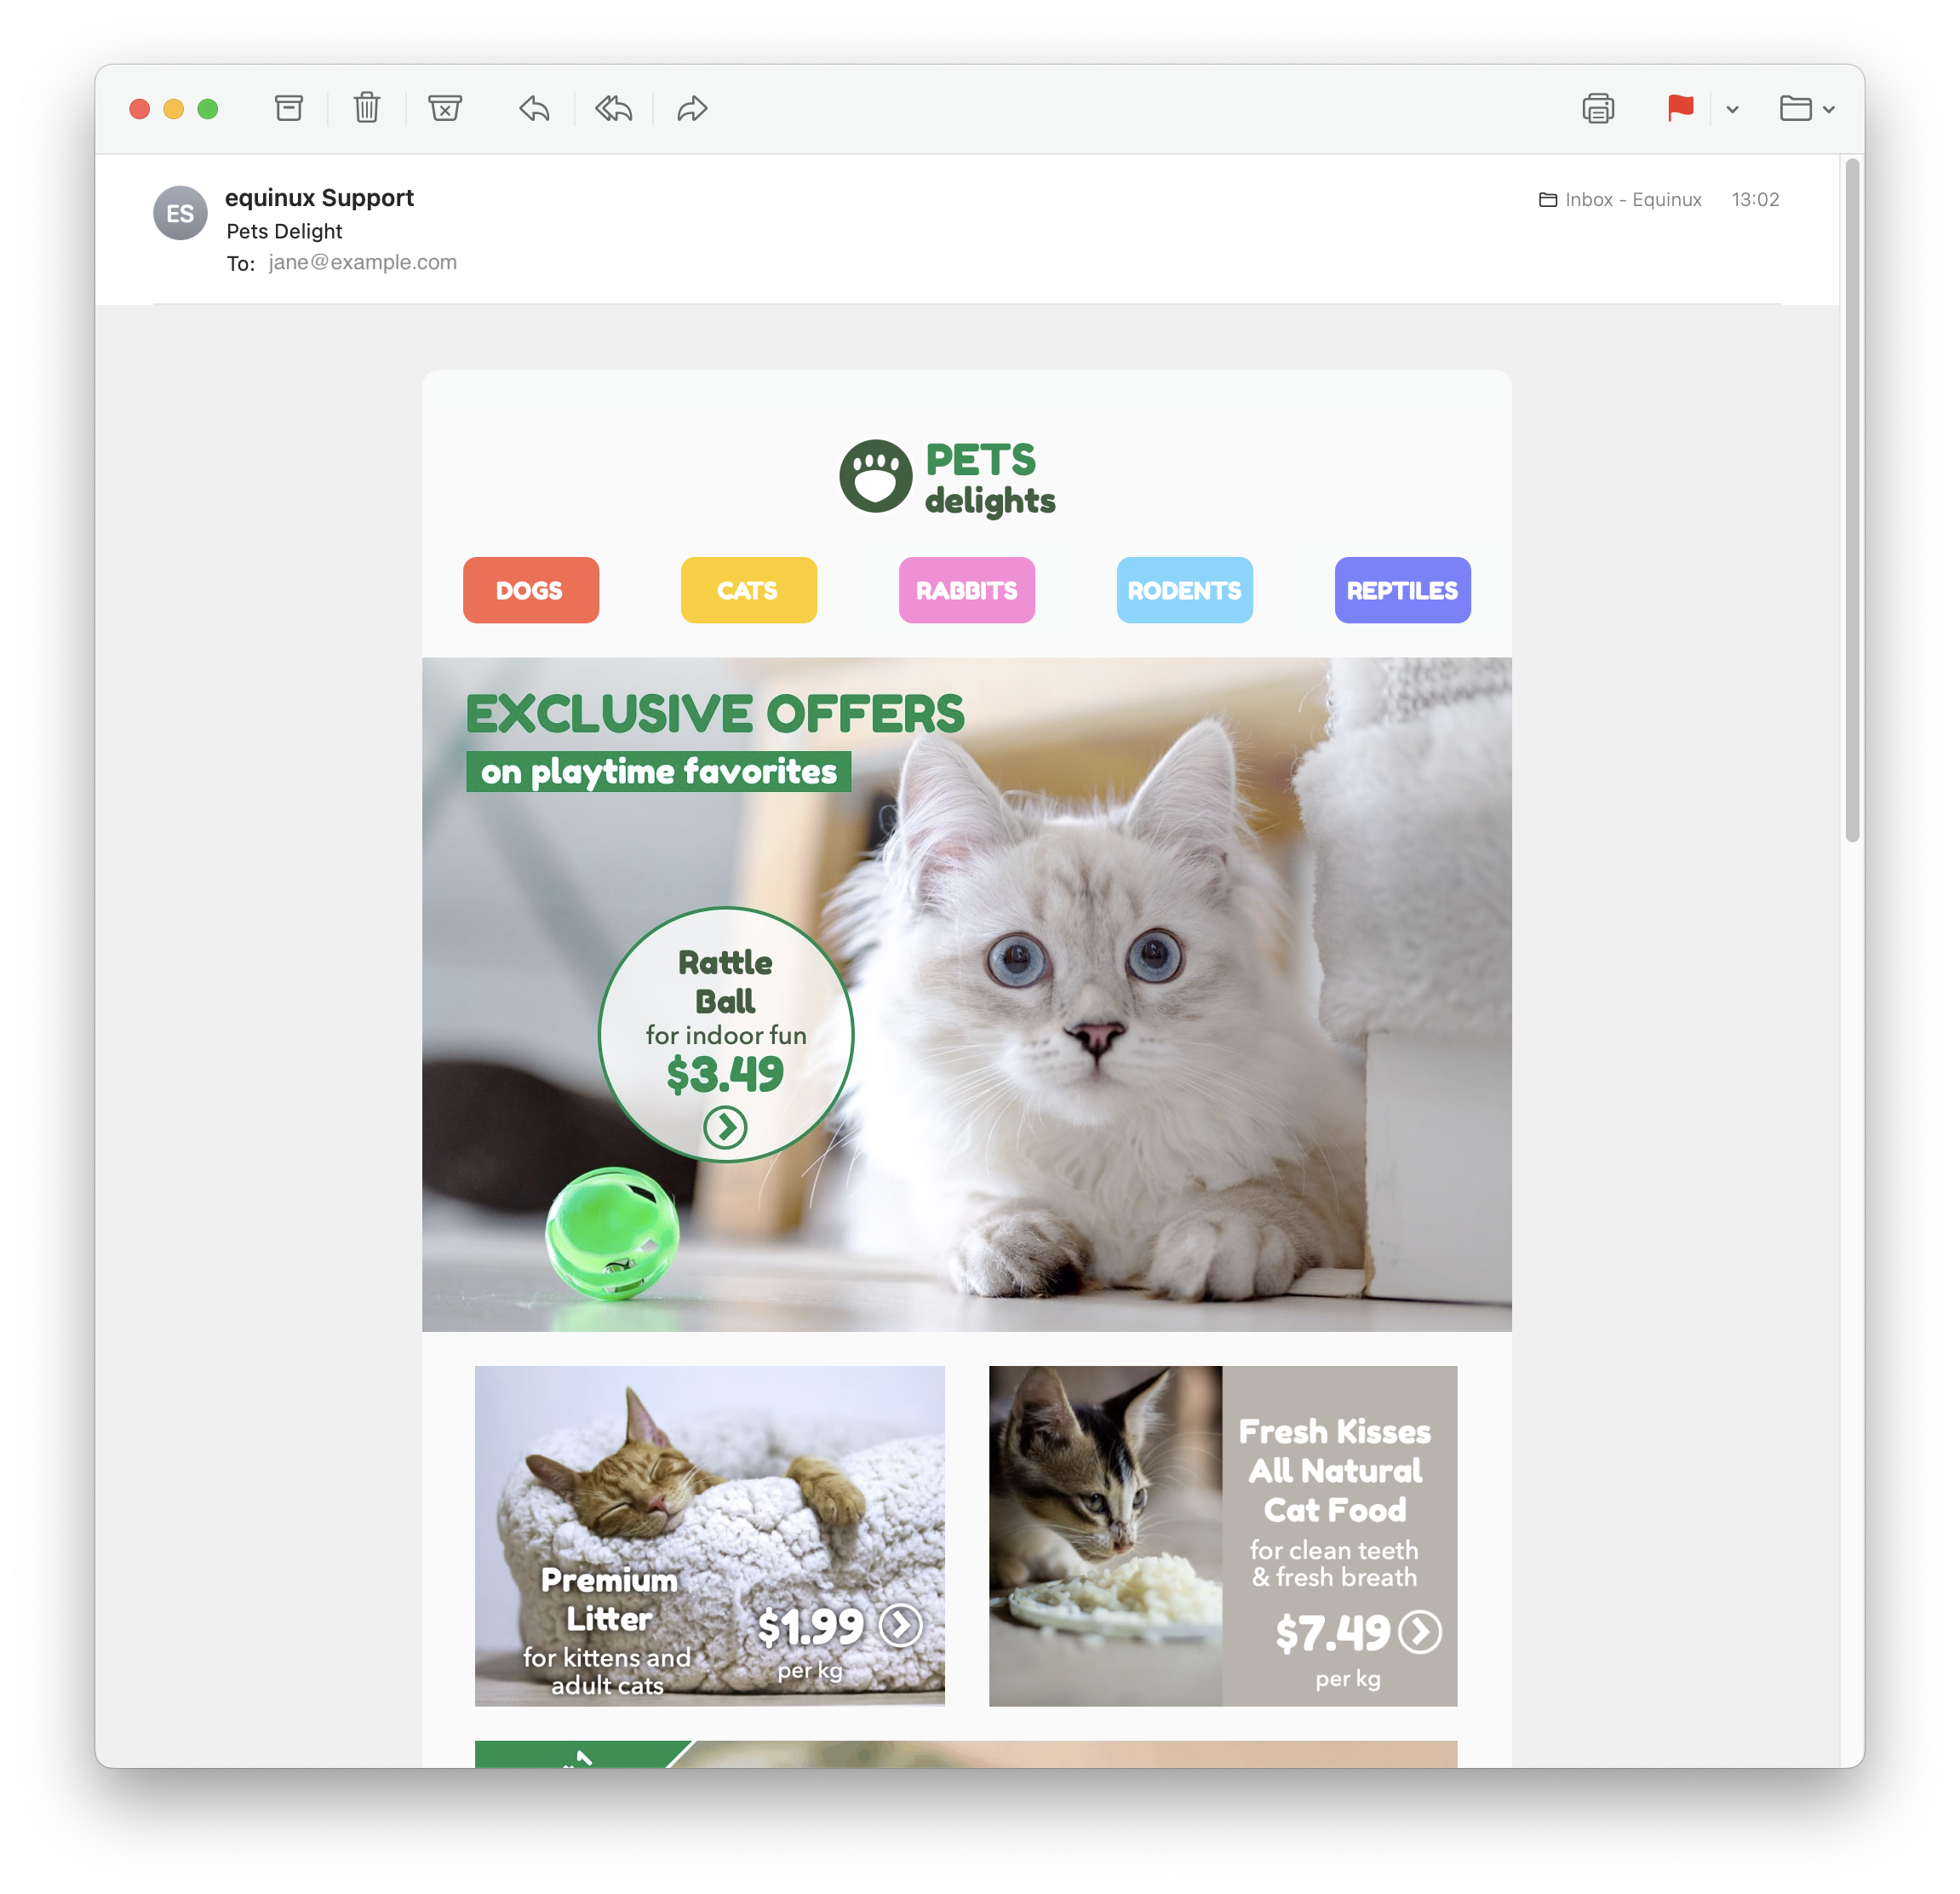
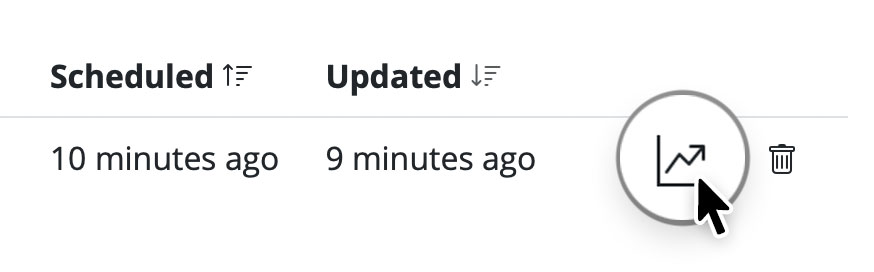
Good to know: Following send, you can easily check if your recipient has received and opened your email by clicking the analytics icon:
We have put together a list of the best known providers including a link to the corresponding DNS setup guide.
If you cannot find your provider in the list please do not hesitate to contact our support team for assistance.
The Anatomy of an Email
Before diving into DKIM, let's briefly understand how emails work. When you send an email, it's like sending a digital letter. It travels through various servers and networks before reaching its intended recipient. Each server it passes through can potentially be a point of vulnerability where malicious actors might tamper with the email's content or disguise themselves as legitimate senders.
Enter DKIM: The Email's Digital Signature
DKIM, which stands for DomainKeys Identified Mail, is a security protocol designed to verify the authenticity and integrity of an email message. It does this by adding a digital signature to the email before it leaves the sender's server. This signature is like a seal of approval, assuring the recipient that the email has not been tampered with and genuinely comes from the claimed sender.
How DKIM Works
DKIM relies on a pair of cryptographic keys: a private key kept by the sender and a public key published in the sender's DNS (Domain Name System) records. Here's how it works:
- Email Signing: When an email is sent, the sending server uses the sender's private key to generate a unique digital signature based on the email's content. This signature is added to the email's header.
- Recipient Verification: Upon receiving the email, the recipient's email server retrieves the public key associated with the sender's domain from the DNS records.
- Signature Verification: The recipient's server uses this public key to verify the email's digital signature. If the signature matches the email's content and has not been altered in transit, the email is considered authentic.
- Filtering and Delivery: If the email passes DKIM verification, it's more likely to be delivered to the recipient's inbox. If not, it may be flagged as suspicious or sent to the spam folder.
The Importance of DKIM
- Protection Against Spoofing: One of the most significant benefits of DKIM is its ability to prevent email spoofing. Without DKIM, cybercriminals can easily forge email headers and pretend to be someone they're not. DKIM ensures that the email you receive from a trusted sender is indeed from that sender.
- Email Integrity: DKIM safeguards the integrity of your emails. It guarantees that your message hasn't been altered during transit, ensuring that the recipient receives the content exactly as you intended.
- Enhanced Deliverability: When your emails are DKIM-signed, email providers are more likely to trust them. This means your legitimate emails have a better chance of landing in your recipients' inboxes rather than getting lost in spam folders.
- Reduced Phishing: By reducing the effectiveness of phishing attacks, DKIM helps protect individuals and organizations from falling victim to scams that could result in data breaches or financial losses.
Conclusion
In an era where email fraud and phishing attacks are prevalent, DKIM serves as a crucial line of defense. It's like a digital fingerprint that assures the authenticity and integrity of your emails. While it may operate behind the scenes and go unnoticed by most email users, DKIM is a vital tool in the ongoing battle against cyber threats. Its use should be encouraged and embraced by individuals, businesses, and email service providers to create a safer digital communication environment for everyone. So, the next time you receive an email, remember that DKIM might be silently working to protect you from potential harm in the vast digital landscape.Email has become an integral part of our daily communication, from personal conversations to business dealings. However, with this convenience comes the constant threat of email-based fraud and phishing attacks. To combat these threats and ensure the authenticity of your emails, there's a simple yet crucial tool known as SPF or Sender Policy Framework.
The Vulnerabilities in Email Communication
Understanding SPF requires a brief insight into how email communication functions. When you send an email, it travels through multiple servers and networks before reaching its intended recipient. At each stop, malicious actors can potentially intercept, modify, or impersonate the email.
SPF: The Guardian of Email Authenticity
SPF, which stands for Sender Policy Framework, is a security protocol that acts as a guardian, protecting your email domain from being used by cybercriminals to impersonate you. SPF helps verify the legitimacy of incoming emails by checking if they originate from authorized servers associated with the sender's domain.
How SPF Works
SPF is relatively straightforward in its operation:
- Sender Declaration: The domain owner (you or your organization) publishes a DNS record specifying which servers are authorized to send emails on its behalf. This record is known as the SPF record.
- Email Reception: When an email is received by the recipient's email server, the server checks the SPF record of the sender's domain to see if the server that sent the email is authorized to do so.
- Validation: If the sending server's IP address matches one of the authorized IP addresses listed in the SPF record, the email is considered legitimate and is accepted for delivery. If not, it may be flagged as suspicious or rejected.
The Significance of SPF
- Protection Against Spoofing: SPF plays a crucial role in preventing email spoofing. It ensures that emails claiming to be from your domain indeed originate from authorized servers, making it harder for cybercriminals to impersonate you.
- Enhanced Email Deliverability: When you implement SPF, email providers are more likely to trust your emails, leading to better deliverability rates. Your legitimate emails are less likely to end up in spam folders.
- Reduction in Phishing: By making it more difficult for cybercriminals to impersonate trusted senders, SPF contributes to reducing phishing attacks, protecting individuals and organizations from potential harm.
- Branding and Reputation: SPF helps maintain your email domain's reputation. It assures recipients that your emails are legitimate, strengthening trust in your brand or organization.
Conclusion
In an age where email is a primary mode of communication and email-based threats are prevalent, SPF serves as a reliable shield against impersonation and fraud. Although it may work silently behind the scenes, SPF is a powerful tool in the fight against cyber threats. Its implementation is highly recommended for individuals, businesses, and email service providers alike to bolster the security of email communications. So, the next time you send or receive an email, remember that SPF is working diligently to protect you from potential email impersonation in the vast digital landscape.
Email is the lifeblood of modern communication, but its ubiquity also makes it a prime target for cybercriminals seeking to deceive, defraud, or disrupt. To safeguard against these threats and ensure the integrity of your email communications, there's a powerful tool known as DMARC, or Domain-based Message Authentication, Reporting, and Conformance.
The Challenge of Email Impersonation
Before we dive into DMARC, it's essential to understand the challenges of email communication. Emails pass through multiple servers and networks on their way to the recipient, creating numerous opportunities for malicious actors to tamper with or impersonate senders.
DMARC: Your Email Security Guardian
DMARC, which stands for Domain-based Message Authentication, Reporting, and Conformance, is a comprehensive email authentication protocol designed to combat email impersonation, phishing attacks, and other email-based fraud.
How DMARC Works
DMARC builds on the foundations of SPF and DKIM but takes email authentication to a whole new level:
- Policy Declaration: The domain owner (the sender) publishes a DNS record that specifies how email from their domain should be handled if it fails SPF or DKIM checks. This DNS record contains DMARC policy settings.
- Email Reception: When an email is received by the recipient's email server, it performs SPF and DKIM checks as usual. If these checks fail, the server consults the sender's DMARC record.
- DMARC Verification: DMARC instructs the recipient's server on how to handle emails that fail SPF or DKIM checks. The sender can choose to monitor these failures, quarantine suspicious emails, or reject them outright.
- Reporting: DMARC provides valuable feedback by generating reports about email authentication activity. These reports help domain owners monitor and improve their email security.
The Significance of DMARC
- Protection from Impersonation: DMARC is a formidable defense against email impersonation. It ensures that emails claiming to be from your domain are indeed legitimate, making it exceedingly difficult for cybercriminals to impersonate you.
- Enhanced Email Trustworthiness: Implementing DMARC enhances the trustworthiness of your emails. Email providers are more likely to recognize your emails as safe and deliver them to the recipient's inbox.
- Reduced Phishing Risks: DMARC is a powerful deterrent against phishing attacks. By reducing the success rate of such attacks, it safeguards individuals and organizations from potential harm.
- Reputation Management: DMARC helps protect your domain's reputation. It ensures that your legitimate emails are not diluted by fraudulent ones, preserving trust in your brand or organization.
Conclusion
In an era where email threats are prevalent and sophisticated, DMARC emerges as the ultimate guardian angel of email authenticity. Although it operates discreetly in the background, DMARC is a potent tool in the fight against cyber threats. Its implementation is highly recommended for individuals, businesses, and email service providers, as it offers a robust defense against email impersonation and enhances the overall security of email communications. The next time you send or receive an email, know that DMARC is diligently working to protect you from email-based deception and fraud in the vast digital landscape.
To send your first email campaign, you first need to set up your email address and domain, so it's ok for Mail Designer 365 Delivery Hub to send emails on your behalf.
There are a few technical steps involved during setup. These steps are crucial, as leading email service providers will check that DKIM, SPF and DMARC authentication are configured in order to prevent spam.
Rest assured we've done all we can to make the setup process as simple and fuss free as possible for you. We recommend that you add all three methods to your domain so that your emails reach all recipients. If you require assistance at any point, reach out to your IT admin or get in touch with our support team.
Ready? Let's get started!
Step 1: Add and Verify your Email Address
Before you start, make sure that you have already set up a Mail Designer team. (If you have not done so already, check out our easy team setup guide).
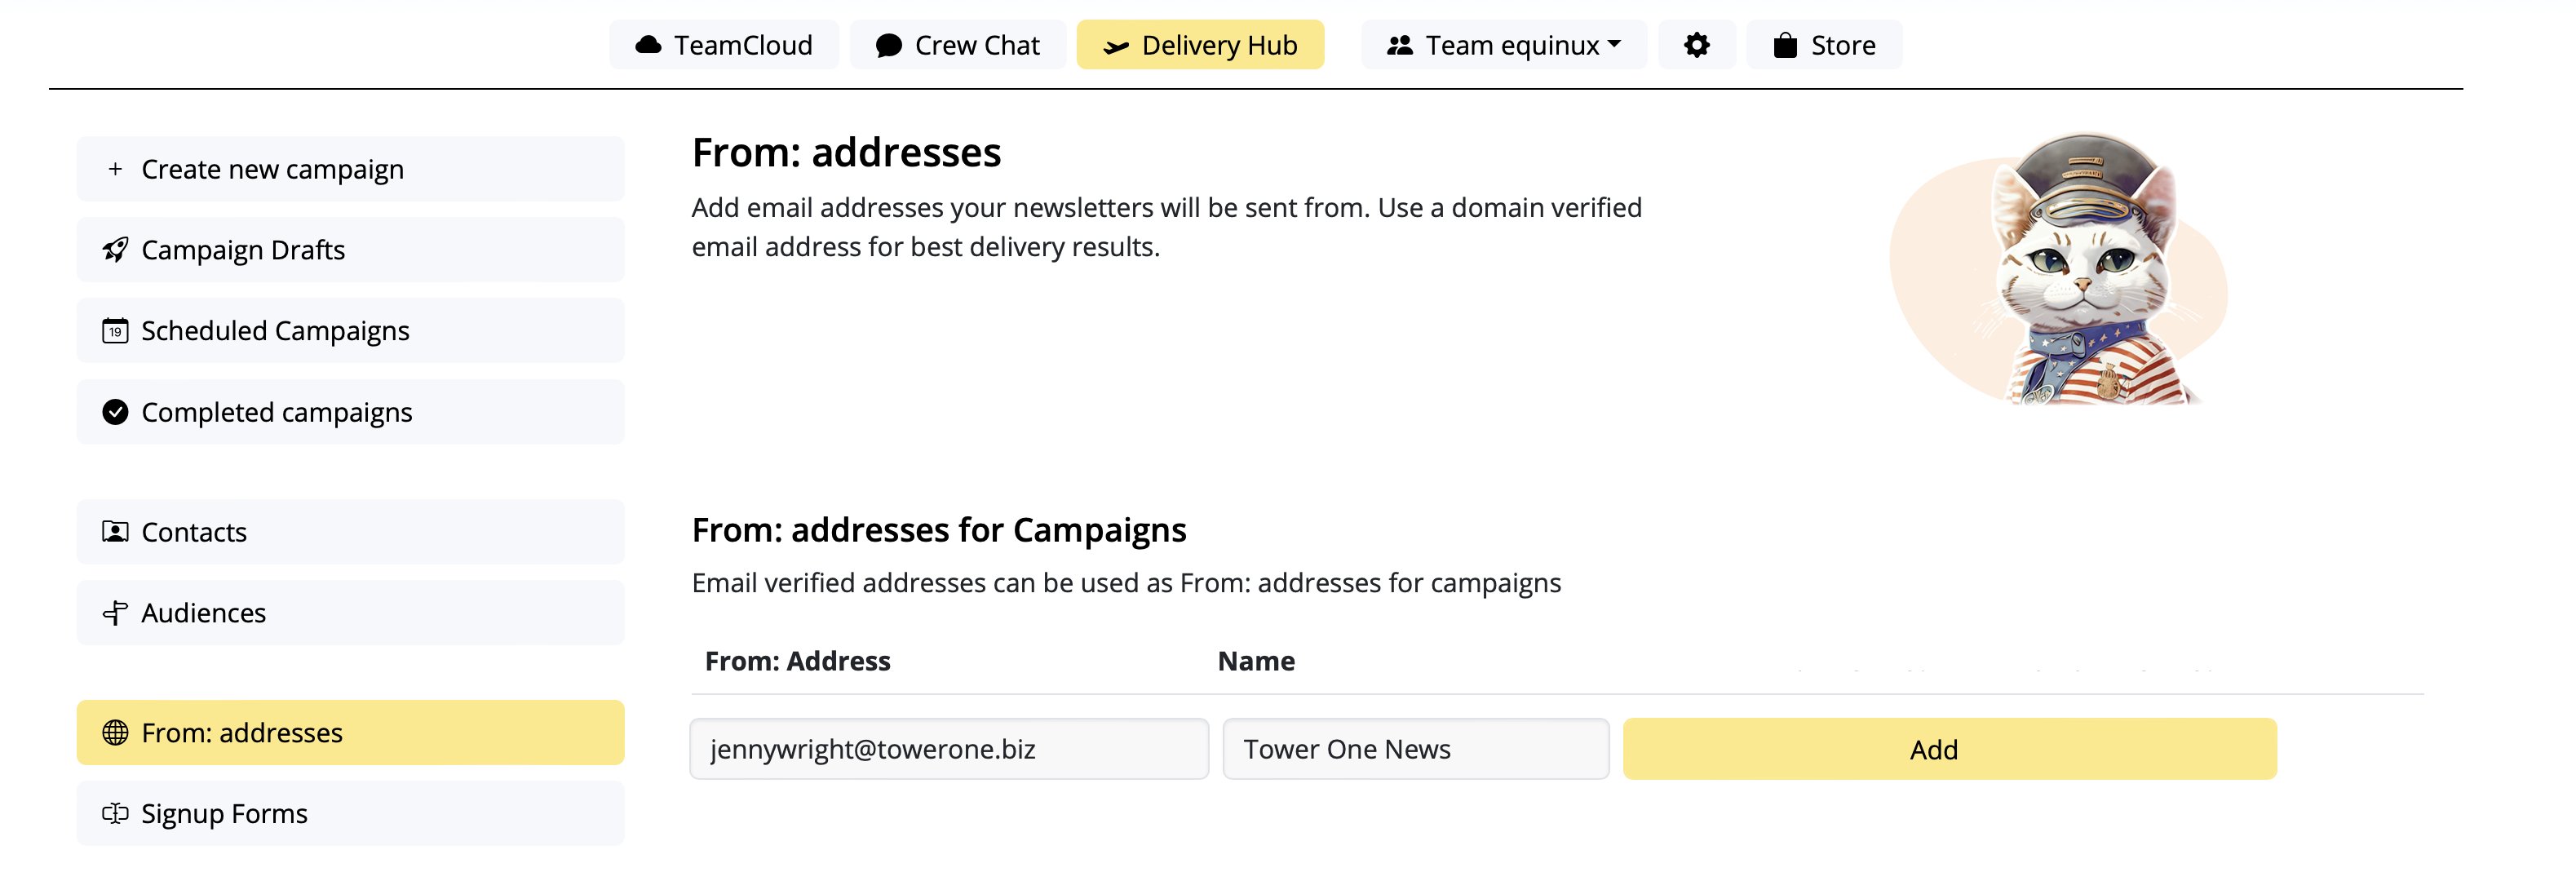
- Go to Settings > "From: addresses"
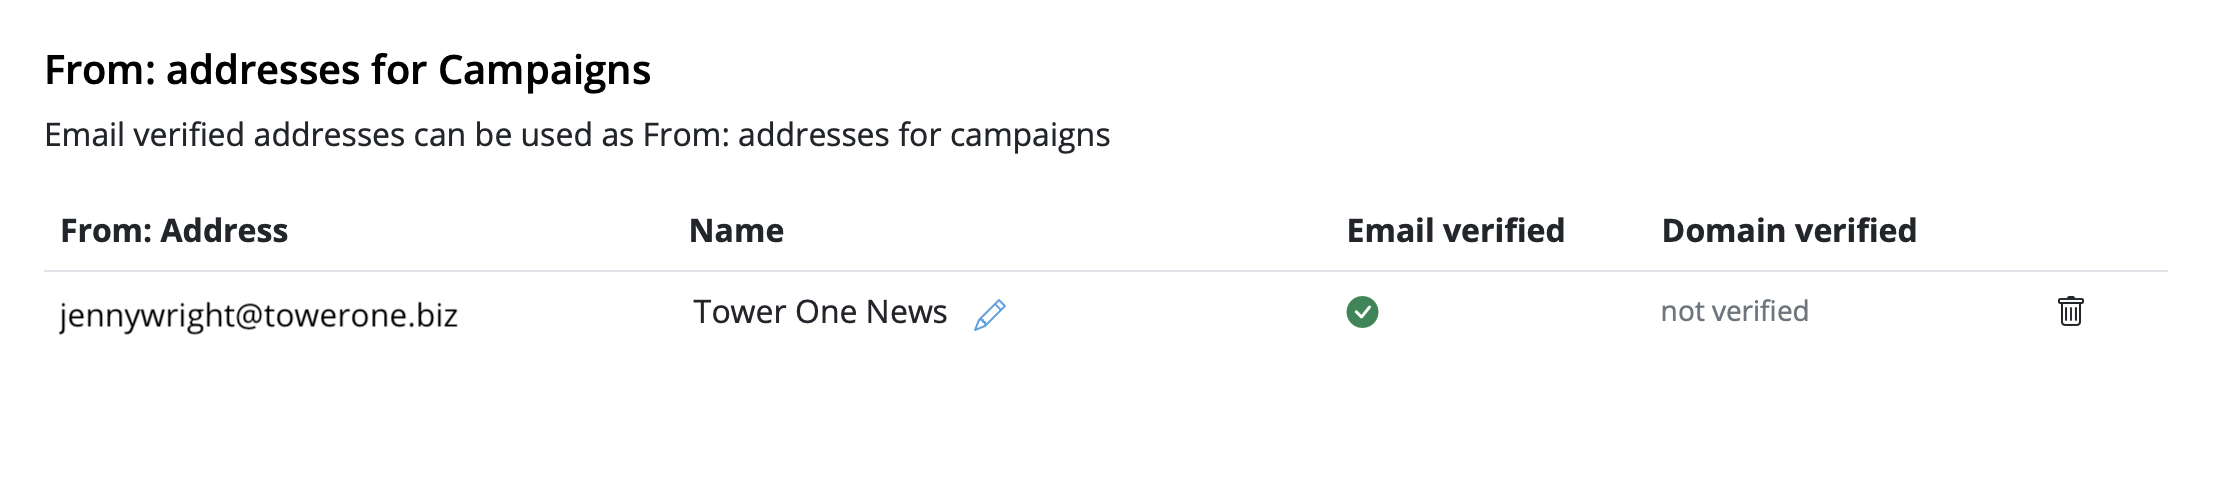
- Under "From: addresses for Campaigns", add a new sender by entering the "From Name" and email address your campaign will be sent from
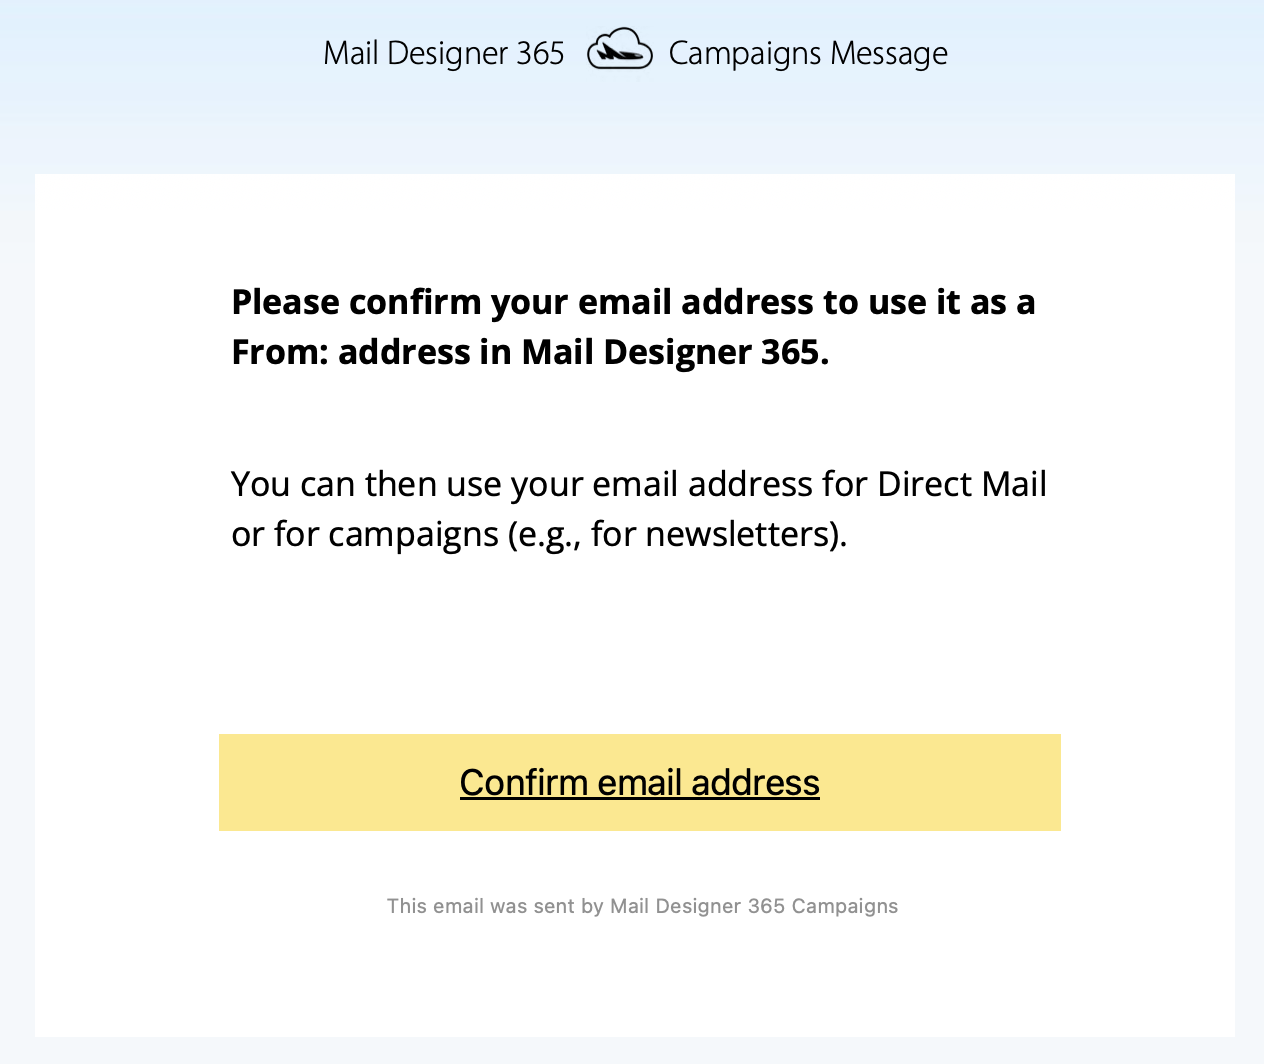
- You'll now receive a verification email. Click the link to confirm you own the email address:
Step 2: To avoid to get marked as spam: Set up DKIM
For this you'll need to create a DNS entry for DKIM (DomainKeys Identified Mail) (more details about DKIM and why it's essential. You should definitely set up DKIM if you want to avoid your mailings ending up in the spam folder.
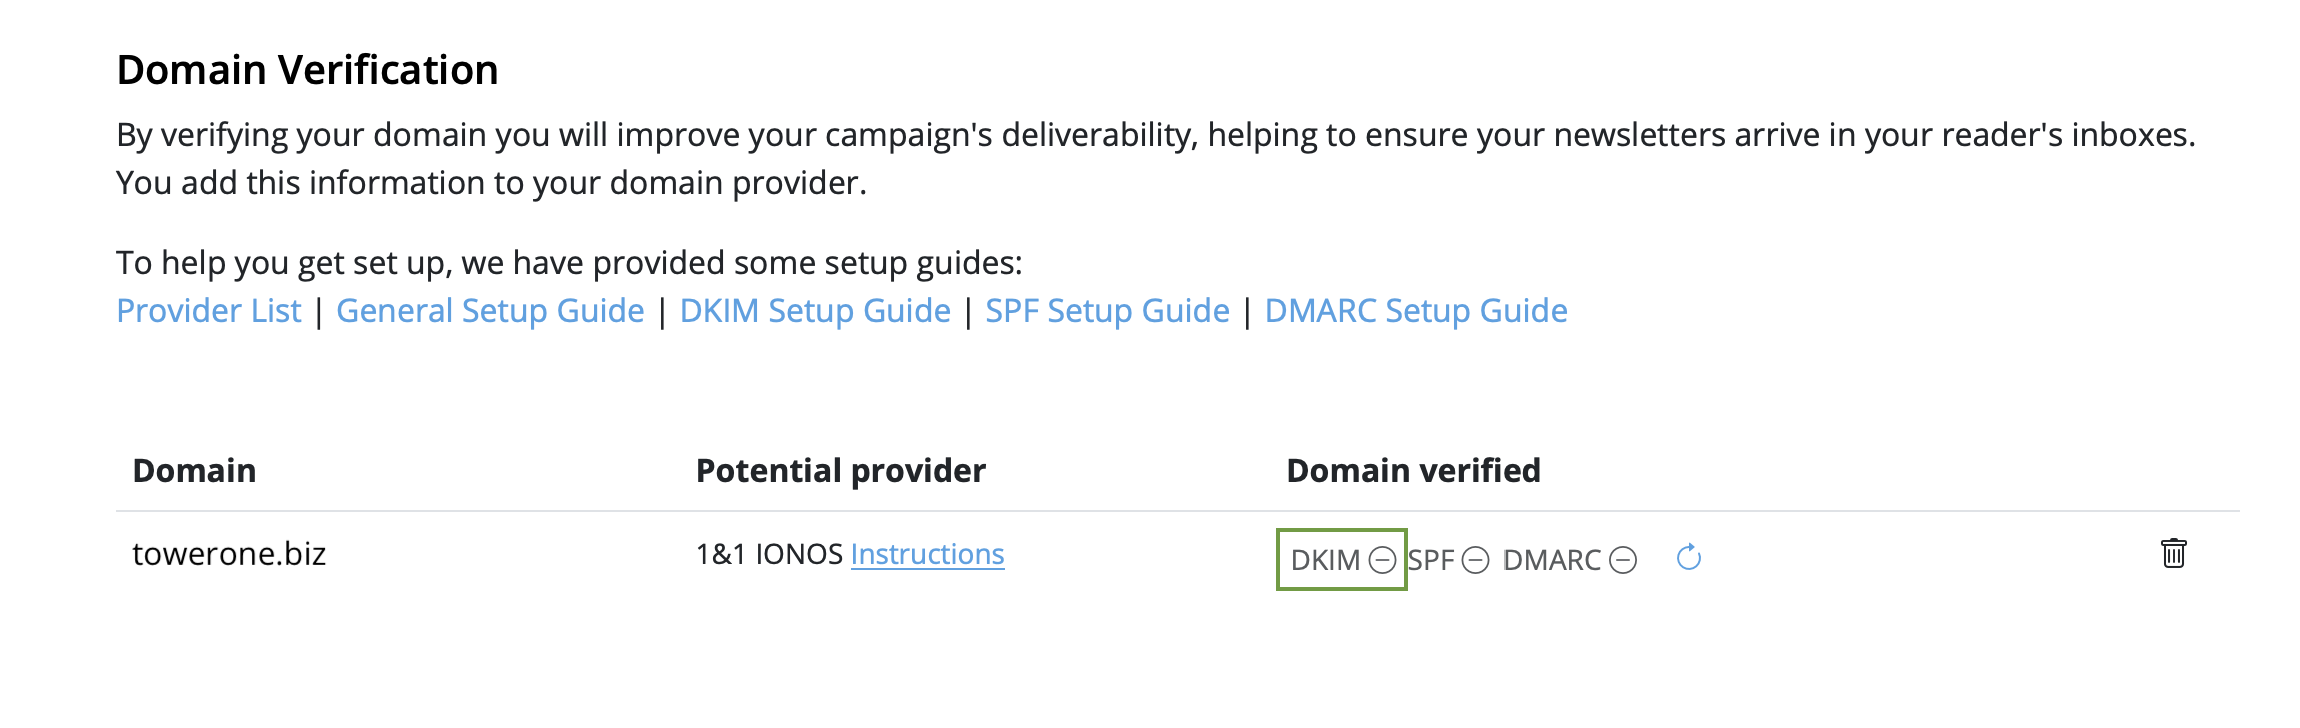
- Stay in "From: addresses" and scroll down to "Domain verification". You will now see the domain for the email address you just set up
- Now it's time to determine the DNS provider for your domain. Most likely, our system has already identified the provider and displayed it as a "Potential Provider," along with a link to the provider's guide. Tip: We've also compiled a list of links to setup guides for common providers in this article.
- Click on the "DKIM" icon in the "Domain verified" column:
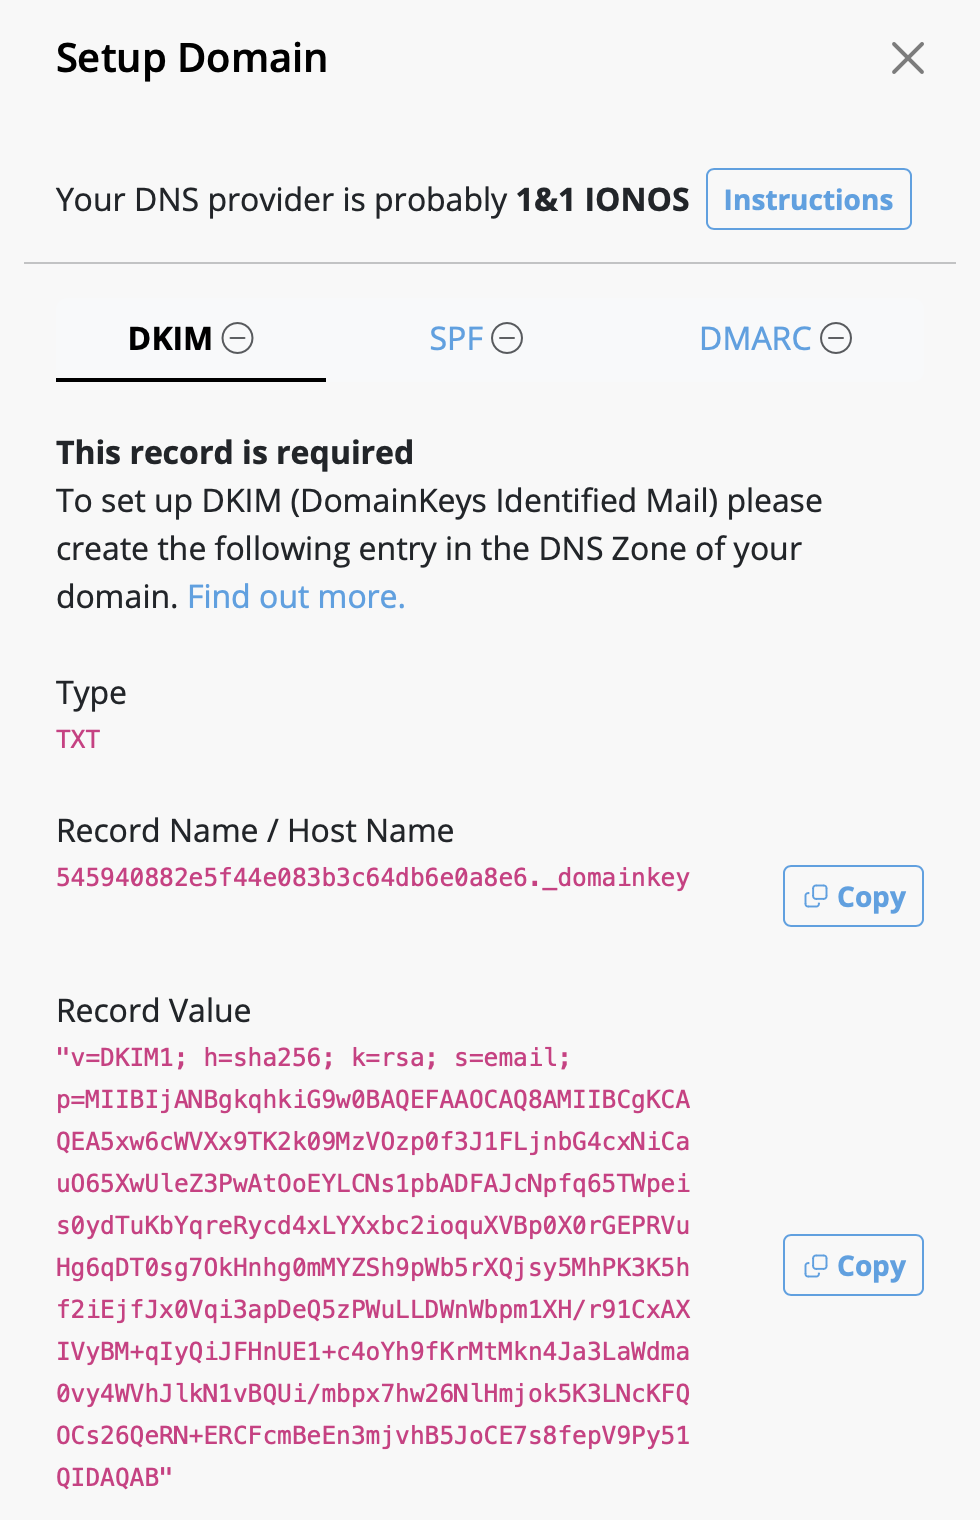
- A DKIM record will be generated for your domain, along with the necessary type, name, and value of the record. Please use the exact information shown to set up the DNS record (including any special characters such as " or . ).
- Depending on your DNS provider, it may take up to 48 hours for the changes to propagate. Delivery Hub will periodically perform automatic checks. Alternatively, click the refresh icon to update results in real time:
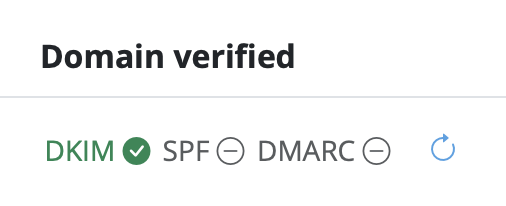
- Once you've completed the setup, and the verification is successful, you'll see a green checkmark next to the DKIM icon:

Step 3: To avoid to get marked as spam: Set up SPF
Now, let's ensure your emails are properly authenticated with SPF (Sender Policy Framework), which prevents email spoofing (more details on SPF).
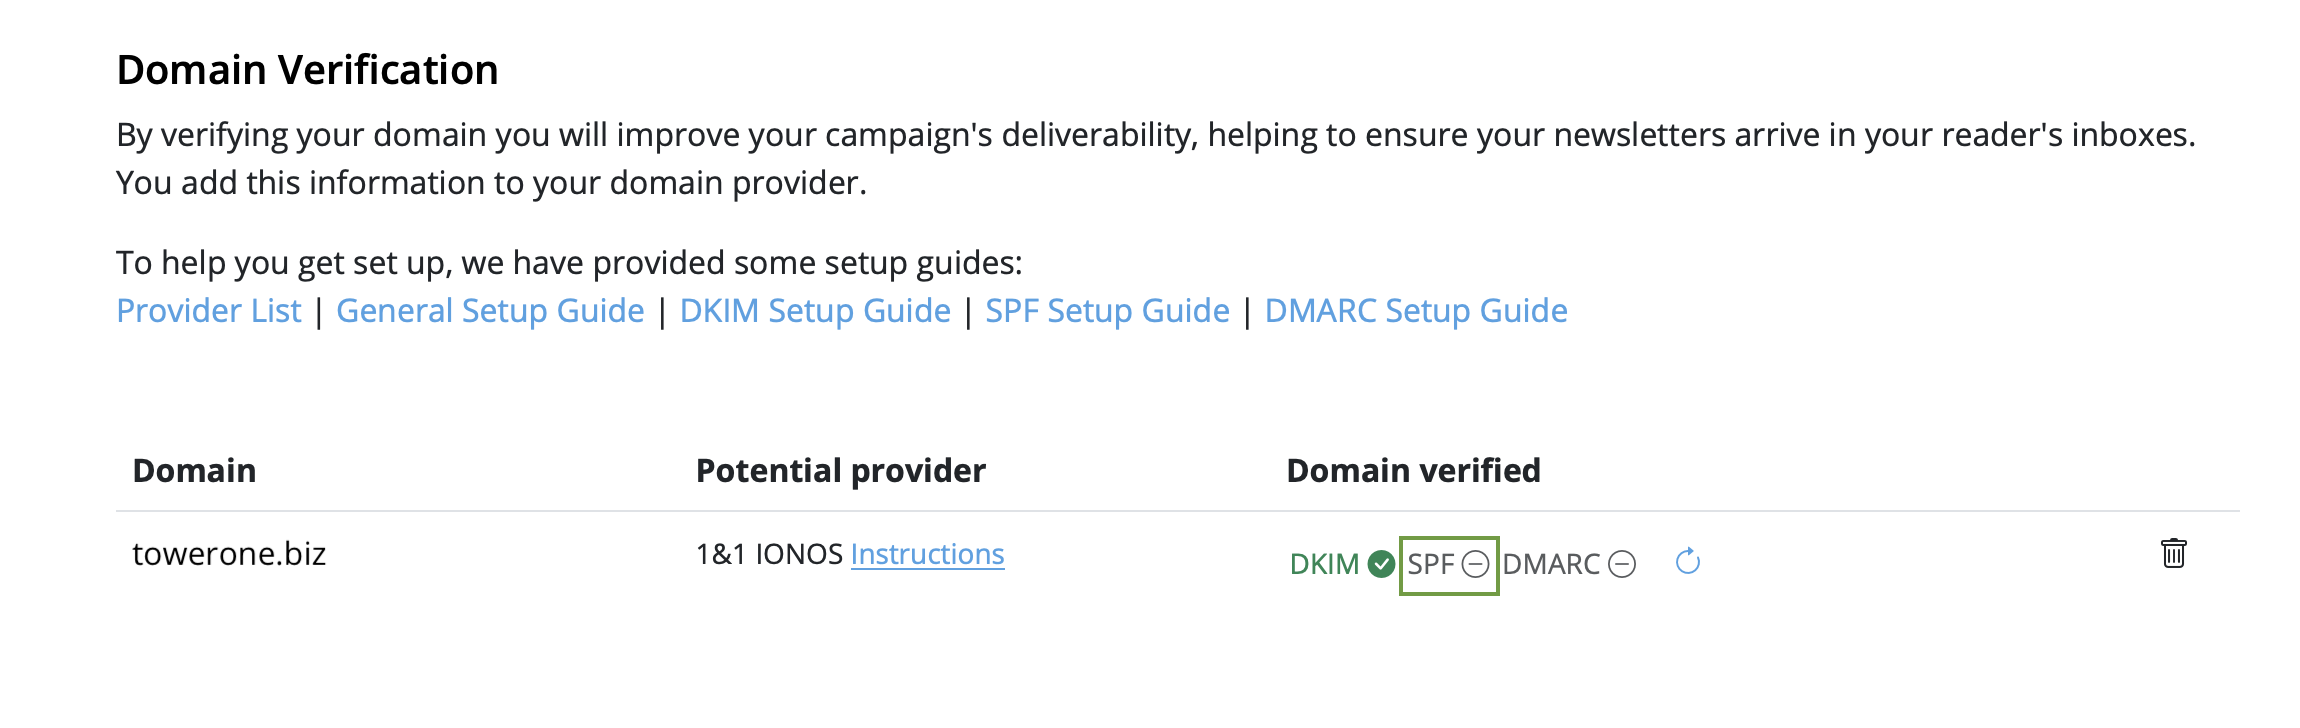
- Go back to your domain under "Domain Verification" and click "SPF":
- Next, go to your DNS provider and create an SPF record for your domain. The exact steps vary depending on your provider, so follow their guidelines.
-
Note: If you or your company have already created an SPF record, our
system will try to include the required part and display the full record
value respecting your previous content. If you feel confident and know what
you are doing, you can also manually edit your existing record and add the
following part:
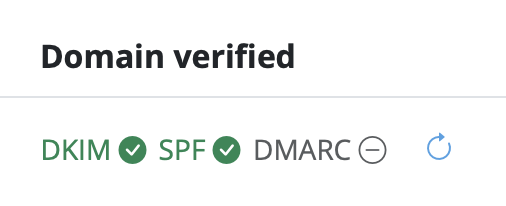
include: spf.welovemails.com. - Once the verification has successfully completed, you'll see a green checkmark next to the SPF icon:
Step 4: Set up DMARC
Although not mandatory, setting up DMARC (Domain-based Message Authentication, Reporting, and Conformance) is recommended to add an extra layer of security to your emails (more details on DMARC).
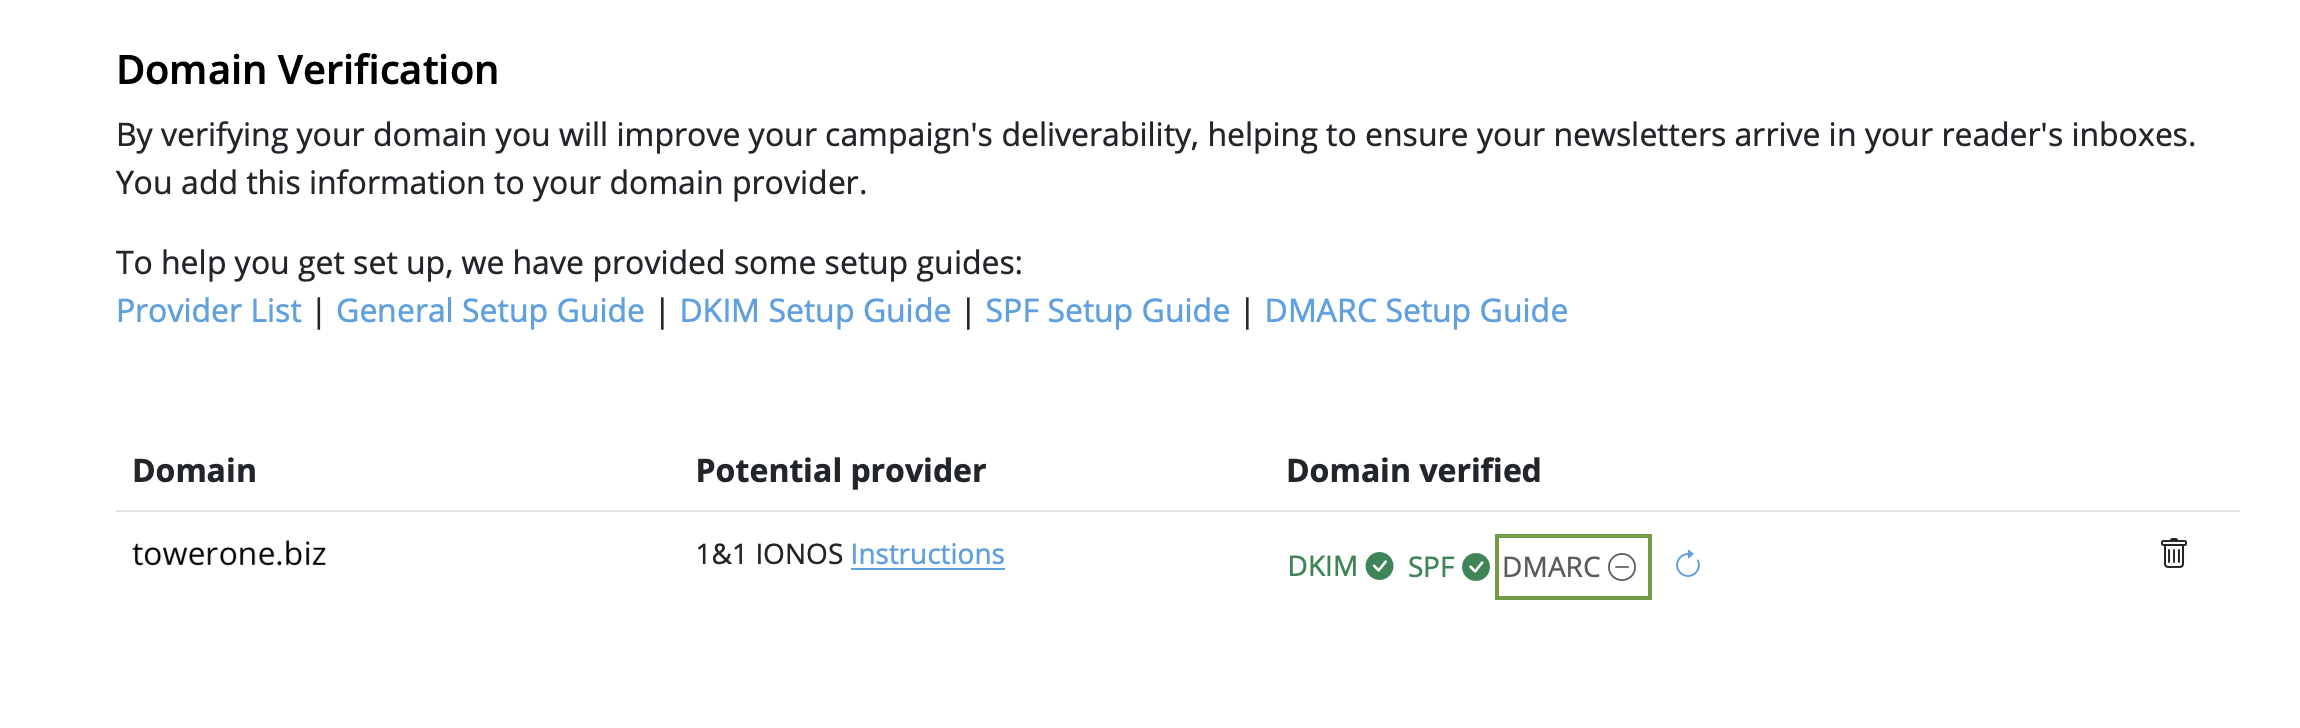
- Click on the "DMARC" icon under "Domain Verification":
- Then, create a DMARC DNS record for your domain
- Feel free to use the suggested record, or your own values. If you're unsure, check your organization's policies or ask your IT team
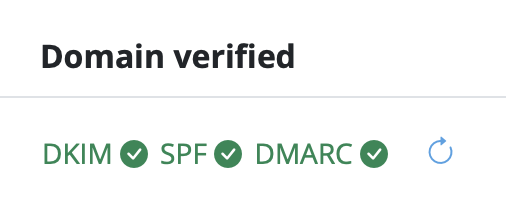
- Just like with SPF and DKIM, once the DMARC verification has successfully completed, you'll see a green checkmark next to the DMARC icon:
Congratulations! You've now set up and verified your from address and can start sending email campaigns to your audience.
As part of the free Campaigns plan included with your Mail Designer 365 design plan, a Mail Designer 365 banner is displayed in the footer of emails sent via Delivery Hub:
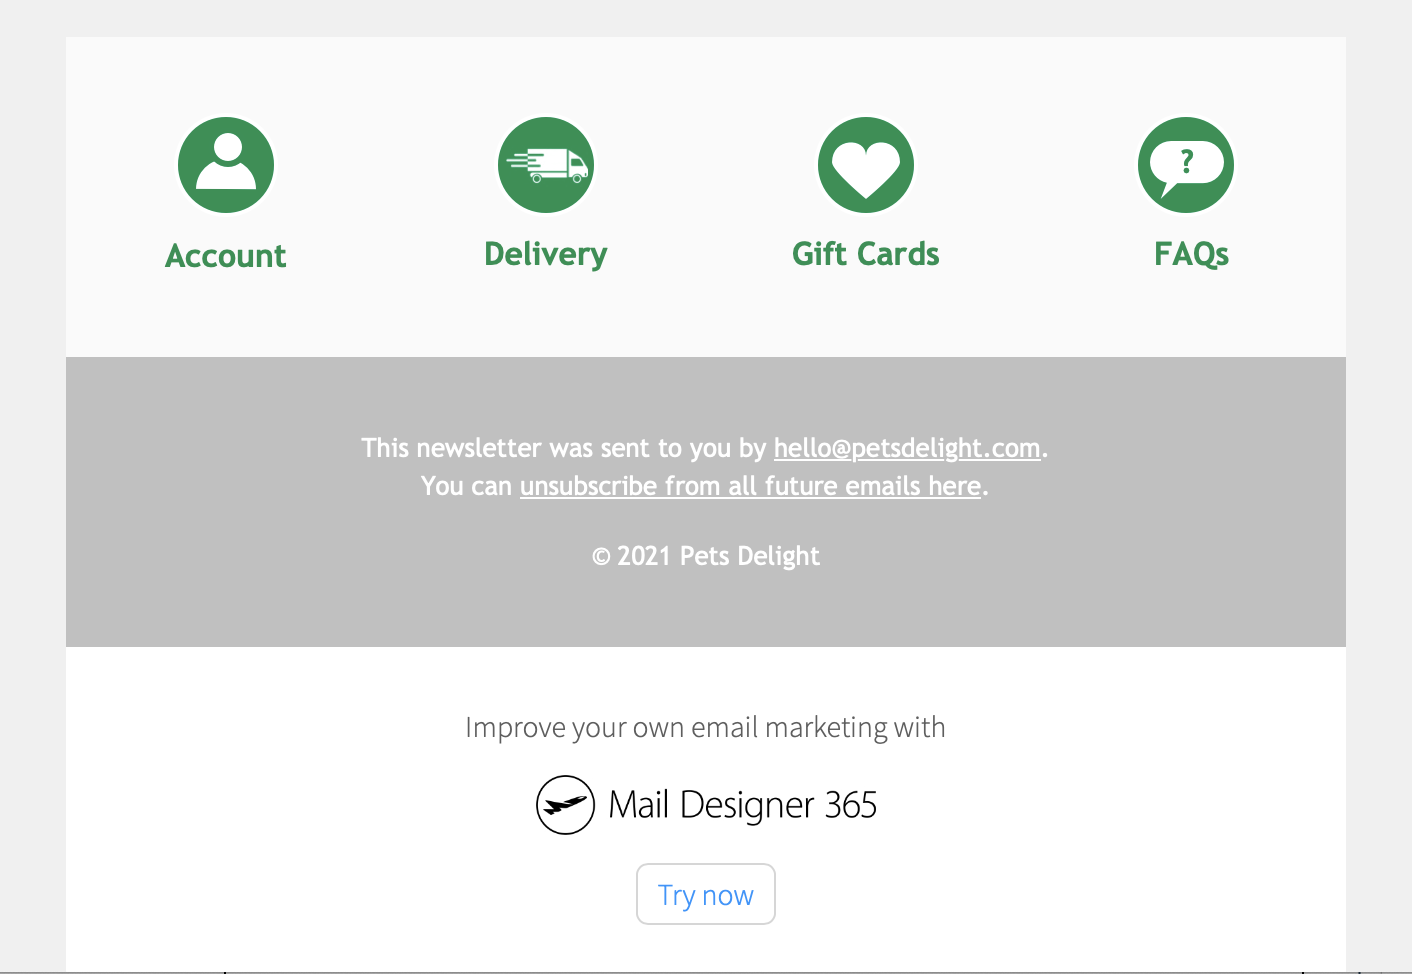
These banners can be removed after switching to any paid Campaigns plan. Log in to your my.maildesigner365 account to explore the Mail Designer Campaigns plan options.
- Automatic unsubscribe handling (Delivery Hub will remove unsubscribed contacts for you)
- Clean email list – your campaigns are only being sent to engaged subscribers
- Fewer spam complaints
- Campaign-based unsubscribe rate tracking
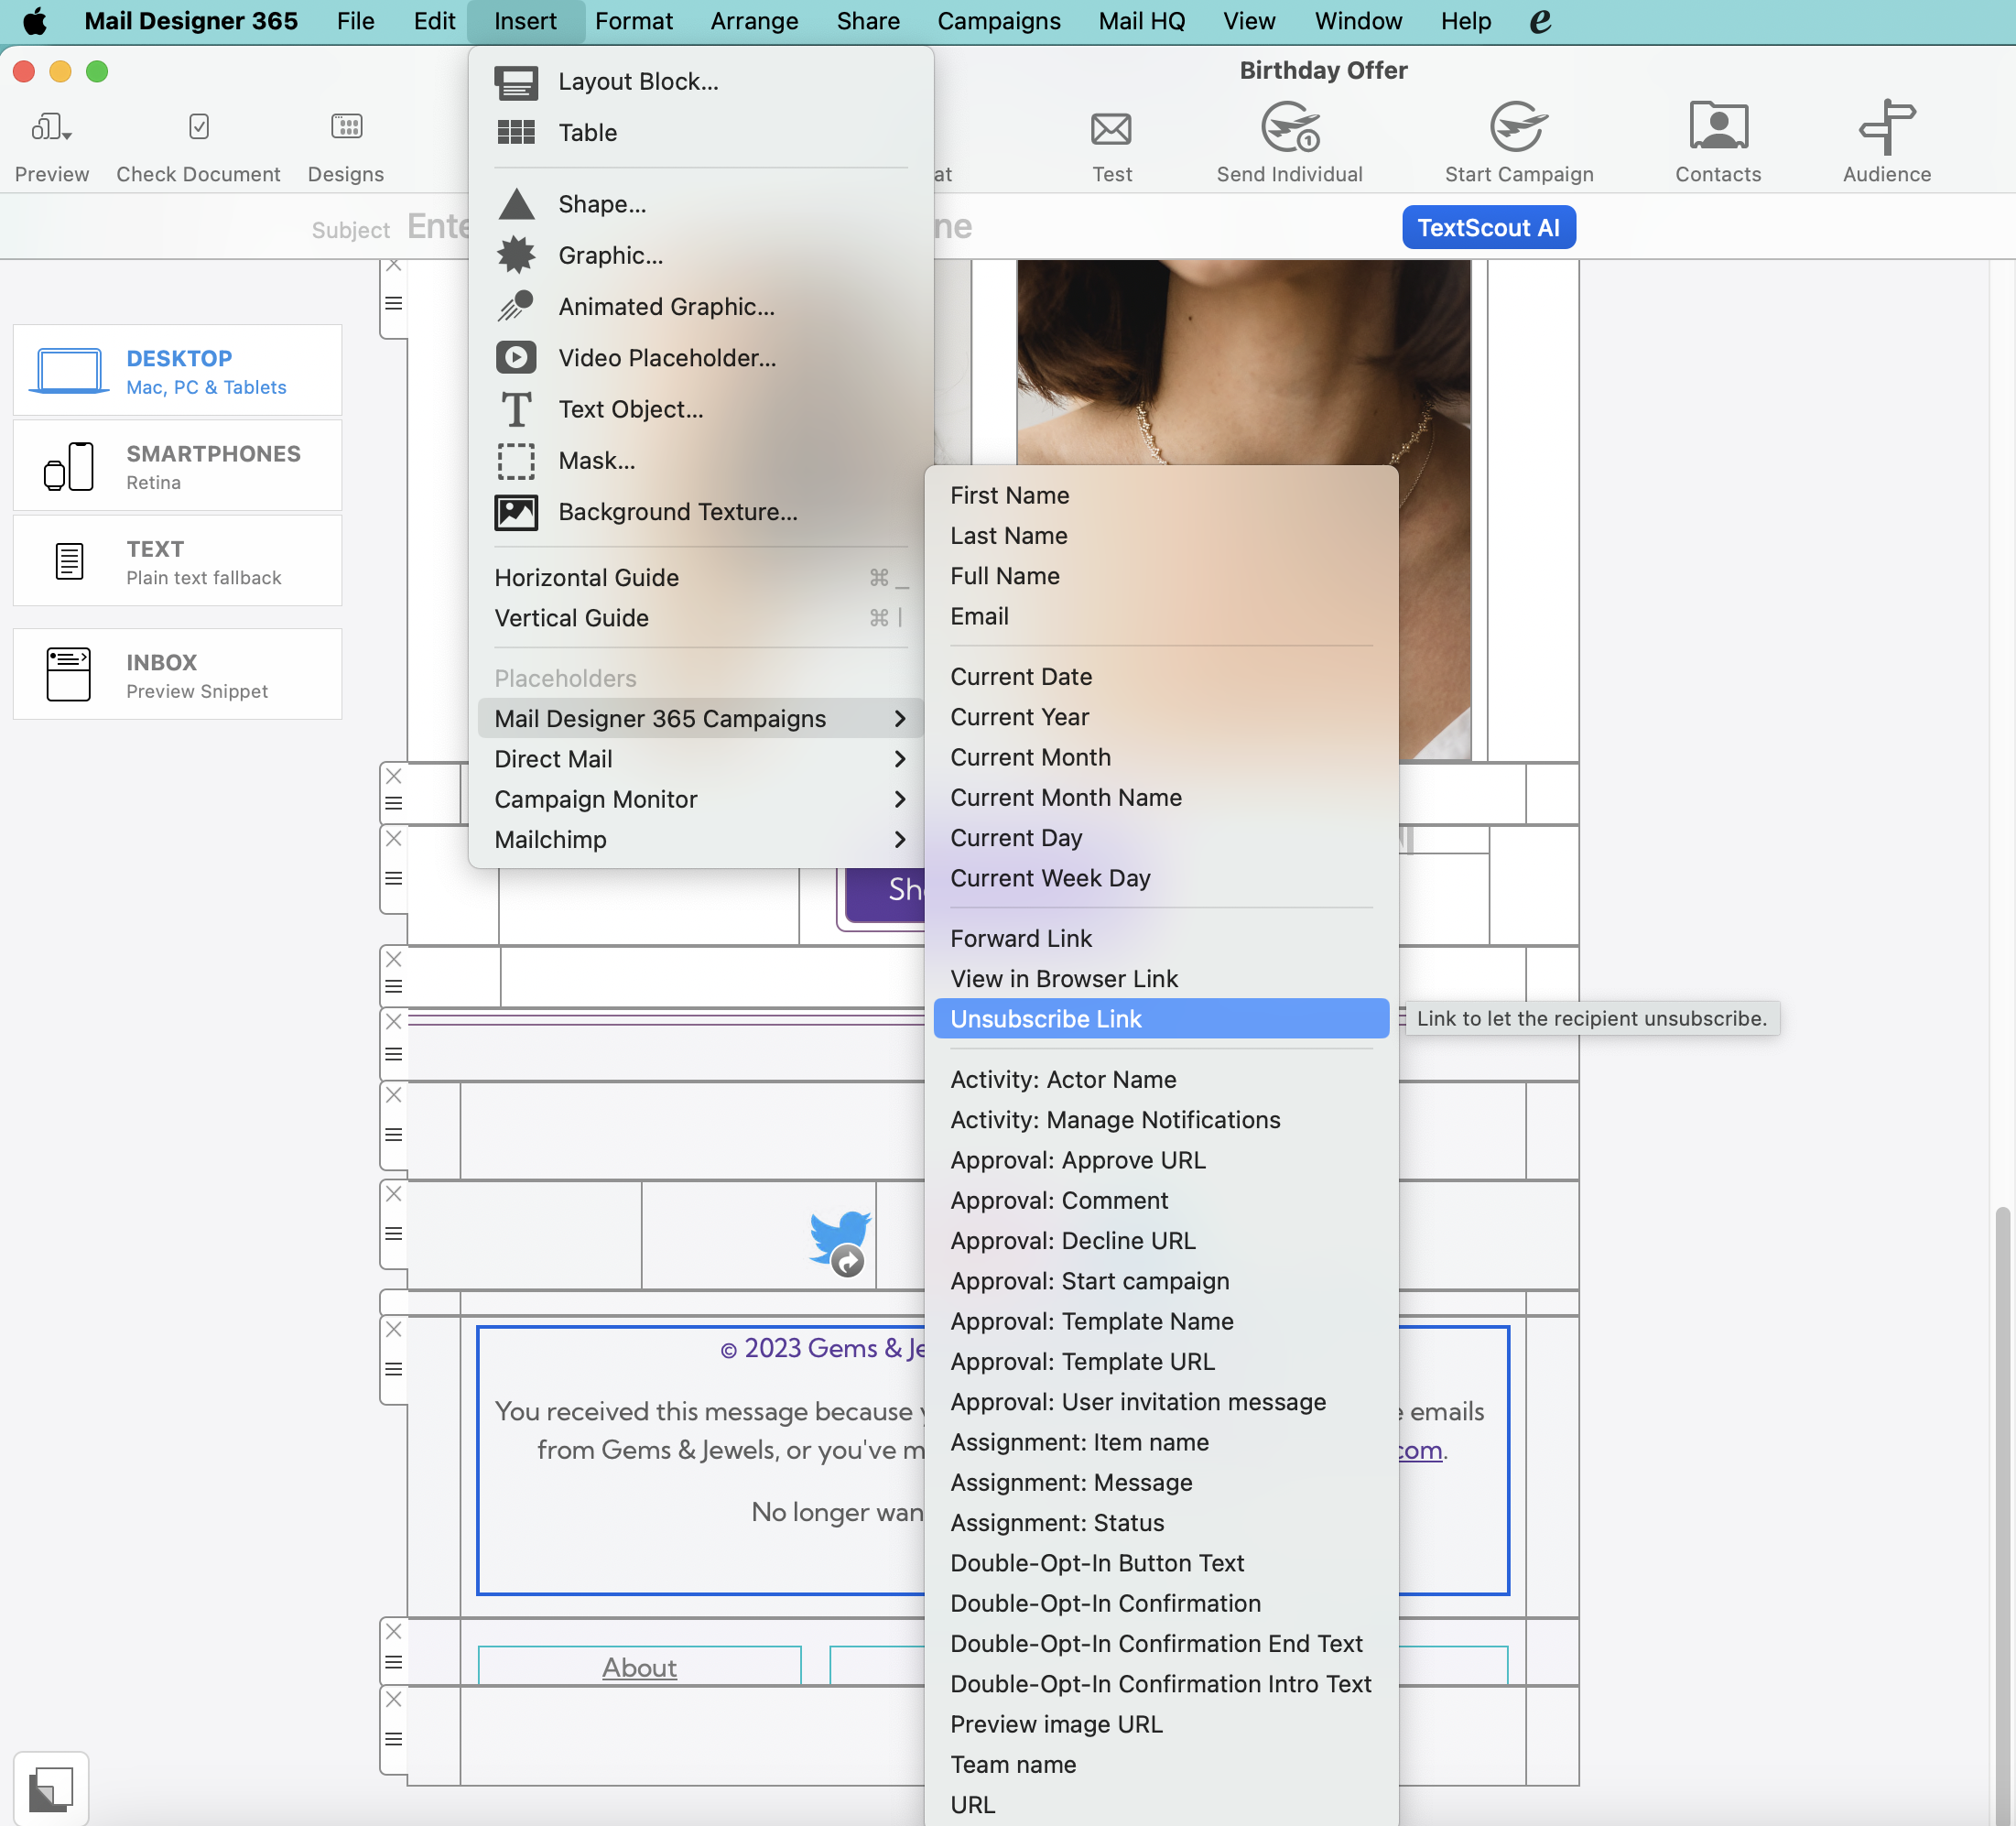
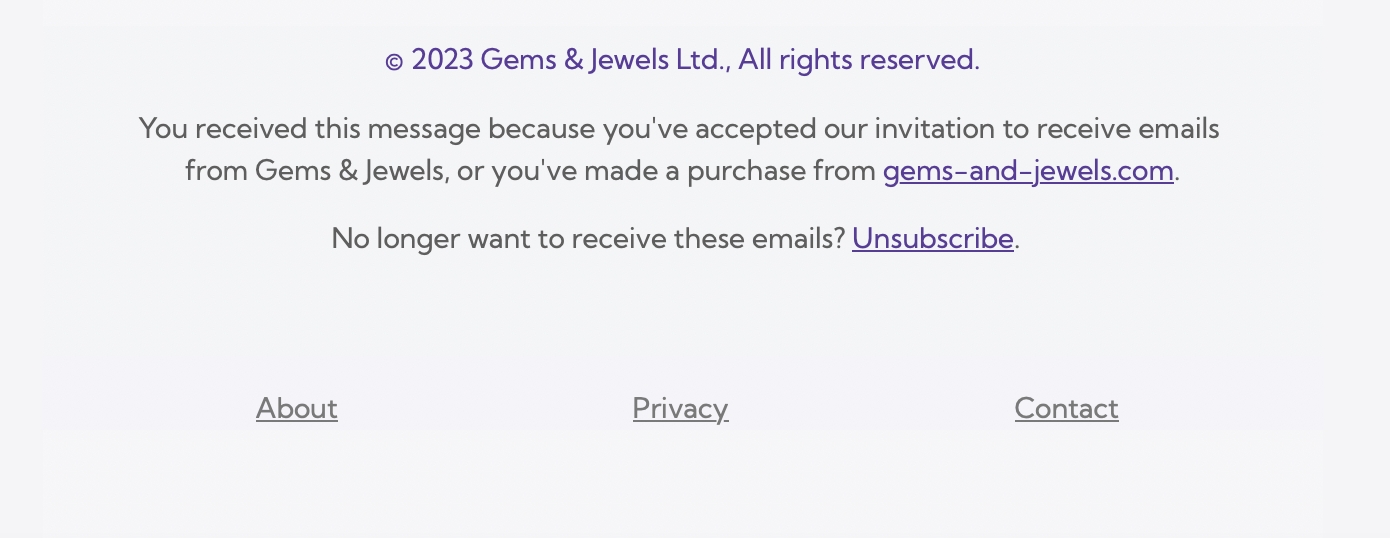
When you send your campaign via Delivery Hub, recipients will see the unsubscribe option in the footer of your email:
Learn more about Delivery Hub →
Email,First Name,Last Name,Favorite Color,Location
miller@example.com,Peter,Miller,blue,New York
smith@example.com,Jody,Smith,red,San Francisco
Good to know: You can re-import the CSV at any time with additional columns to enhance your contacts. All new placeholders will then be attached to your contacts. Need help? Download an example CSV file here for reference: Mail_Designer_365_Campaigns_Email_Import_Example.csv
Scenario: Suppose we run a jeans shop that offers three different fashion newsletters: one for women, one for men and one for children's fashion. The shop already has lists of email addresses for the respective groups.
What is the best way to import these email lists into Mail Designer Campaigns in order to send newsletters to them?
1. Add new email contacts
Add contacts in Mail Designer Campaigns: https://my.maildesigner365.com/team/deliveries/contacts/add
Email addresses can be added via copy and paste or via CSV file.
Add contacts via copy and paste
Insert your email addresses into the field separated by a comma or return. To start with, we are only using the newsletter addresses for the “Women” newsletter.
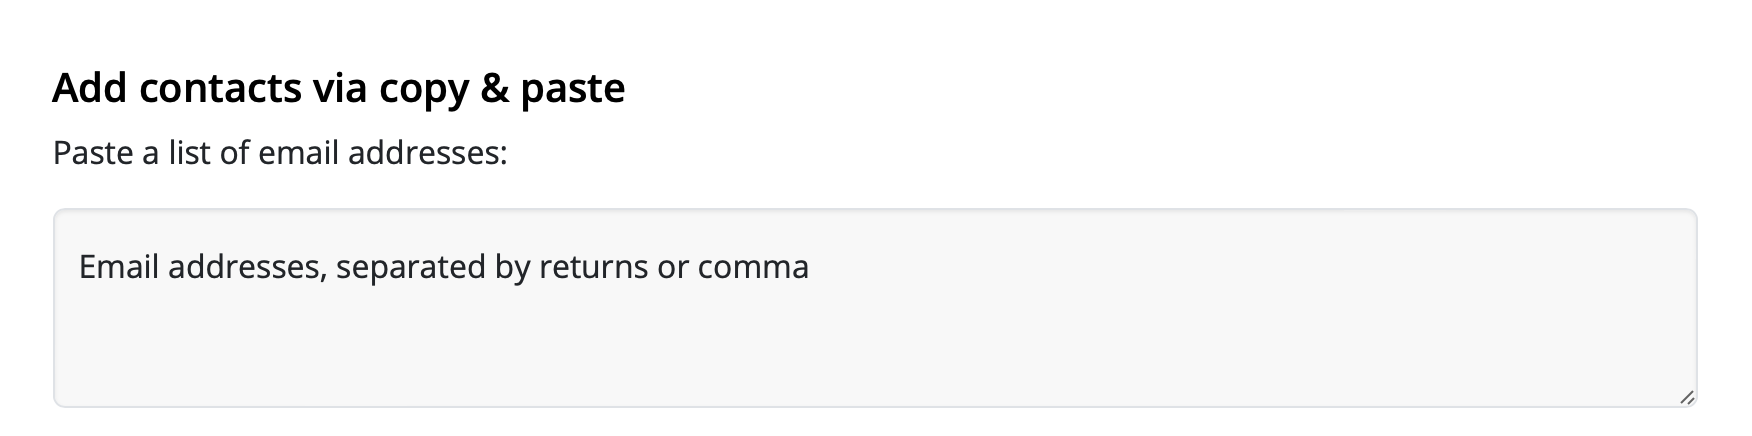
Then select below: "Add placeholder"

Now you can assign a placeholder name.
What are placeholders? Placeholders are used so that we can later filter contacts according to their characteristics – for example, if we want to identify all contacts who are interested in women's fashion. Placeholders can be understood like columns in an Excel table.
In this example, we will call the placeholder “Newsletter Type”. The new placeholder is then created by clicking on “New placeholder: + Newsletter Type”.
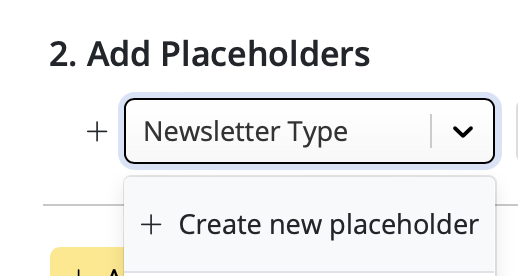
We can now assign a placeholder value: “Women”:
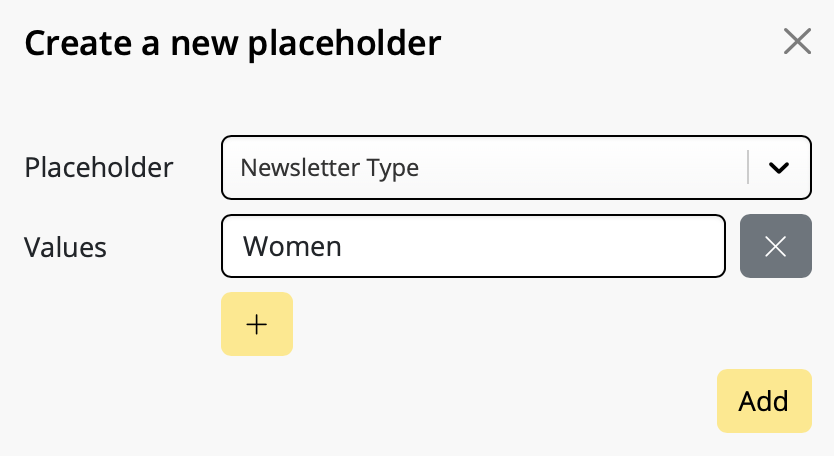
Finally, click on “+ Add Contacts” to import all contacts and assign them the placeholder value “Women”. This way, we can later see that these contacts are interested in women's fashion.
Add more contacts
We can now repeat the entire process for the “Men” and “Children” newsletters. Use the “Newsletter Type” placeholder we created in the previous step, but this time use the placeholder values “Men” and “Children”.
Important information:
- If an email address already exists in your saved contacts, it will not be re-imported, but the placeholder and its value will still be added. This means you can safely add email addresses again and again without ending up with duplicates in your list.
- A placeholder can have multiple placeholder values.
Example: Grace Müller with the email address mueller@example.com is interested in both women's and children's fashion and therefore appears on both lists. If you import the contact once with the placeholder "Newsletter Type" and the value "Women" and then again with the placeholder "Newsletter Type" and the value "Children", both placeholder values will appear in your search results:
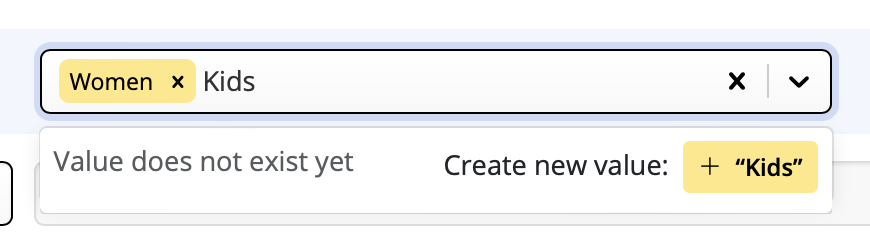
We have now finished importing our contacts and can proceed to create target groups in the next step.
2. Create target groups
Once you've added contacts and assigned placeholders to them, you can create your first audiences. These are the email lists (or target groups) your newsletters will later be sent to.
Audiences can be created at: https://my.maildesigner365.com/team/deliveries/contacts/targetgroups
Creating a new audience
We will start off with the newsletter for women's fashion. Create a new audience and give it a name (i.e. "Women".)
Now, select the placeholder (i.e. “Newsletter Type”) that you created during the contact import from the menu.
Next, select the corresponding value (e.g. "Women"):
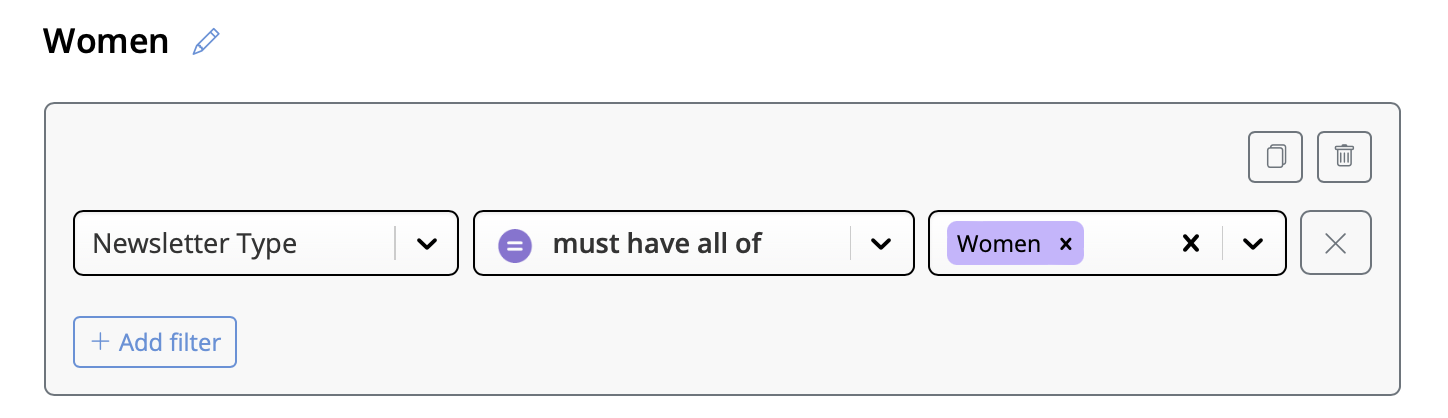
Now all contacts with the placeholder value "Newsletter Type = Women" will be displayed below. Click to save your new audience.
Create additional audiences
These steps can also be carried out for the “Men” and “Children” lists by selecting the appropriate placeholder values.
Good to know:
- Mail Designer audiences are dynamic. This means that if you add new contacts later on, they will automatically be added to the appropriate audience, provided the same placeholder value was assigned during import.
3. Sending newsletters
We refer to each sent newsletter as an individual campaign. This means that there is one campaign per target group.
Have you created your email template for the women's fashion campaign on your Mac in Mail Designer 365? Excellent! Click Start Campaign to get started.
Plan a campaign
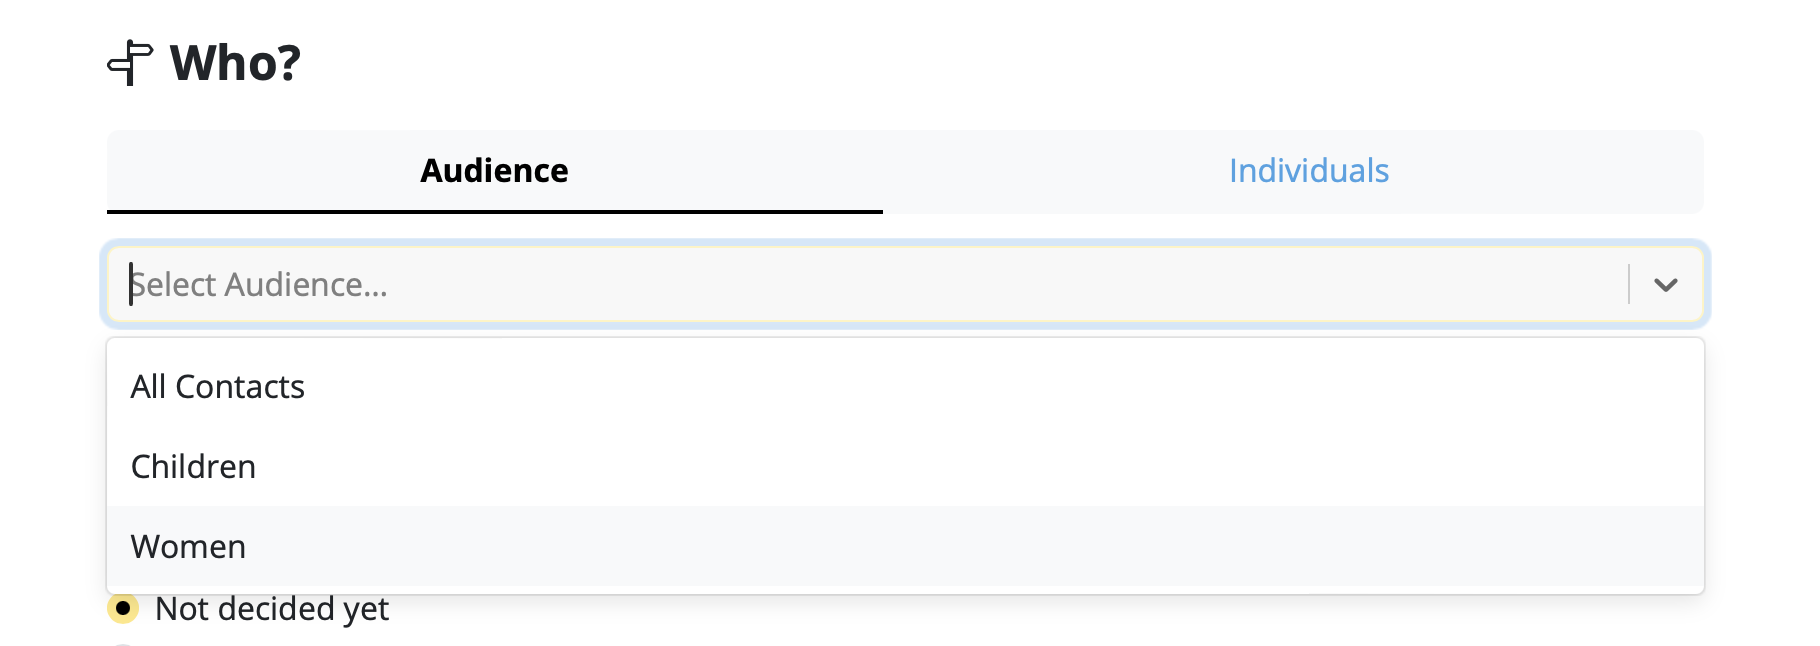
When you prepare a new campaign, the subject line and sender address fields are automatically filled out for you. Assuming you don't want to change anything here, you can immediately go to "Who?" and select your audience.
Here you can choose the audience (i.e. “women”) that we created in the last step:
Choose a time for delivery or click on "Now" to send the email right away. Afterwards, you can check over your email one last time by selecting "Queue this email for delivery".
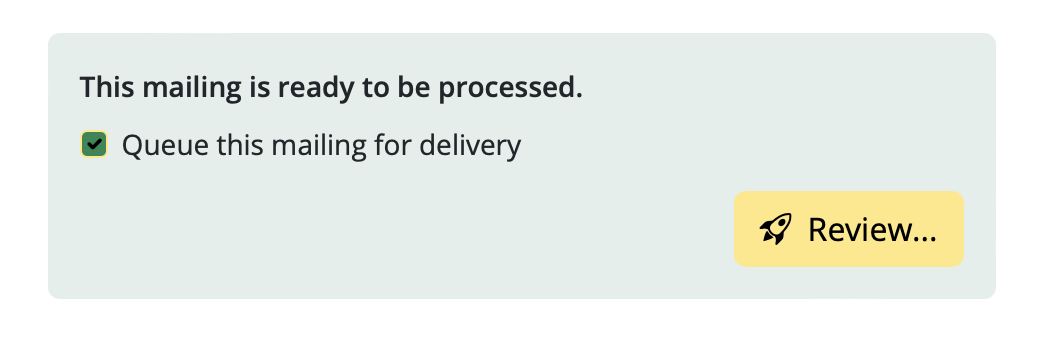
You are now ready to send!
Ready for the next one? Repeat these steps for any additional newsletters and their respective email lists.
When would I need to edit links post sending?
- You accidentally entered the wrong link
- You forgot to change a link because you duplicated a design
- You want to change a link because the old URL no longer exists (e.g. a limited time offer or live stream)
How to change a link in an email after sending
Mail Designer 365 Delivery Hub users can use Link Rescue to easily change email newsletter links after a campaign has been delivered. To get started, open the Analytics view for your chosen campaign and switch to the Link Overview tab: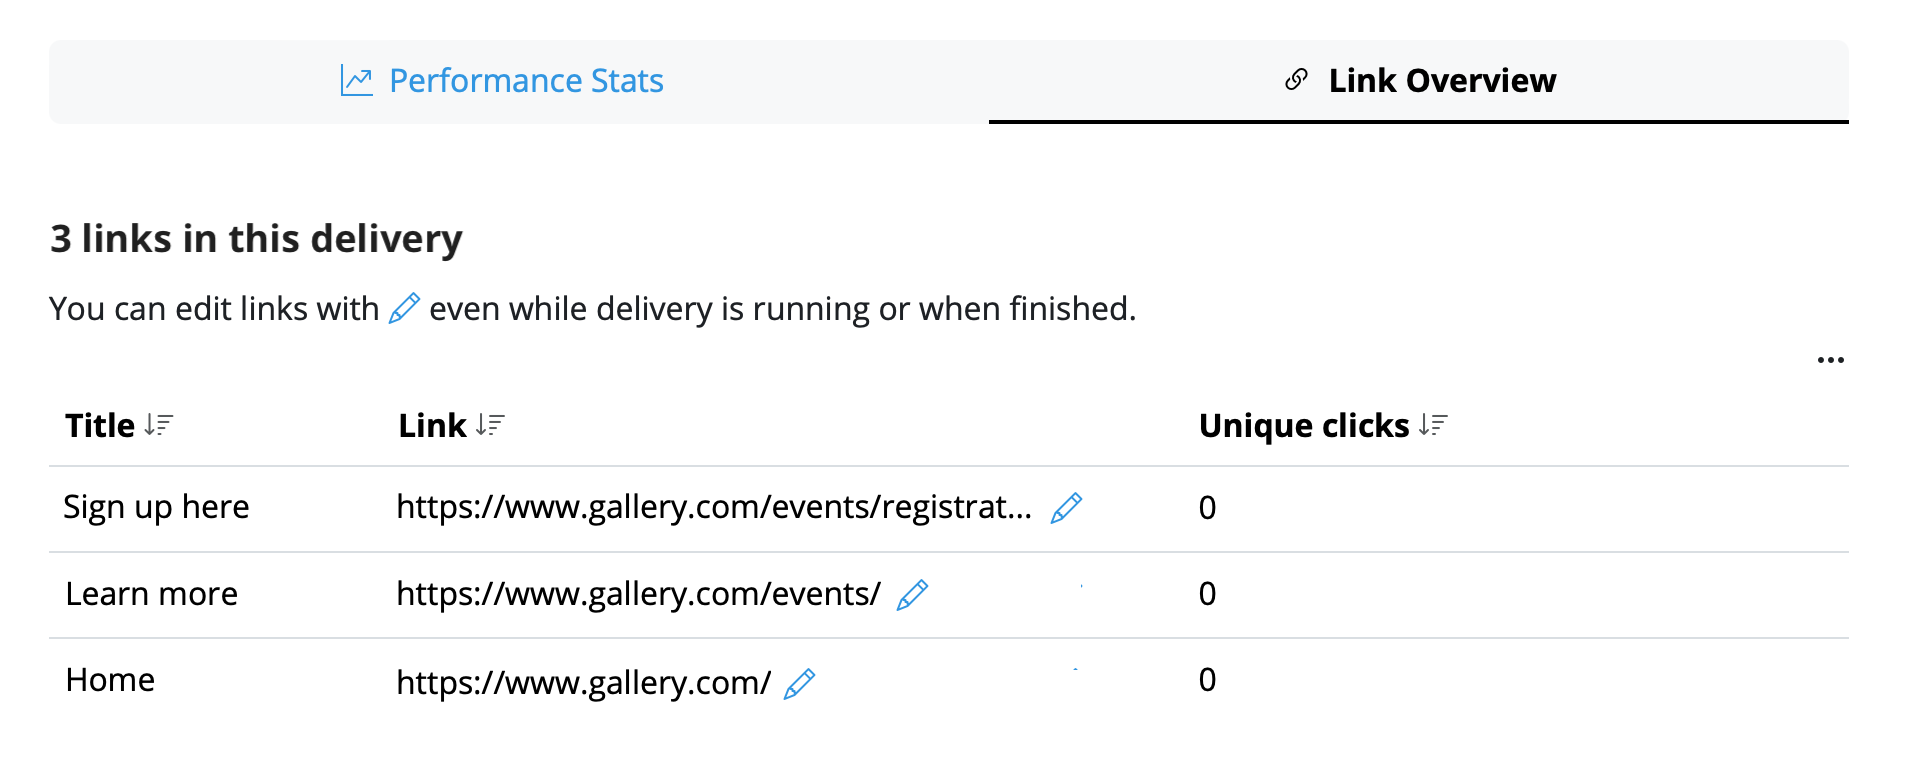 Here you can select any link and edit it at any time. Once you have replaced any given link, click Save to update the change for all recipients – including those who have already opened the email!
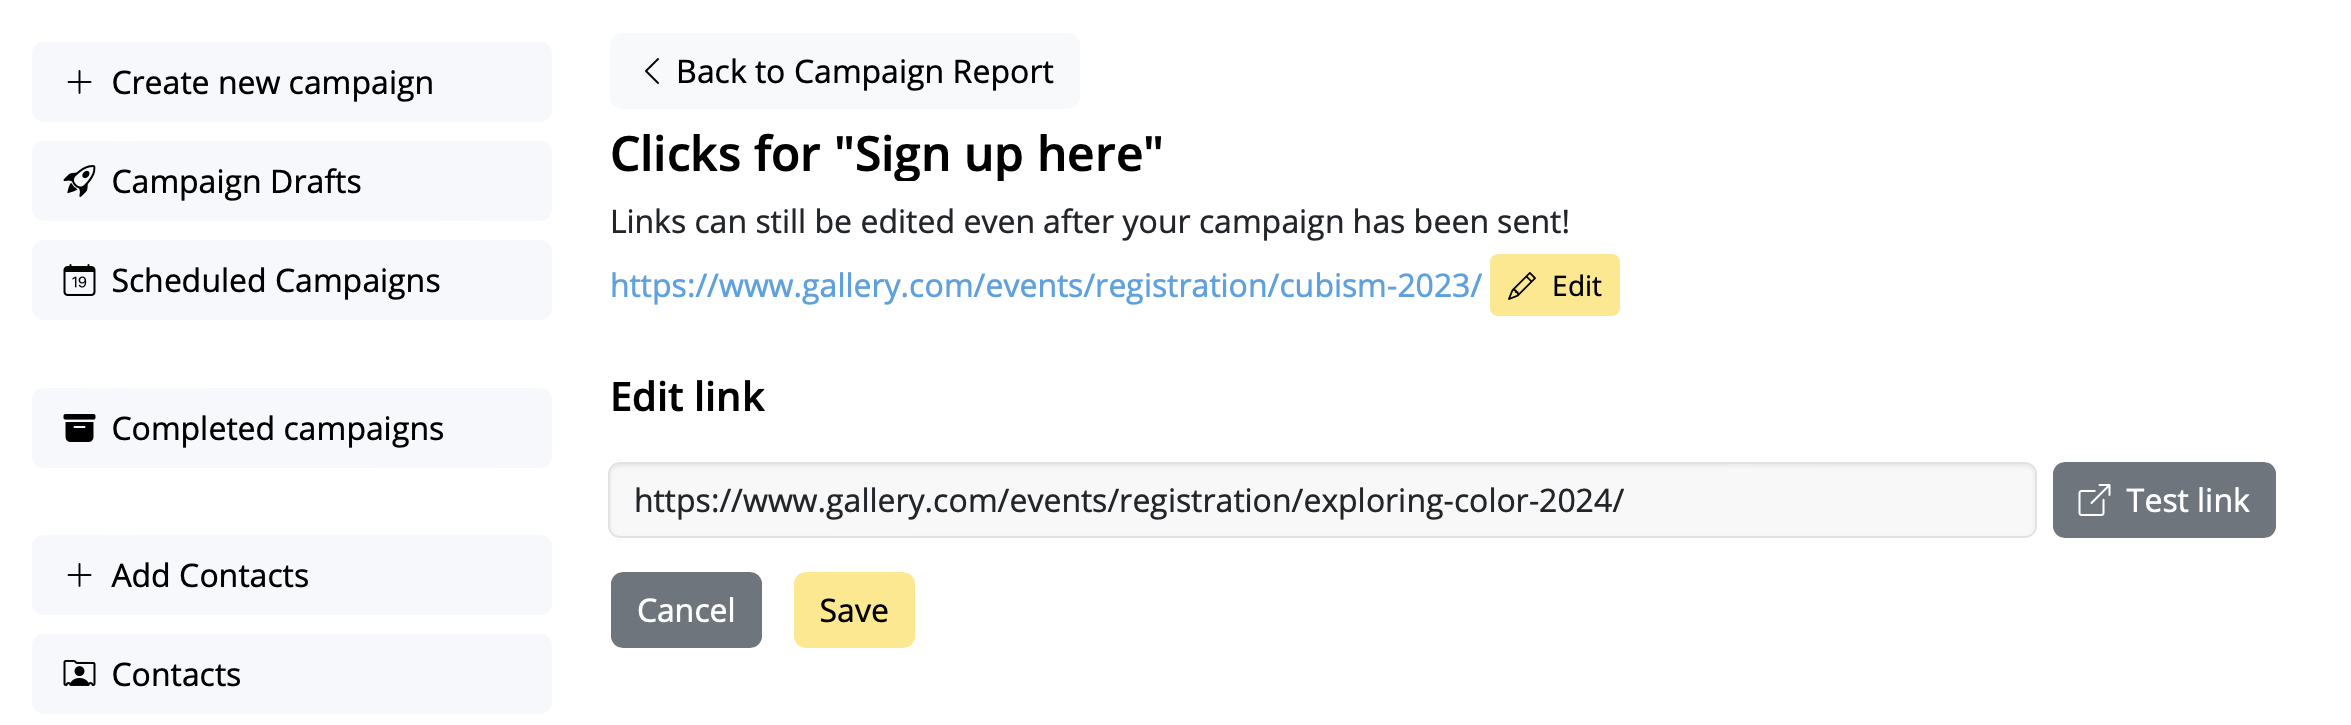 Your changes will be synced immediately, giving you ultimate peace of mind.
Important:
Mail Designer 365 Link Rescue is available to Mail Designer Campaigns users with a Seoul plan or higher. View all plan tiers here →
Your changes will be synced immediately, giving you ultimate peace of mind.
Important:
Mail Designer 365 Link Rescue is available to Mail Designer Campaigns users with a Seoul plan or higher. View all plan tiers here →
How to View Your Email Campaign Performance Report
So you've sent out your email campaign and now want to see how well it has performed – no problem! Mail Designer Delivery Hub offers you a detailed performance report for all your sent campaigns.
How it works
You can access performance reports for any given campaign under https://my.maildesigner365.com/team/deliveries/campaigns/finished.
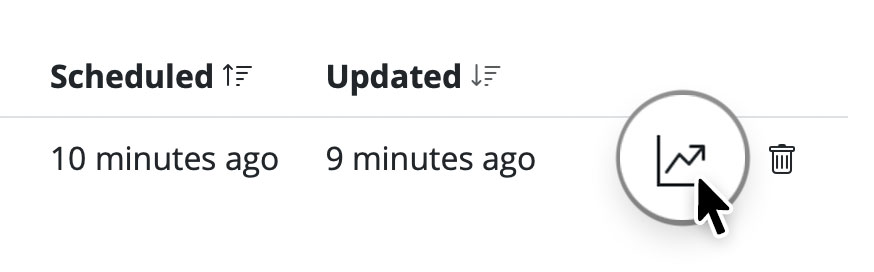
Find your chosen campaign and click the statistic icon to open its performance report:
During the delivery
As soon as an email campaign is sent, you can use Delivery Hub's live reporting tools to track the progress of your newsletter in real time. This includes email deliveries, bounces, and opens.
The numbers in the overview will be updated live as your email is delivered to your target group.
After the delivery
Once delivery has completed, you can view an overview of all campaign statistics.
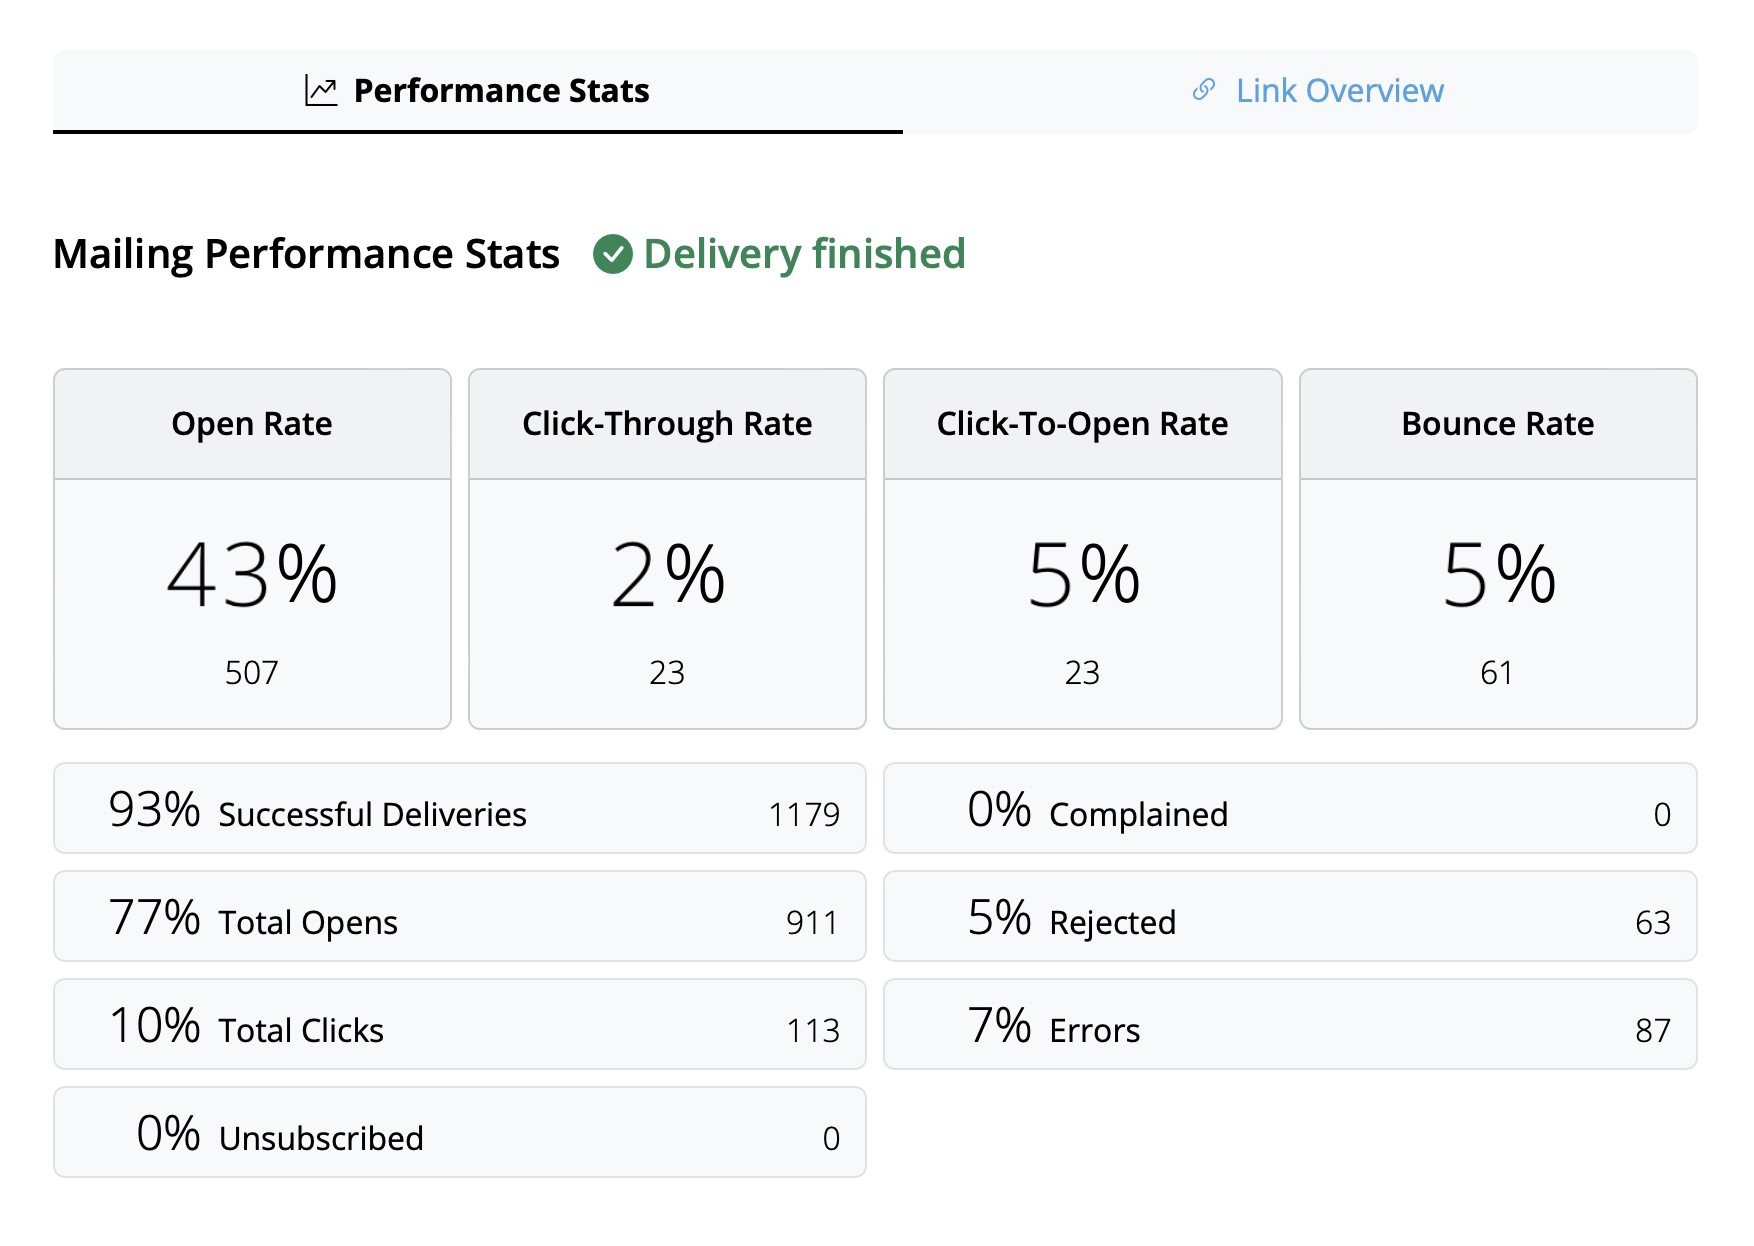
Tip: For best results, we recommend carrying out your final analysis from 24 hours after delivery. This helps ensure all recipients have had time to read and interact with your campaign.
Interpreting email metrics
The performance report covers a wide range of analytics data which aim to help you better understand how your campaign did and what you can improve on next time.
Here is a breakdown of the most important email metrics, what they represent and some current industry benchmarks:
- Open Rate: The number of times your email was opened compared to the amount of successful deliveries. The benchmark for this can vary depending on industry but anything above 25% can be considered a good result.
- Click-Through Rate: The number of email link clicks compared to the number of successful deliveries. This value is often quite low, with an average of around 2–3% across all industries.
- Click-To-Open Rate: The number of email link clicks compared to the number of email opens. This helps you understand how your email content resonated with readers. A good benchmark to aim for here is 10%.
- Bounce Rate: The percentage of emails which were not successfully delivered to the recipient – e.g. because the email address is incorrect or inactive. Here, the lower the number, the better. Anything above 3–5% should be cause for concern.
- Unsubscribe Rate: The percentage of recipients who unsubscribed from your email list after receiving this email. Again, you want this number to be as low as possible – ideally 0! However, anything under 0.5% can be considered a good result.
Tip: If you are noticing higher unsubscribe rates, you should take a look at the type of content you are sending, the frequency of your emails, and also consider segmenting your audience appropriately.
Other useful statistics
These metrics are also worth a mention and shouldn't be overlooked in your email analysis:
- Complained Rate: This calculates the number of recipients who marked your email as spam. This is never a good sign and if you notice your emails being marked as spam, check out this post for our tips →
- Rejected Rate: This calculates the number of times your email was rejected by an email provider (e.g. Gmail, Outlook, Yahoo, etc.) and can be an indicator for a more serious issue. If your emails are being rejected, please ensure you are sending from a verified email domain. More information →
How to Create a Signup Form for Your Website
Want to offer your customers an easy way to subscribe to your email newsletters?
Mail Designer Delivery Hub can be conveniently connected to your website, offering your website visitors a direct way to sign up to your email list. Here's how it works!
Create a signup form
The signup form builder in Delivery Hub is easy to use and a great way to grow your email list.
Good to know: Signup forms are available in all Mail Designer 365 Campaigns plans. The number of forms you can create depends on your plan tier.
Setting up your form
To get started, go to https://my.maildesigner365.com/team/deliveries/contacts/signupForms to set up your new signup form.
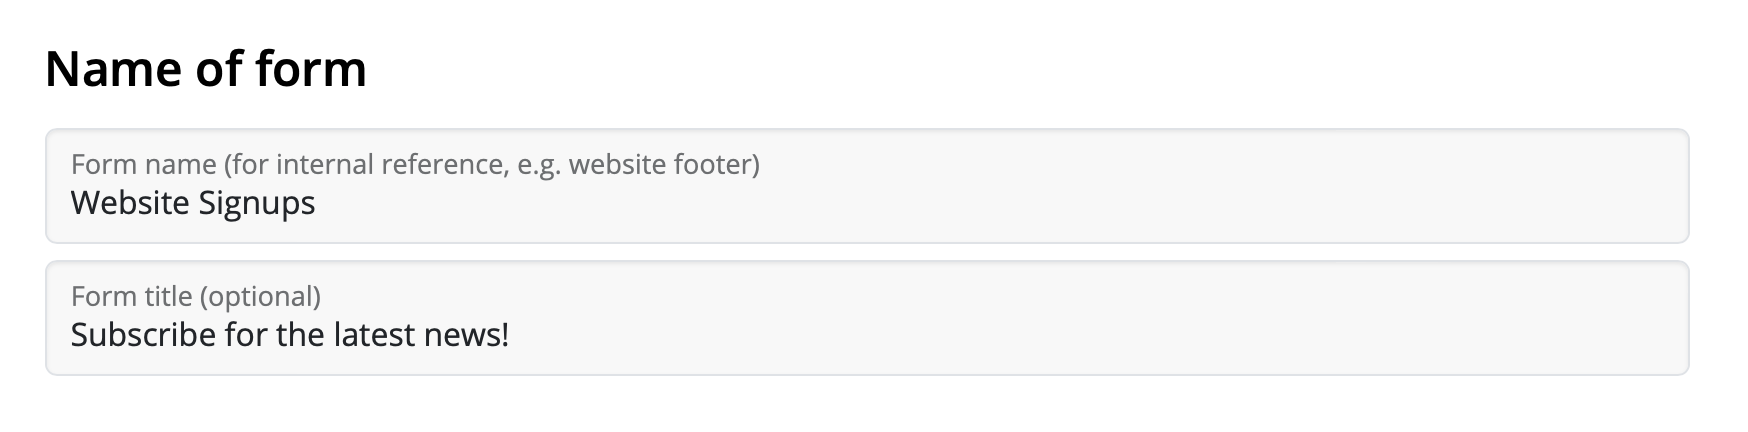
You can begin by giving your form a name, e.g. Website Signups. This helps you identify where the contacts came from and is not visible to customers.
Additionally, you can add a catchy title which will be visible on your site.
Form fields
The next step is setting up the fields of your form. This is an important step, as it determines how contacts will be categorized later in Delivery Hub.
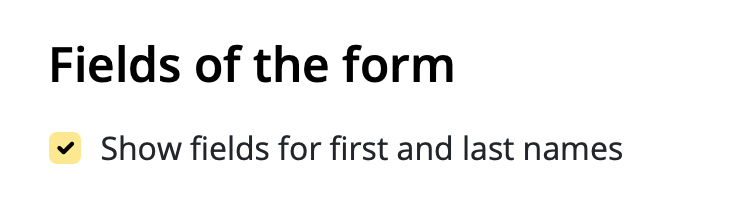
First and last name
You have the option to allow subscribers to enter a first and last name into your form. This can be helpful if you wish to send personalized emails, but also adds an extra step to the signup process.
Automatic placeholders
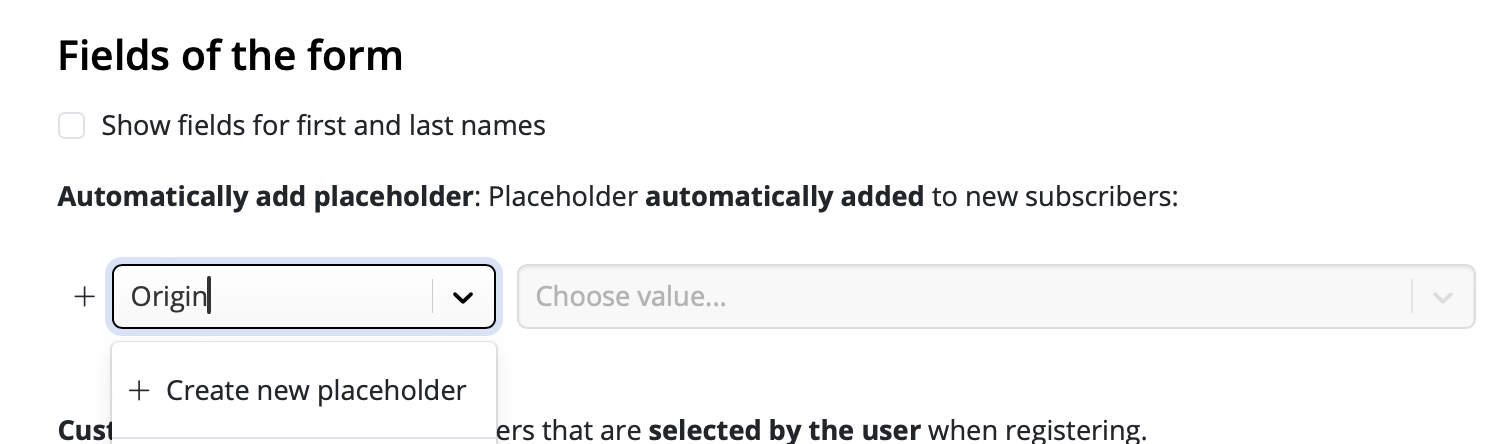
These placeholders will be automatically assigned to new contacts who sign up via this form. Subscribers will not be able to see the placeholder name when they sign up.
Choose an existing placeholder from the list or enter a new one, for example "Origin", then click "Create new placeholder...":
Following this, enter a placeholder value. For example, "Website", then click "Click to create new value...":
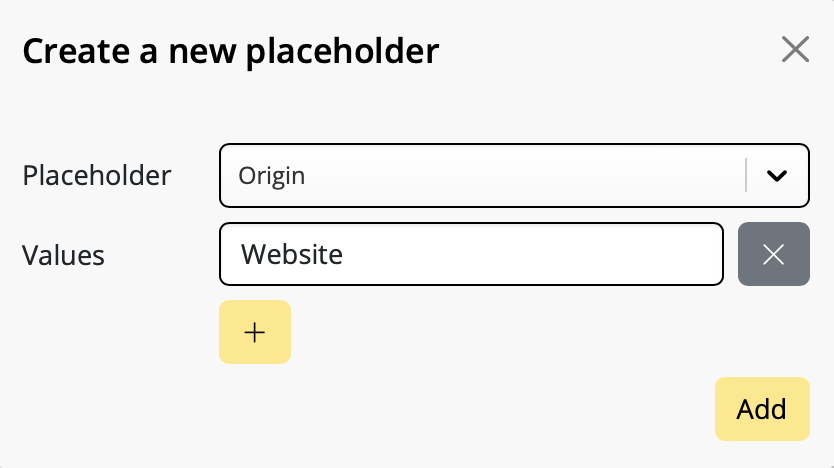
New signups via this form will now be automatically assigned this placeholder, meaning you can see how many contacts came via your website and even create tailored content for them.
Customer placeholders
In many cases, it's helpful for customers to self assign placeholders to help show you what type of content they are interested in.
Let's say you are a clothing store and regularly create newsletters with news and offers on women's, children's and men's fashion. You can include these as options in your signup form to let your subscribers determine which newsletters they want to receive.
This is a great way to make sure your email content stays relevant and reduces the risk of contacts unsubscribing later.
Again, you can choose an existing placeholder from your list, or enter a new one as described in the previous step. Here, we are using the placeholder "Newsletter Type" with the values "Women", "Children", and "Men". These will be the options your website visitors can choose from.

As soon as you've specified these placeholders, you can also customize how they are displayed to users.
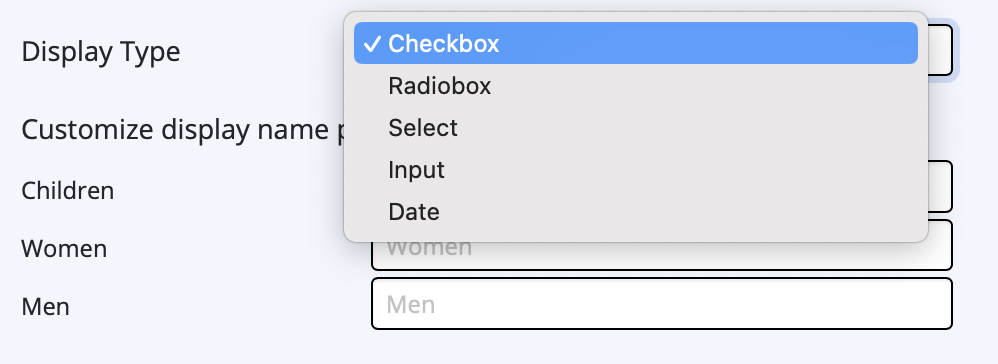
Check the box "Show placeholder label" to enter a text which best describes the choices shown to users – e.g. "I'm interested in offers for"

You can now choose a display type. In most cases, "Checkbox" makes sense, i.e. if you want to offer multi selection. However, if users should only choose one option (e.g. location) or can input their own values (e.g. birthday), you can select the appropriate option from the dropdown menu.
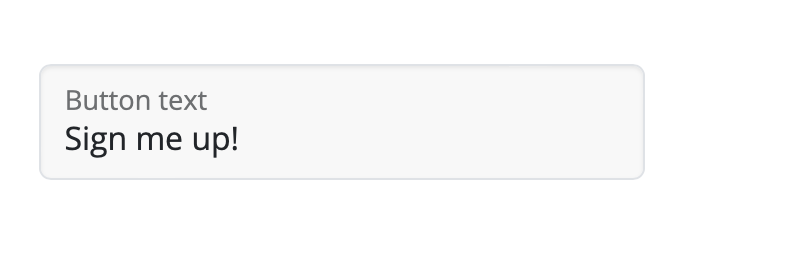
Finally, you can enter a custom button text for your signup form in the field provided:
Double Opt-In
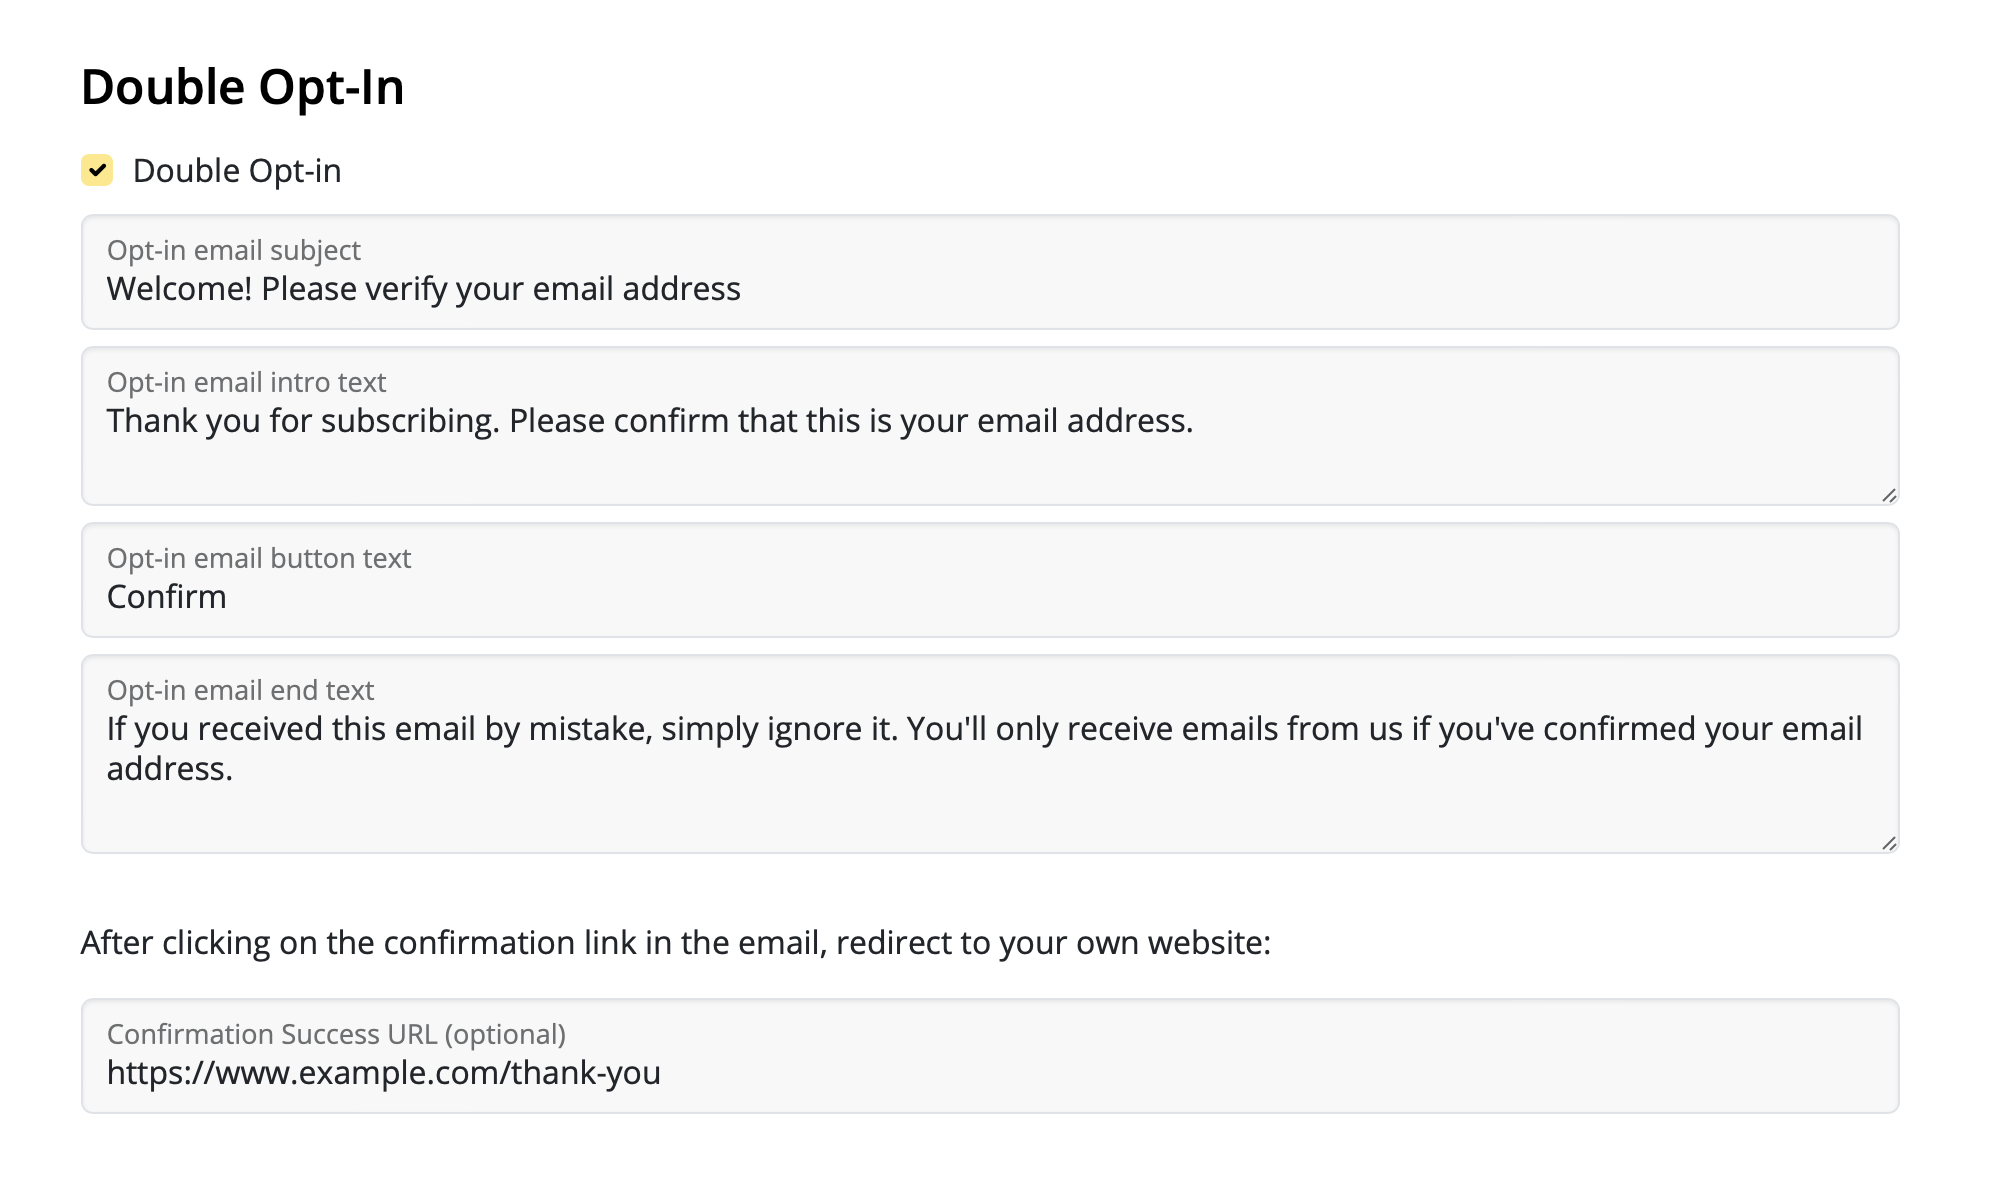
A double opt-in email is essential for all new sign ups, as it helps ensure your newly obtained email addresses are genuine – a good measure for preventing email bounces later on. Therefore we recommend keeping this option active.
The Delivery Hub signup form generator allows you to customize your double opt-in emails. Fill out the fields for email subject line, body text, and button.
In this section, you can also specify a custom landing page (e.g. a thank you page) for new subscribers.
Layout & Preview
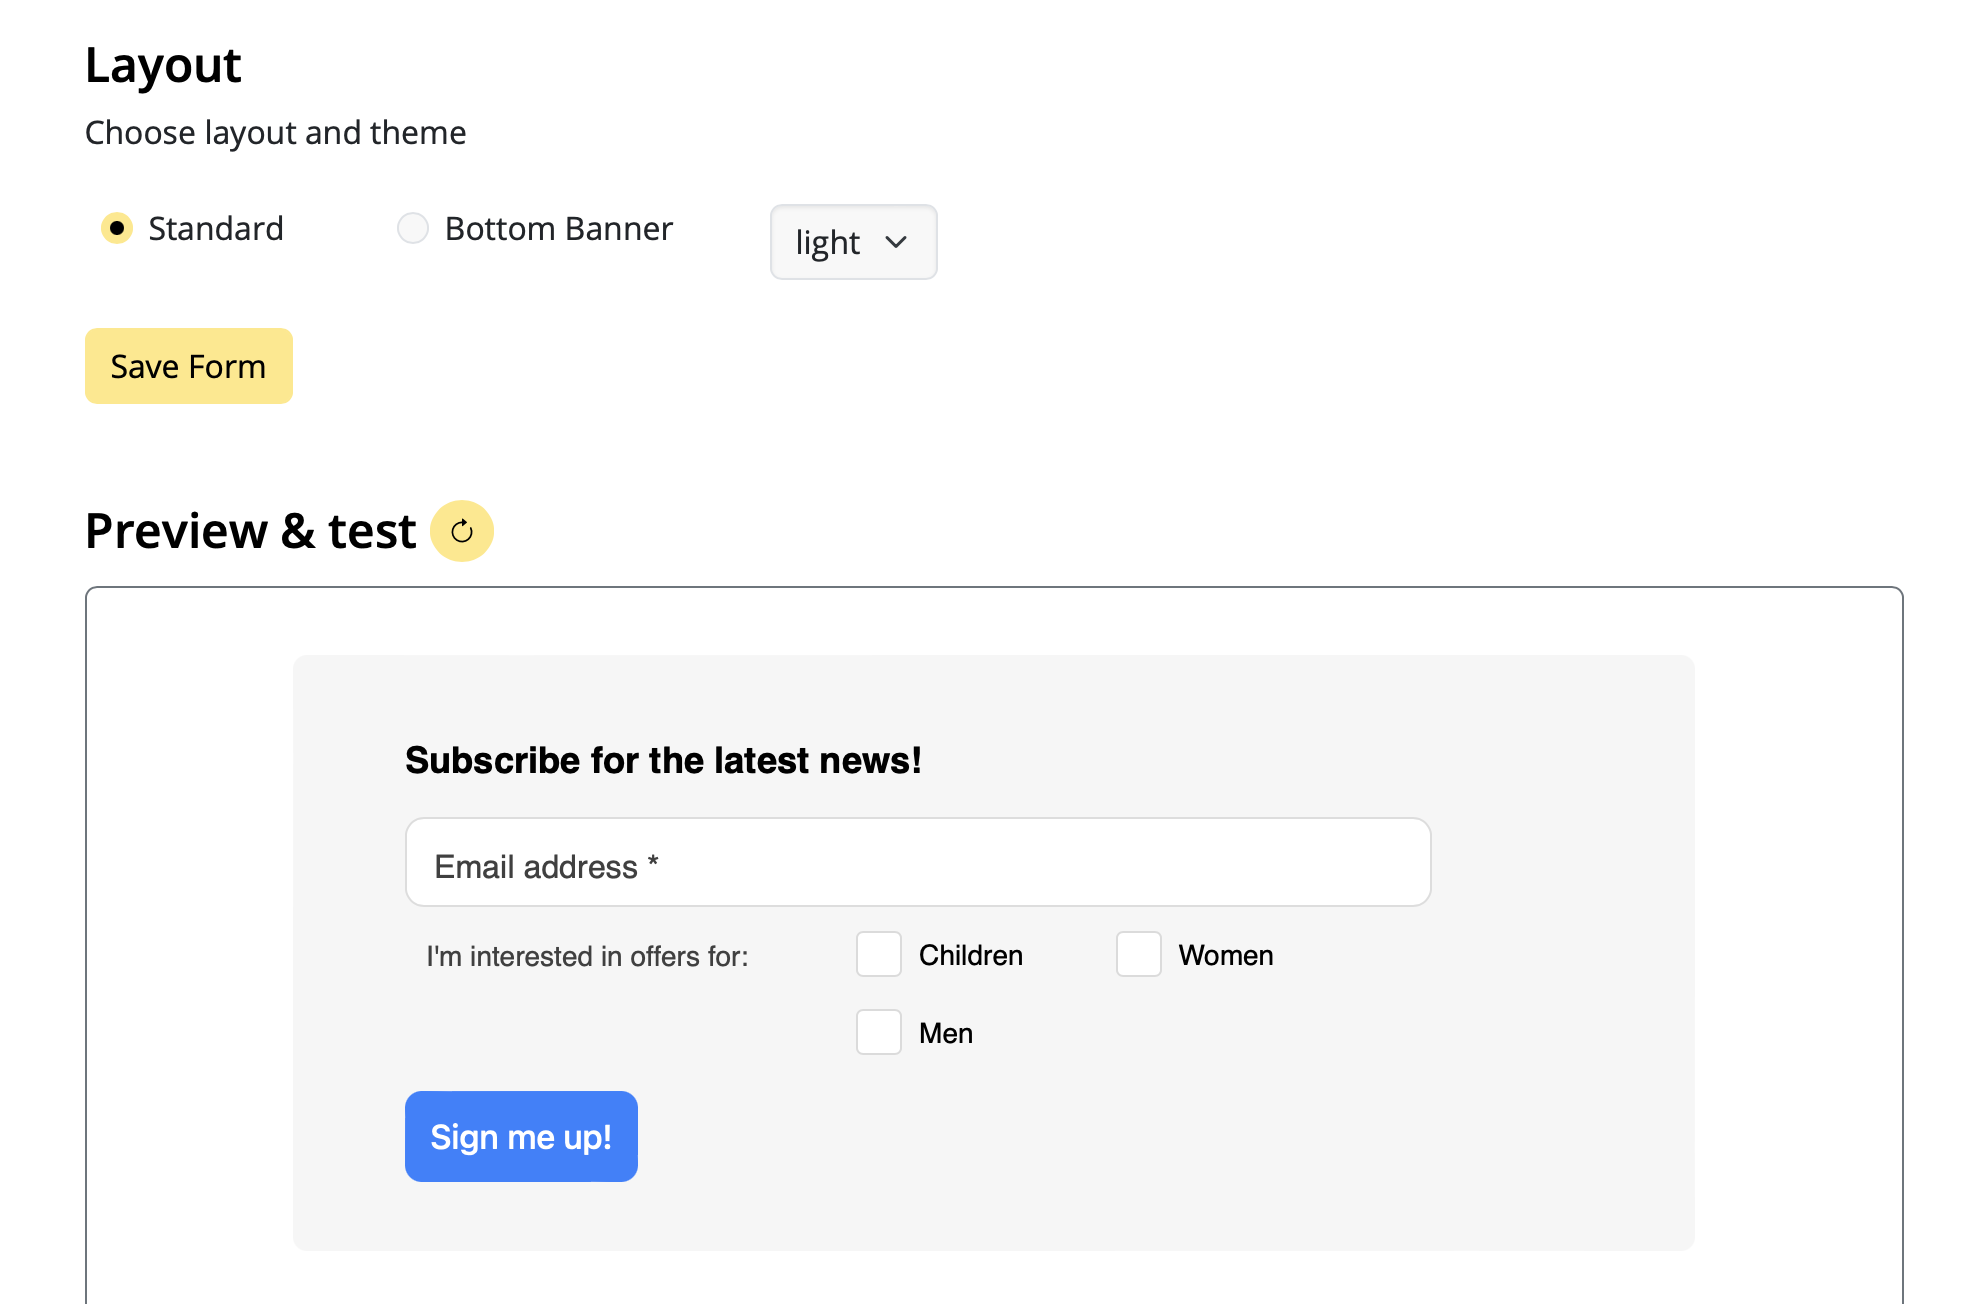
In the final setup step, you can choose between different layout options for your signup form. For example, light or dark design.
To preview a design option, select your design settings, then click the refresh icon to see the latest version of your form. This also includes a preview of all the form fields selected in the previous step:
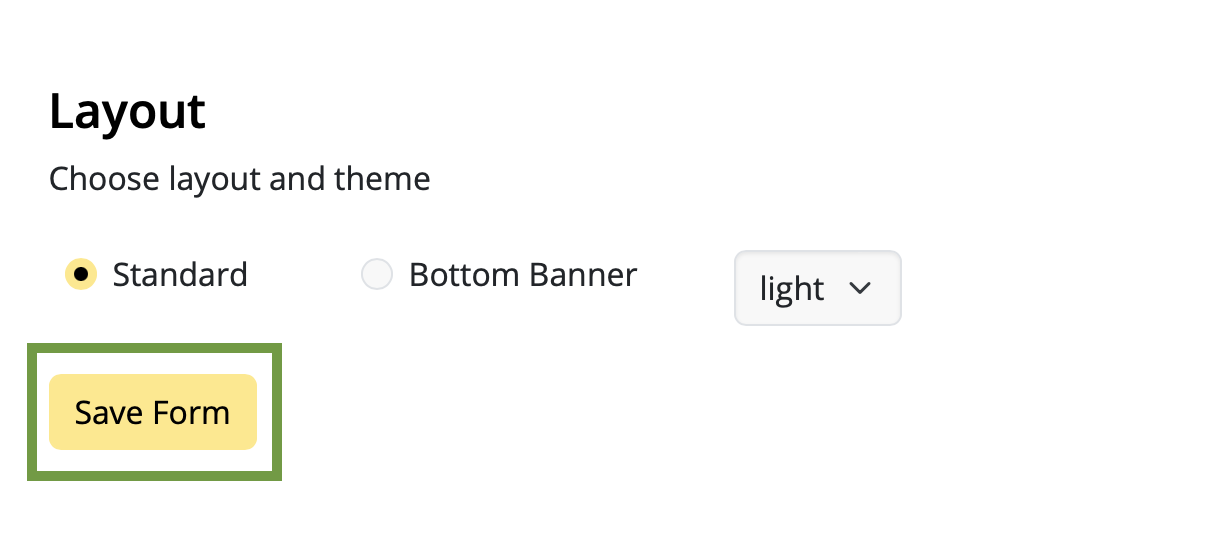
Once you're happy with the design, remember to save the form by clicking "Save Form":
Adding a signup form to your website
Adding your finished form to your website is super easy, thanks to Delivery Hub's code generator.
- Click on "Generate code" to create the code needed for your form
- Click "Copy code" to copy the form code to your clipboard
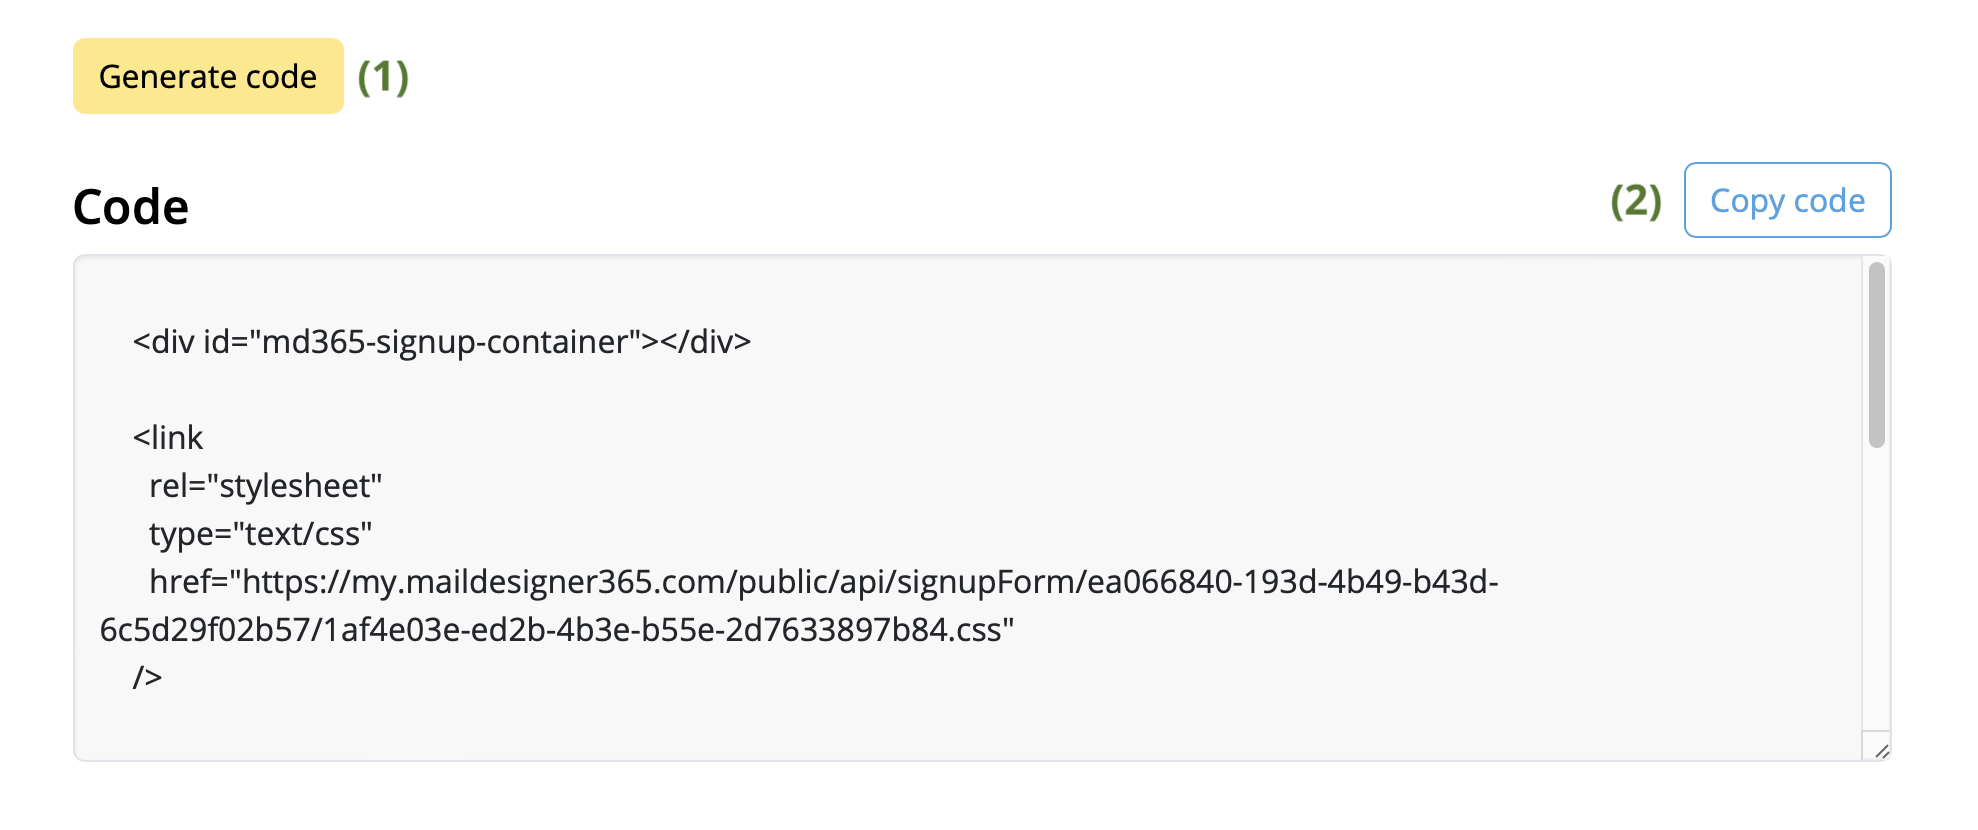
You can then paste this code into the desired area of your website and start collecting new subscribers!
Your next step - creating an audience
If you have not done so already, now is a good time to set up your email list(s). We call these audiences.
You can base your audiences on certain criteria, known as placeholders i.e. the placeholders you specified in your signup form. For example, our clothing store needs at least three audiences for their newsletters: for women's, children's, and men's fashion.
Audiences can be created at: https://my.maildesigner365.com/team/deliveries/contacts/targetgroups
Creating a new audience
We will start off with the newsletter for women's fashion. Create a new audience and give it a name (i.e. "Women".)
Now, select the placeholder (i.e. “Newsletter Type”) that you created during form setup.
Next, select the corresponding value (e.g. "Women"):
Now all contacts with the placeholder value "Newsletter Type = Women" will be displayed below. Click to save your new audience.
Create additional audiences
These steps can also be carried out for the “Men” and “Children” lists by selecting the appropriate placeholder values, providing you with dynamic audiences for each newsletter type.
Whenever a subscriber signs up via your website form, they will be automatically added to the respective audience(s) based on the categories they select.
If you want to create one audience with all your website signups, follow the steps above using the placeholder and value that you specified during form setup, i.e. "Source" and "Website". All new subscribers will be automatically added to this list – even if they don't select one of your optional fields.
- Open team management and invite another member.
- Then log out of your current Mail Designer account (top right)
- Now open the invitation link from the email from your second email address.
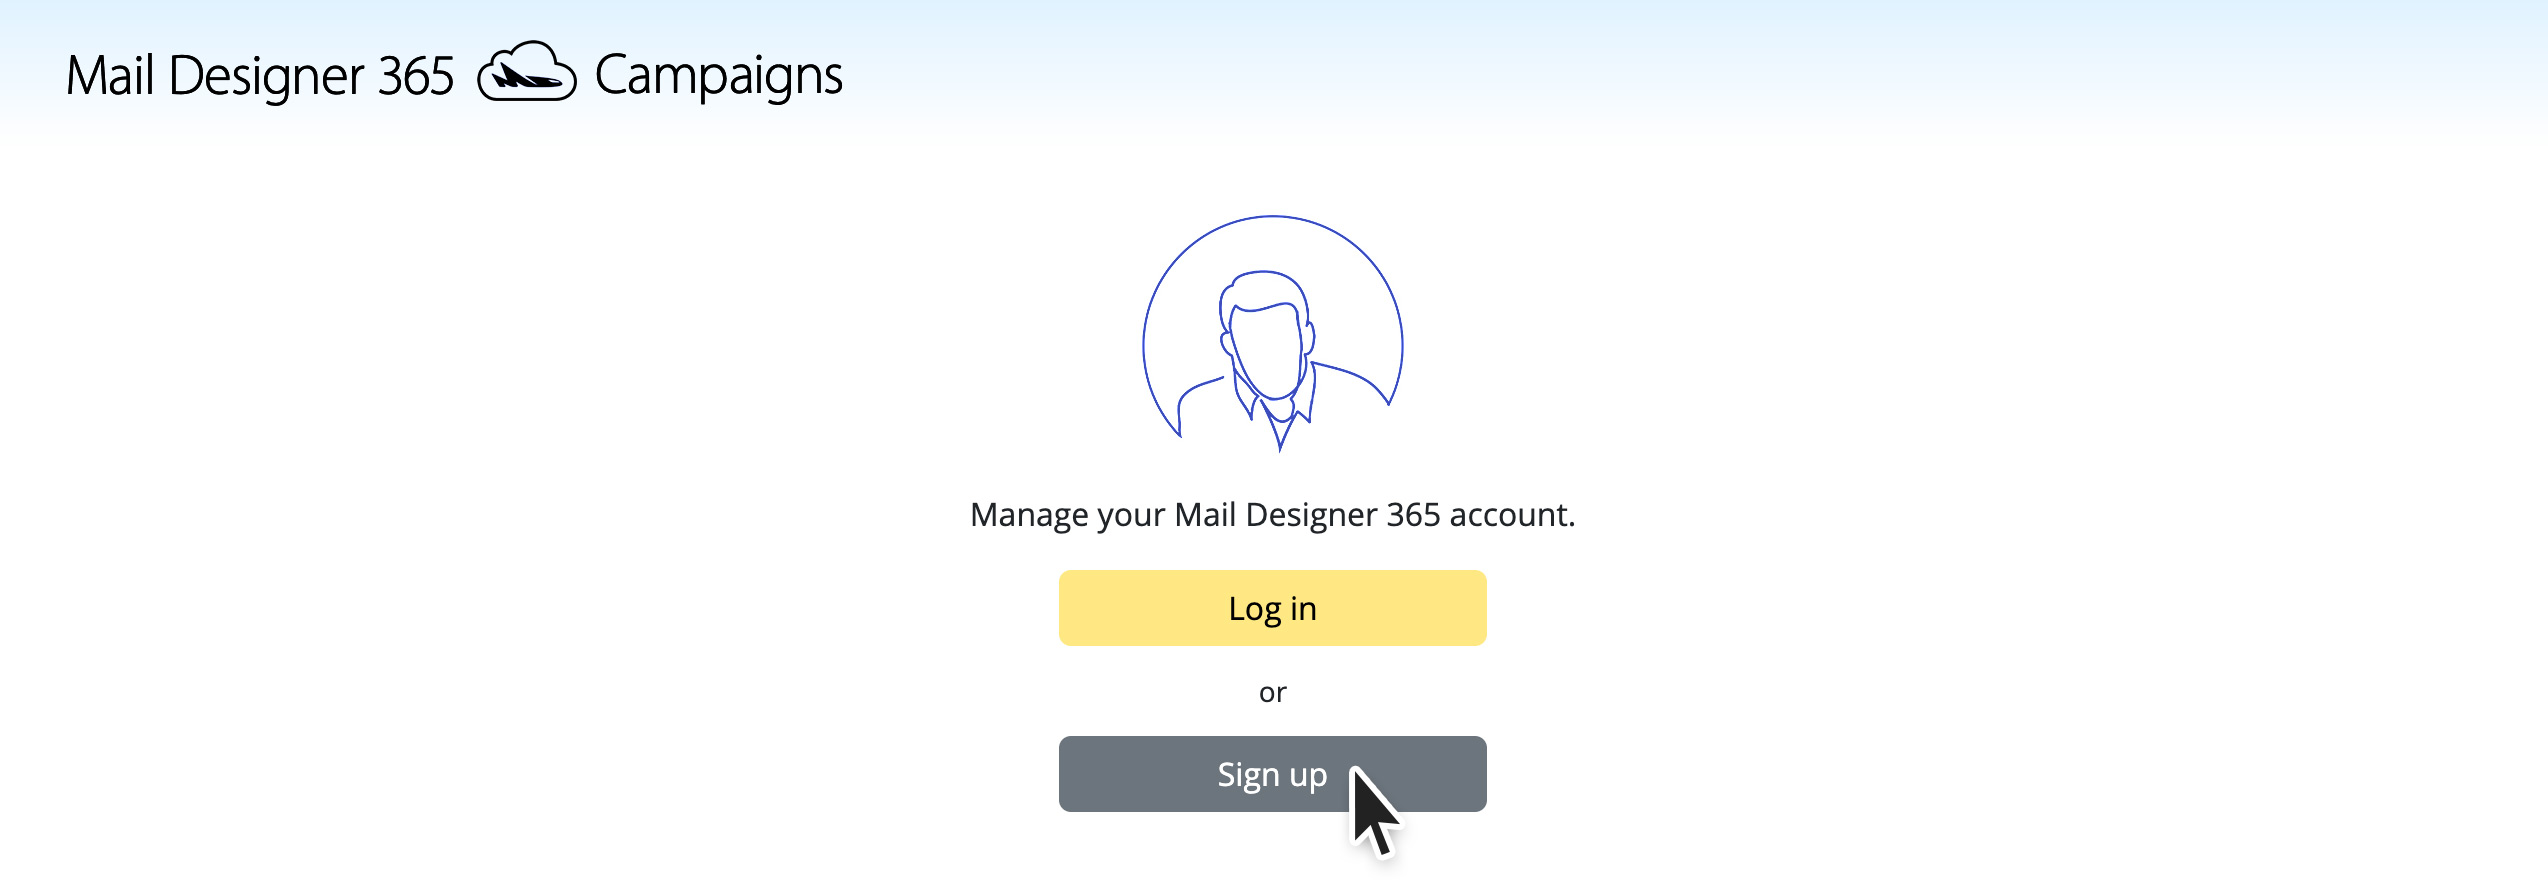
- Create a new account with the second email address.
- When you start the test send now, select the bottom option “Team”.
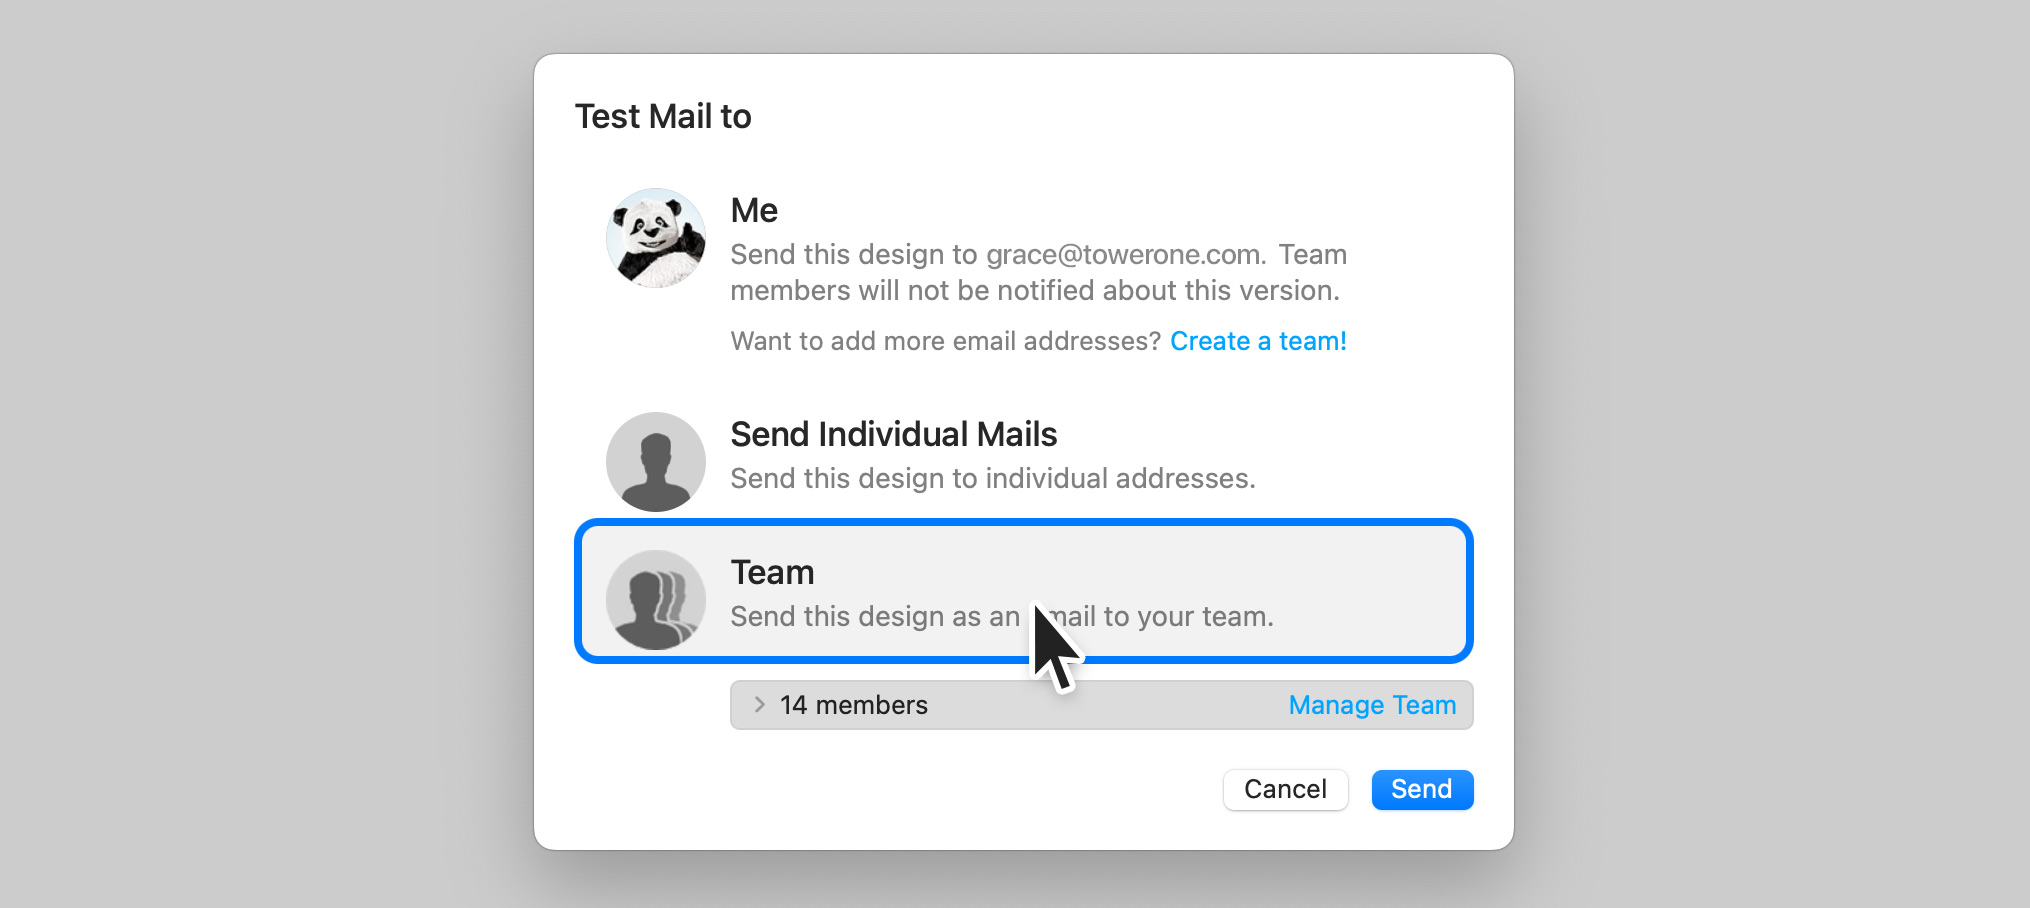
This will send the test email to all members of the team, including your second email address.
You can repeat these steps for other email addresses. Up to 10 team members or additional email addresses can be added.
The thing triggering these blocks of email transmissions is not the nature of the email. Even personal Christmas Greetings will potentially get blocked if sent to a large enough audience. After all, how would the email provider know what nature the content of the email is? They block emails purely based on the number of emails being sent at the same time from the same origin.
Here is how Mail Designer Campaigns can help in this situation:
- When you don't have your own domain email address, we replace the From Address automatically with one of our verified Domains
- This address replacement would look as follows: Original Address - supercoolmails@yahoo.com New Address: supercoolmails.yahoo.com@sentwith.maildesigner365.com
- Since the Domain @sentwith.maildesigner365.com is fully DKIM certified, these emails would not be blocked due to DKIM issues.
Alternatively if you do have your own Domain, Mail Designer Campaigns allows you to DKIM verify your send address, so you can send from your own Domain without being blocked by the providers.
Are you new to Mail Designer? Why don't you try the Mail Designer Free Demo for Mac users.
- Non-usage of the app or service
- Failure to cancel your account within the cancelation period
- Lack of features or functionality on your subscribed plan
- Purchases made in error
- Exceptional circumstances beyond our control
- Violations to our Terms of Use
What is a MAIL FROM Domain?
When sending an email, there are two addresses that reveal its source:- a FROM address, visible to the recipient
- a MAIL FROM address denoting the message's source
When do I need a MAIL FROM Domain?
When you use Mail Designer 365 Campaigns for sending emails, the default MAIL FROM domain automatically uses a subdomain of Mail Designer 365 Campaigns (sentwith.maildesigner365.com). In this case, Sender Policy Framework (SPF) authentication effectively validates these messages since the default MAIL FROM domain aligns with the Mail Designer – i.e. the application responsible for sending the email. However, if you would prefer not to use Mail Designer 365 Campaigns' default MAIL FROM domain, and instead wish to opt for a personalized subdomain under your own domain, this is known as utilizing a custom MAIL FROM domain within Mail Designer 365 Campaigns. In short, using a custom MAIL FROM domain allows you to gain the flexibility to utilize SPF, DKIM, or both for attaining Domain-based Message Authentication, Reporting, and Conformance (DMARC) validation. DMARC empowers a sender's domain to signal that emails dispatched from the domain are safeguarded by one or more authentication systems. DMARC validation can be achieved through SPF compliance, DKIM compliance, or both methods.Requirements for a custom MAIL FROM domain
When setting your own MAIL FROM domain, the following requirements must be met:- Must be a subdomain of the parent domain of a verified email address or domain
- Should not be the same as a subdomain that you are using to send email from
- Should not be the same as a subdomain that you are using to receive email
How to set up a custom MAIL FROM domain in Mail Designer 365 Campaigns
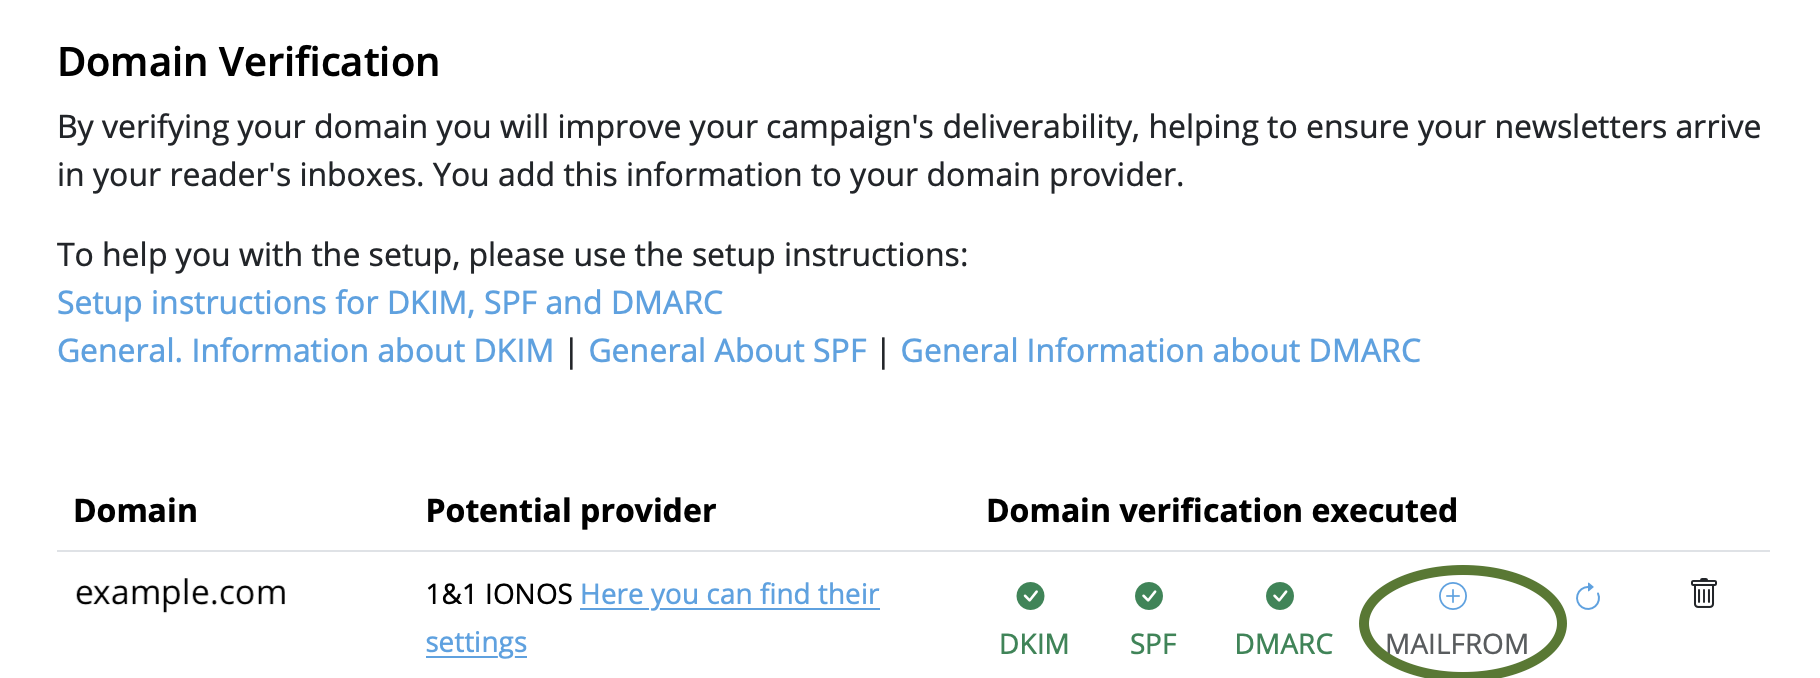
In order to set up a custom MAIL FROM domain, you'll need to add records to the DNS configuration for the domain. Mail Designer 365 Campaigns requires users to publish an MX record so that your domain can receive the bounce and complaint notifications sent to you by email providers. You will also have to publish an SPF (type TXT) record to show that Mail Designer 365 is authorized to send emails from your domain.- Log in to your my.maildesigner365 account and go to From:addresses > Domain Verification
- Locate your domain in the list and click on the tab MAILFROM:
- You will now see and be able to copy the text for the new MX record you need to add to your domain's DNS record
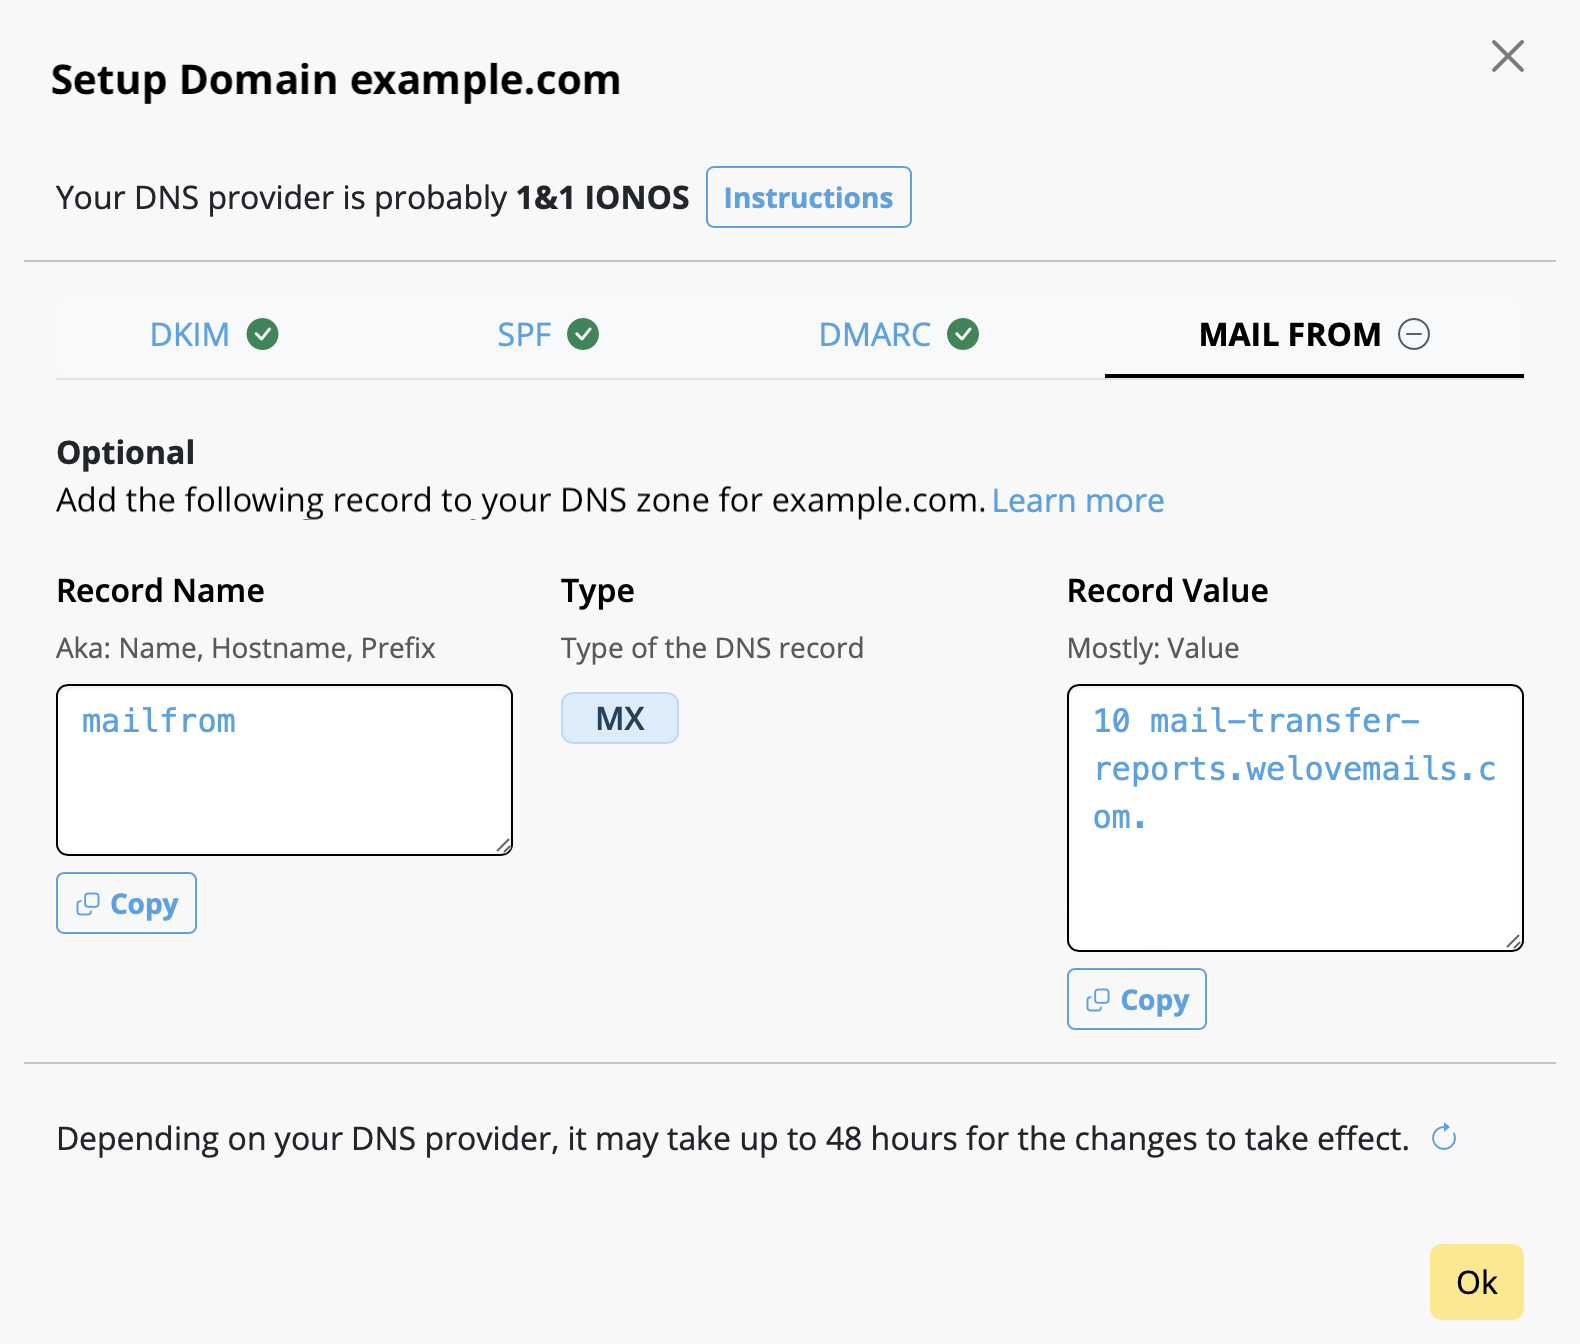
Please note once you are done, it could take up to 48 hours to update your settings, depending on your DNS provider. The green checkmark will indicate when the setup is complete:
- Open up your template in Mail Designer 365 and make the changes in your design
- Go to Delivery Hub and open your scheduled campaign
- The new version of your template will be picked automatically.
- Press Save to save your campaign with the new design
- Repeat for other scheduled campaigns using the same design
- Regular email with several contacts in the To field
- Regular email with several contacts in the BCC field
- An email to a predefined group, such as an Outlook Group
- Your email service provider or the recipient's email service provider may raise suspicions of SPAM (unsolicited junk emails) sending, potentially leading to your account's suspension or temporary freeze.
- Receiving an email with an extensive list of recipients often diminishes its perceived relevance to individual recipients, making it seem impersonal and more likely to be classified as junk mail.
- Messages sent to a large number of recipients are often flagged by Junk Mail Filtering systems as Spam, increasing the risk of your message being blocked and not reaching its intended recipients.
- Mail Designer Campaigns enables you to fully verify your domain, ensuring optimal verification for your emails to reach recipients' inboxes.
- If you don't have your own domain or prefer not to undergo the verification process, we can provide you with a custom address from a fully authenticated domain, significantly reducing the risk of your emails being marked as Spam.
- We offer intelligent list management for your contact lists, allowing you to either send emails to all contacts or create targeted groups tailored to your audiences.
Emails that contain only images are often flagged as spam because spam filters rely on text to evaluate the content's legitimacy. Without text, the filters may assume the email is hiding suspicious or harmful content, a tactic commonly used by spammers. Additionally, image-only emails can load slowly, frustrating recipients and increasing the likelihood that they will mark your email as spam.
To improve your email's chances of landing in the inbox, follow these best practices:
- Avoid image-only layout blocks: Instead of using layout blocks that consist only of images, opt for blocks that combine text and images. This ensures your text gets displayed as actual text, not as part of a large image, which helps filters and recipients better understand your content.
- Include relevant text: Clearly explain the purpose of the email using text. This gives spam filters context to analyze and helps your audience engage with your message.
- Use alt text for images: Add descriptive alt text to each image. This ensures that even if the images don’t load, recipients (and spam filters) can still understand the email’s content.
- Maintain a good text-to-image ratio: A balanced approach, where there’s more text than images, can reduce the chances of your email being flagged as spam. The text gives spam filters more material to evaluate.
- Use a combination of image and text blocks: Combining both elements not only enhances readability and engagement but also prevents spam filters from interpreting your email as an attempt to hide important information in images.
- Use a reputable email service provider like Mail Designer 365 Campaigns: Many email service providers such as Mail Designer 365 Campaigns help optimize email structure and offer authentication protocols like SPF, DKIM, and DMARC to enhance deliverability.
By following these guidelines and ensuring your email contains a mix of well-placed text and images, you can improve its deliverability and reduce the risk of it being sent to the spam folder.
- Set Up a New Email List: Create a new email list with recipients who did not open your original email. Resend the email to this group after a short delay, ideally with a different subject line or slight modifications to the content. This can help re-engage those who may have missed the first message.
- Review Email Content: Analyze the content of the emails that went to spam. Look for elements that could trigger spam filters, such as excessive use of images, spammy keywords, or poor formatting, and make necessary adjustments.
- Engage with Your Audience: Foster a positive relationship with your recipients by providing valuable content and encouraging interaction. Engaged recipients are less likely to mark your emails as spam.
If you're struggling with email deliverability—especially with Gmail users—there are proven strategies to improve sender reputation and ensure your emails land in inboxes rather than spam folders. Follow these steps to get back on track:
Steps to Improve Email Deliverability:
-
Warm Up Your Email Lists Gradually
- Treat the process as if warming up a completely new account.
- Divide your mailing into smaller batches and send them on different days. For example, start with 500 emails on Monday, 1,000 on Tuesday, 2,000 on Wednesday, and so on.
-
Focus on Engaged Recipients First
- Begin by sending emails only to contacts who have opened your emails recently (e.g., within the last 30 days for weekly senders).
- Gradually increase this timeframe as your deliverability improves.
-
Leverage Google Postmaster Tools
- Set up Google Postmaster Tools to monitor spam rates, domain reputation, and other deliverability metrics.
-
Create Test Gmail Accounts
- Subscribe a test Gmail account to your email campaigns.
- Monitor where emails land. If emails go to spam, interact with them (e.g., open, click, and reply) but do not move them out of the spam folder. This helps train Gmail’s algorithms.
-
Adjust Based on Metrics
- Use Google Postmaster Tools to track your spam rates. If spam rates are too high, reduce the timeframe of your engaged recipients or maintain the current level of sending until the rates stabilize.
-
Monitor Progress
- As Gmail deliverability improves and emails stop landing in spam, expand your email list incrementally to include less recently engaged recipients.
How Mail Designer Campaigns Can Help:
Mail Designer Campaigns provides several built-in features to optimize email deliverability and improve your sender reputation:
- Professional Email Authentication: Ensure your emails are authenticated with SPF, DKIM, and DMARC, reducing the likelihood of being flagged as spam.
- Engagement Tracking: Identify active and inactive recipients in your mailing list, allowing you focus on your most engaged contacts first.
- Custom Domain Support: Addd your own domain to Mail Designer Campaigns to reinforce trust with email providers like Gmail.
- Clean and Optimized Designs: Mail Designer 365 helps you to create email content that is visually appealing while avoiding spam-triggering elements, increasing inbox placement rates.
- Advanced Segmentation: Mail Designer Campaigns allows for advanced segmentation, such as creating lists of only people who have opened the email in the past X days, and options for sending to only a portion of your subscriber list. This ensures that your emails reach the most engaged recipients first, improving overall deliverability.
By following these best practices and leveraging Mail Designer Campaigns' tools, you can rebuild your sender reputation, enhance Gmail deliverability, and achieve more successful email marketing campaigns.
Email marketing isn’t dead—it has simply evolved. While it’s true that inboxes are busier than ever, email marketing remains one of the most effective ways to connect with audiences when done right. Here’s why:
- People value quality over quantity: Subscribers are more selective about the emails they sign up for, so it’s crucial to offer valuable, engaging, and relevant content that stands out. Generic or repetitive emails won’t cut it anymore.
- It’s a personal choice: Unlike unsolicited messages on platforms like WhatsApp, email gives recipients control—they’ve opted in to hear from you. For many people this makes emails far more welcome than intrusive messages on other channels.
- Still an ROI powerhouse: Email marketing continues to deliver one of the highest returns on investment (ROI) in digital marketing. When you focus on personalization and value, email can drive conversions better than almost any other medium.
While automation and messaging apps like WhatsApp are growing, they serve different purposes. Instead of replacing email, they complement a well-rounded marketing strategy. So, no—email marketing isn’t dead. It’s just more competitive, and that’s a good thing because it pushes brands to be better.
If you don’t have a warmed domain or custom email address, Mail Designer 365 offers a professional solution for sending email campaigns without the need for your own domain.
How does it work?
Mail Designer 365 uses its Mail Designer Delivery service, which ensures that your campaigns are sent reliably and securely from a trusted, pre-configured email domain. This avoids potential issues like deliverability problems caused by an unprepared domain or emails landing in spam folders.
Why choose Mail Designer Delivery?
- No Setup Hassle: You don’t need to purchase, warm up, or configure your own domain.
- Trusted Reputation: Mail Designer’s sending infrastructure is optimized to ensure high deliverability.
- Professional Appearance: Your emails are sent with an authenticated domain, giving a polished and professional look to your campaigns.
- GDPR-Compliant Sending: All data is handled in compliance with GDPR, ensuring the privacy of your recipients.
What’s the catch?
While using a shared domain is a quick solution, a custom email domain (e.g., yourname@yourbusiness.com) is always recommended in the long term. This gives you full control and enhances your brand image. Mail Designer 365 supports this setup with tools to configure SPF, DKIM, and DMARC authentication for maximum deliverability.
Ready to get started?
Mail Designer 365 is perfect for sending individual emails or thousands of recipients quickly and professionally. Start your campaign with our delivery service today and reach your audience without worrying about technical setup or deliverability!
Yes, with Mail Designer 365 you can track whether an email was opened. The built-in Mail Designer Delivery email tracking features give you detailed statistics for every email and campaign you send.
Whether you're using Direct Send or sending a newsletter campaign: If you send your email using the built-in delivery service in Mail Designer 365, you'll get access to detailed analytics – including open rate, click rate, and many other important metrics.
You can view analytics for your newsletter campaigns here:
https://my.maildesigner365.com/team/deliveries/campaigns/finished
Detailed tracking is also available for Direct Send emails. You can find the relevant statistics here:
https://my.maildesigner365.com/team/deliveries/direct/finished
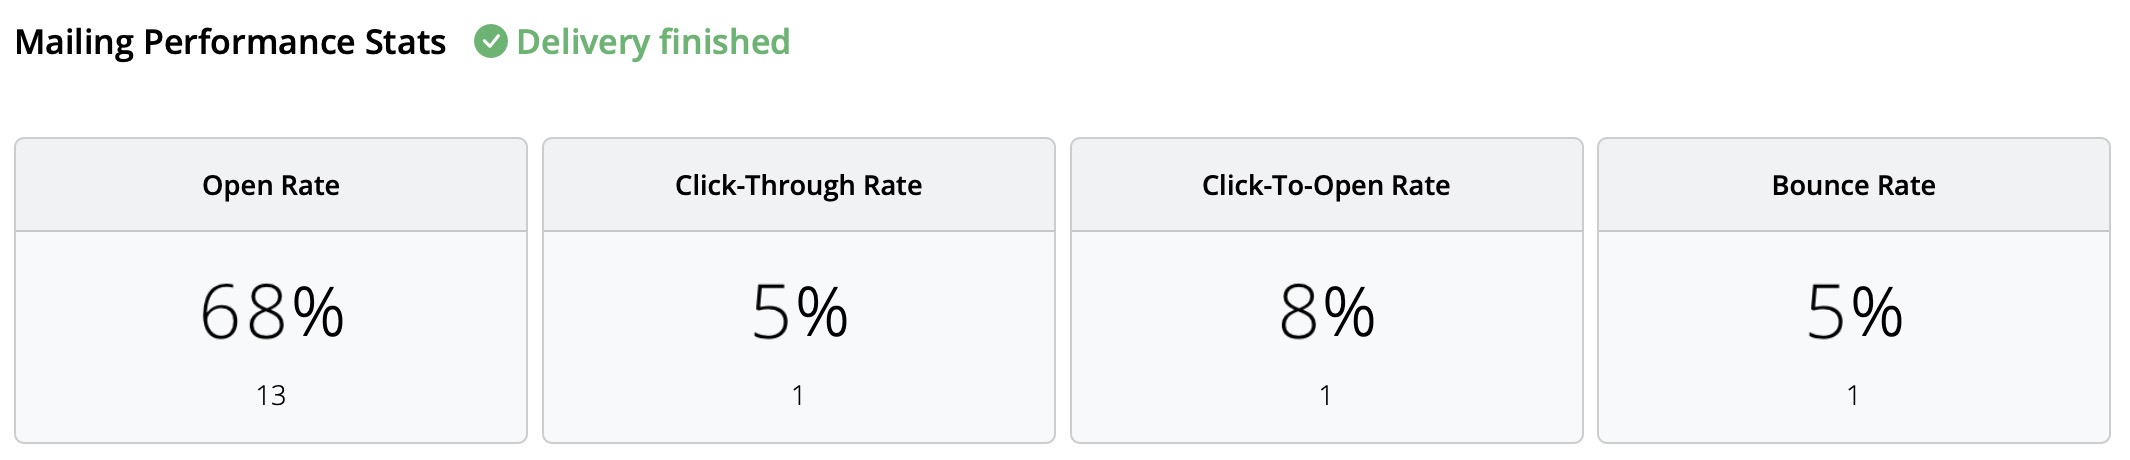
No matter which sending method you choose, Mail Designer 365 provides the following analytics:
- Open rate and total opens
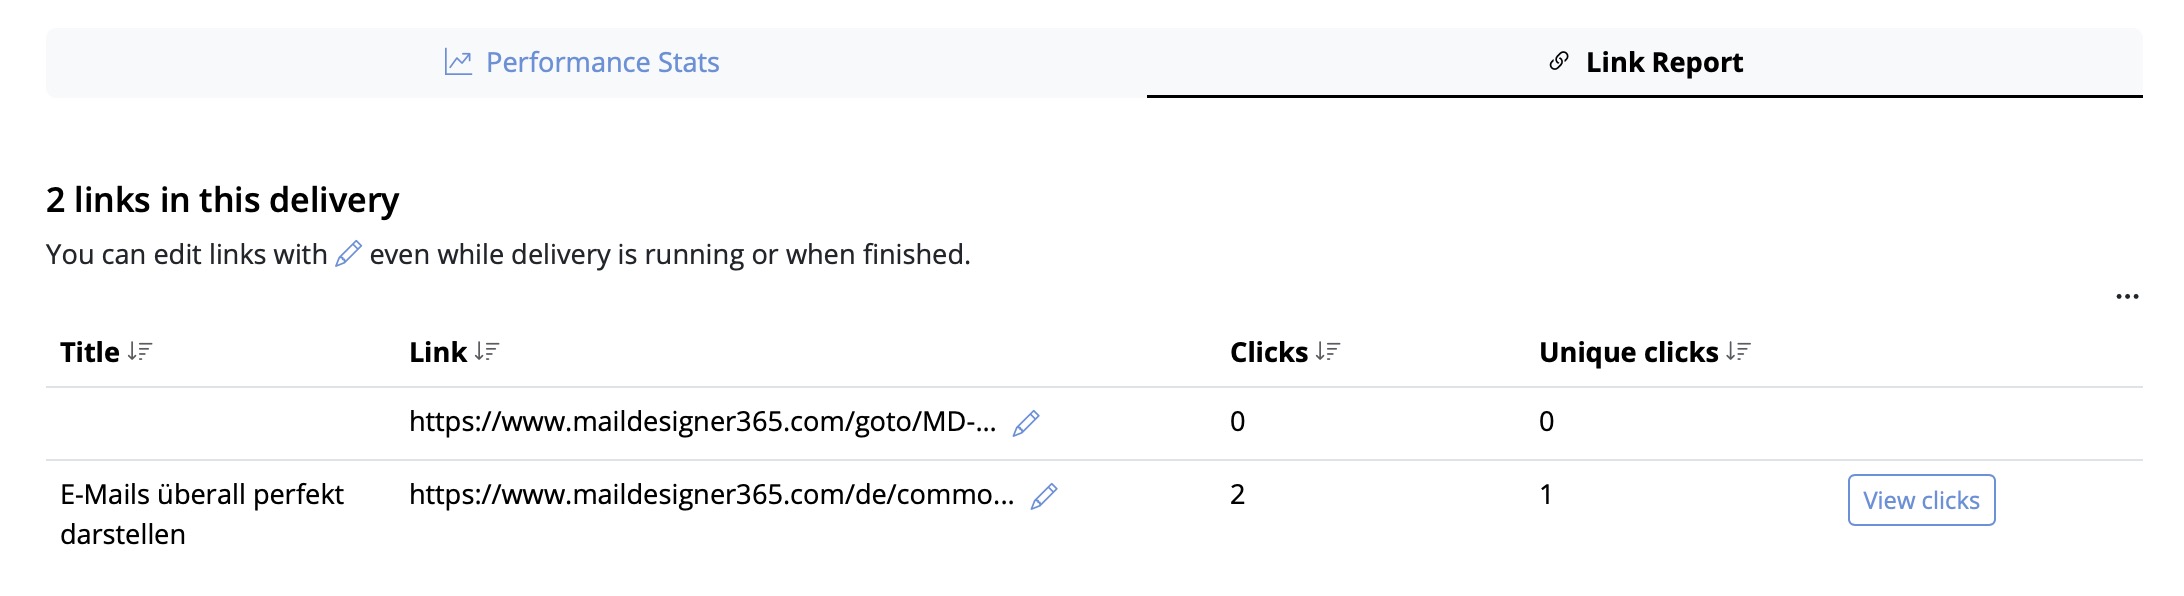
- Click rate and total clicks
- Delivery status and bounces
- Unsubscribes (unsubscribe rate)
- Detailed link click tracking
- Recipient-level statistics
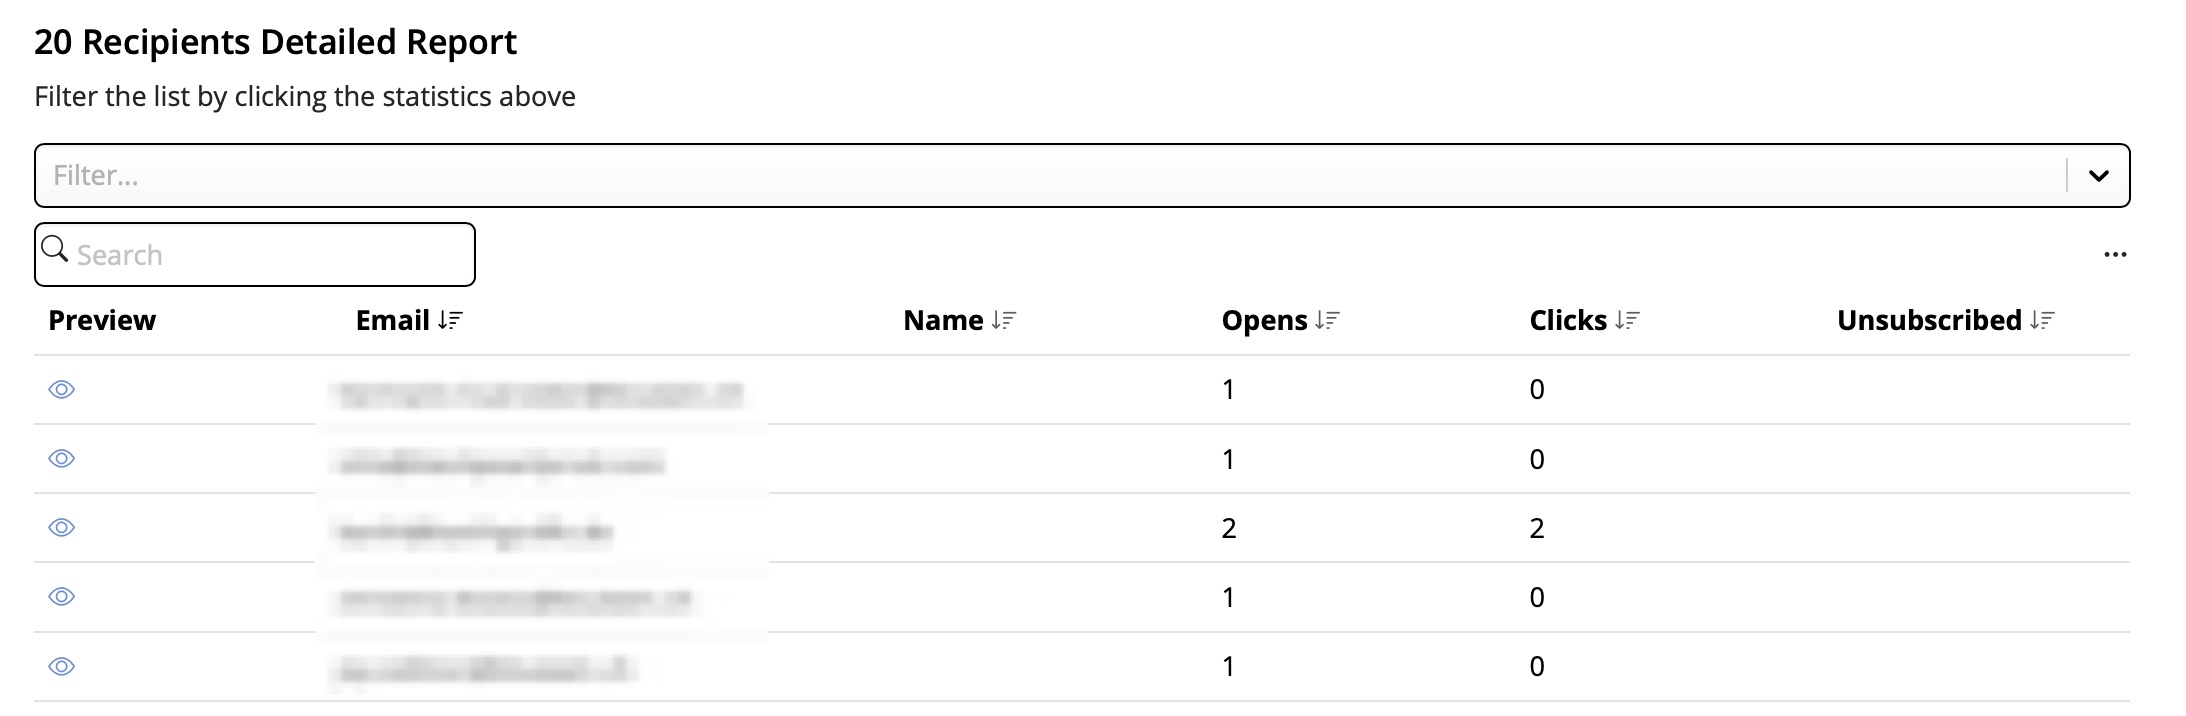
This performance analysis helps you better understand the success of your email campaigns and improve your content accordingly.
Tip: For accurate results, we recommend checking your statistics at least 24 hours after sending. This ensures your recipients had enough time to open and engage with your email.
Step 1: Create the $AttributeFields Variable
Start by creating a variable named $AttributeFieldsThis variable will contain the text string that defines the placeholder content used in your Mail Designer 365 email template. All values must be separated by commas.
Scenario A: FileMaker Field Names Match the Email Placeholders
Method: Use FileMaker field names that directly match the placeholders in your email design. Build the$AttributeFields variable by listing these field names, separated by commas.
In Mail Designer, you simply use the field name as the placeholder.
Format:
$AttributeFields = "Table::Field1,Table::Field2,Table::Field3"
Example Definition of $AttributeFields in FileMaker:
$AttributeFields="CityHotel::GUEST_FIRST_NAME,CityHotel::GUEST_LAST_NAME,CityHotel::GUEST_EMAIL,CityHotel::BOOKING_METHOD"
In Mail Designer 365, you can reference the values later using these placeholders:
GUEST_FIRST_NAME
GUEST_LAST_NAME
GUEST_EMAIL
BOOKING_METHOD
⸻
Scenario B: FileMaker Field Names Do Not Match the Email Placeholders in Mail Designer
Method: Build the$AttributeFields variable by manually mapping each placeholder name to the corresponding field or variable using the format:
$AttributeFields = "PLACEHOLDER_NAME:" & FieldName_or_Variable & "," ...
Example Definition of $AttributeFields in FileMaker:
"BOOKING_DATE:" & RESERVATION_DATE & "," &
"BOOKING_TIME:" & RESERVATION_TIME & "," & ...
⸻
Scenario C: Using FileMaker Variables as Placeholders
Method: If your FileMaker variable has the same name as the placeholder in Mail Designer 365, you can directly assign it like this:$AttributeFields = "$city,$country"
This tells Mail Designer to use the value of $city for the placeholder named “city”.
Example:
The FileMaker variable $city contains “Munich”. If your Mail Designer template includes a placeholder named “city”, then define:
$AttributeFields = "$city"
The script will reveal the content “Munich” and pass it to Mail Designer to populate the “city” placeholder.
⸻
The Best Scenario D: Mixing All Methods
You can combine the approaches above into a single$AttributeFields string.
Method:
Mix matching field names, manually mapped fields, and variables in the $AttributeFields variable.
Example:
$AttributeFields = "BOOKING_DATE:" & RESERVATION_DATE & "," &
"CityHotel::BREAKFAST_TYPE," & "$city"
In Mail Designer 365 you can then reference them with the name BOOKING_DATE, BREAKFAST_TYPE and city
The MailDesignerIntegrationExample file in FileMaker walks you through the required scripts step by step (.fmp12 FileMaker file):
And in the Mail Designer 365 template, you’ll find placeholders that show how your FileMaker fields come to life directly in the design (Mail Designer file):

Open this Mail Designer file and then go directly to File > Save to save it in your project.
Don’t have the Mail Designer app yet?

Visit our Mail Designer 365 Store.
If you have any questions or run into any issues during the trial period, feel free to contact us at any time.

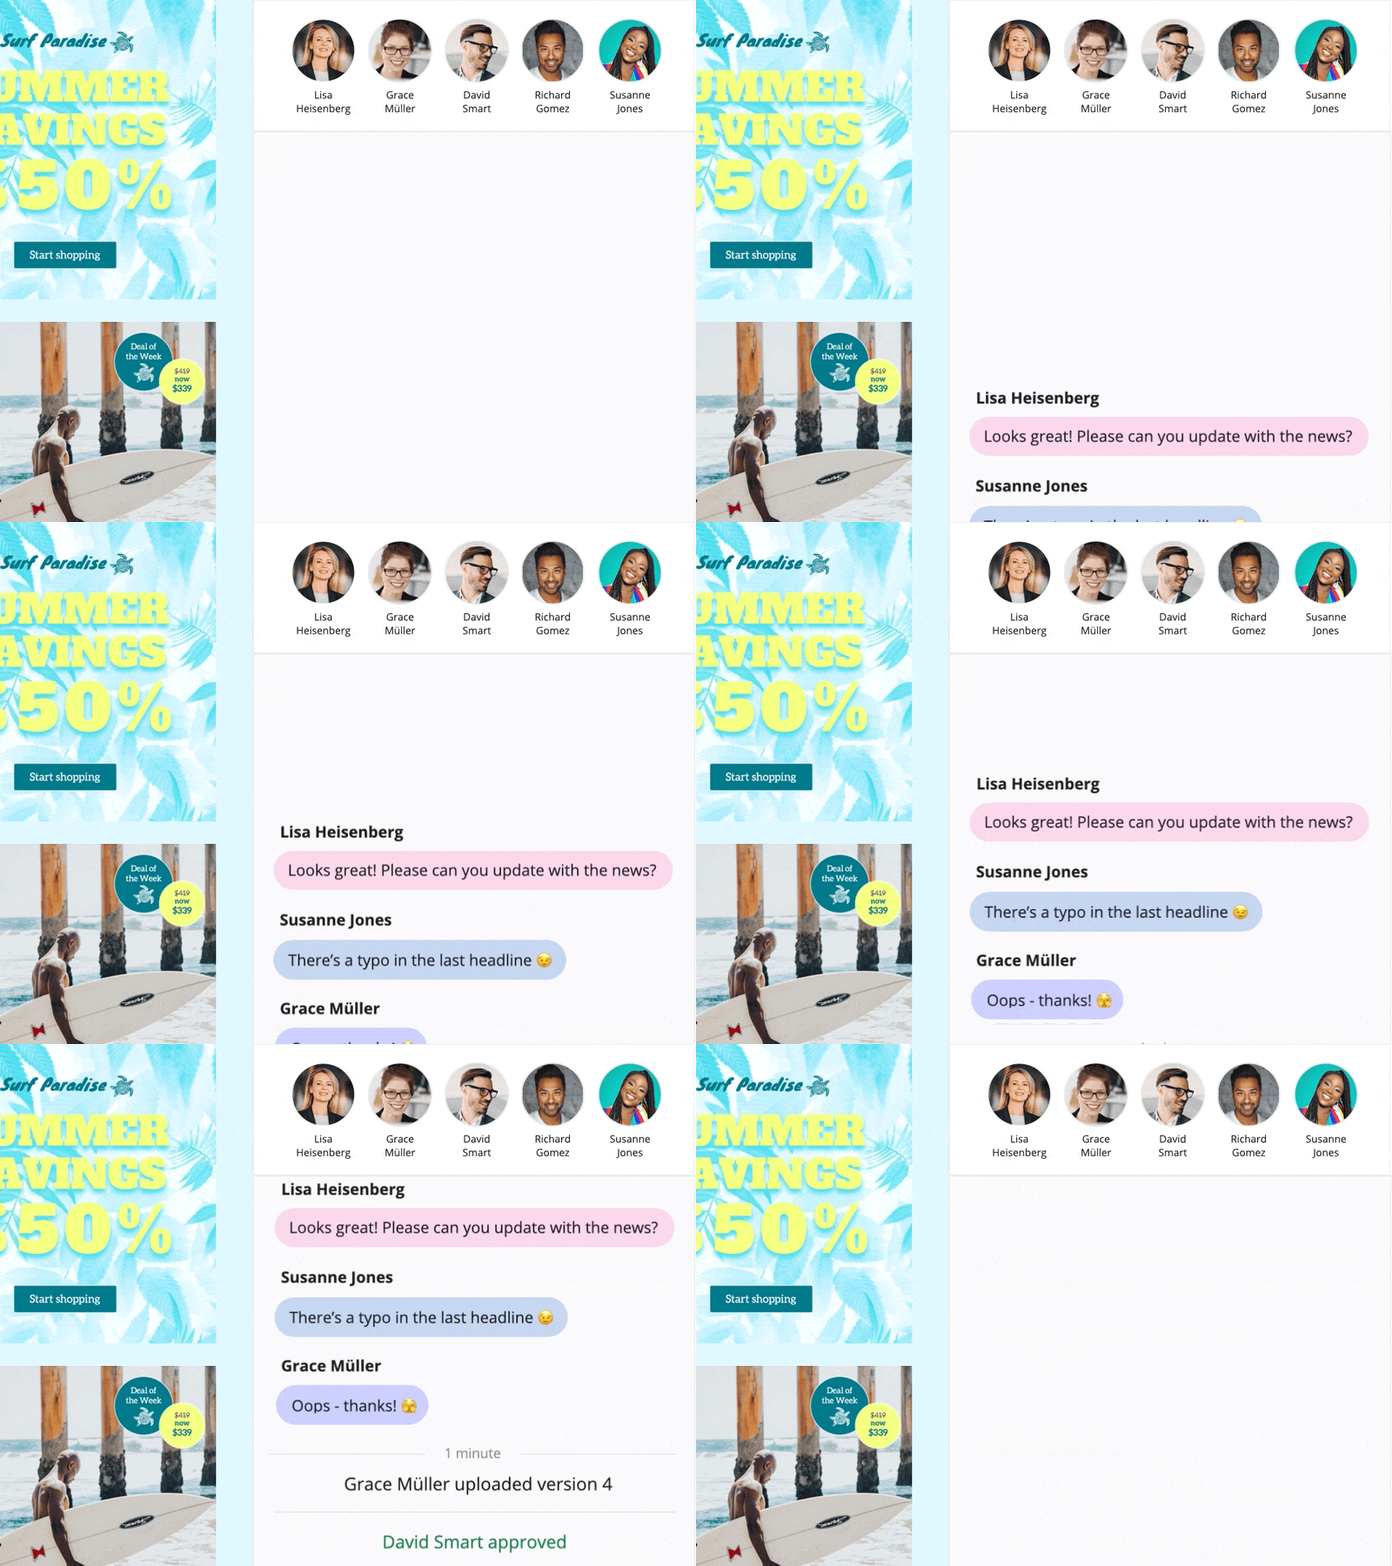
In a design, click “Crew Chat” in the toolbar to start a discussion with your colleagues — or invite us to help.
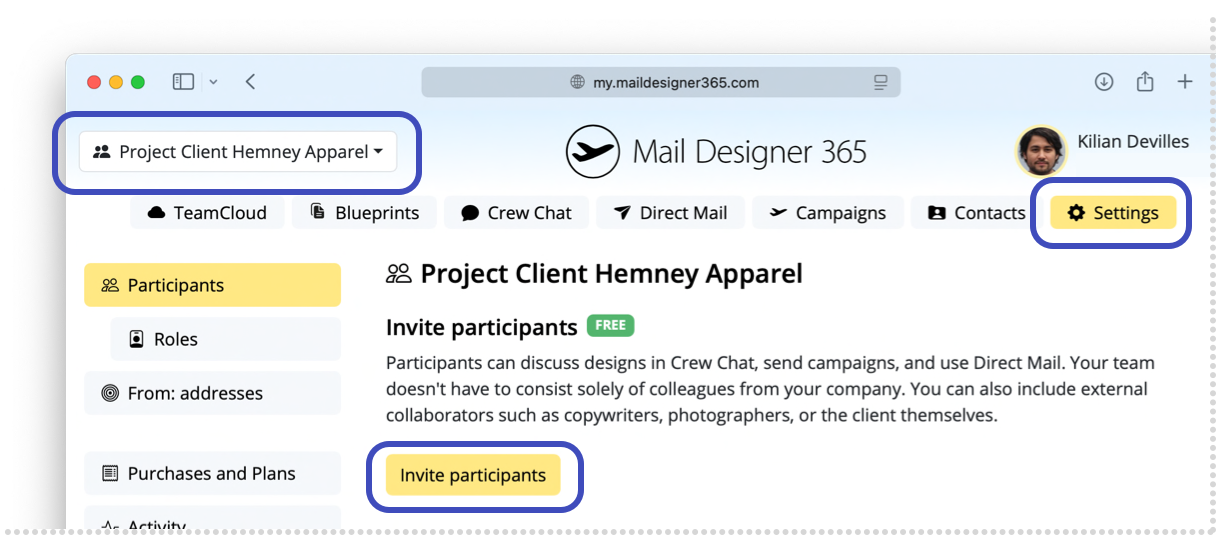
Here is how to invite Mail Designer support members to your Crew Chat:
1. Log in at my.maildesigner365.com
2. Choose your project and hit „Settings“, then “Invite participants”
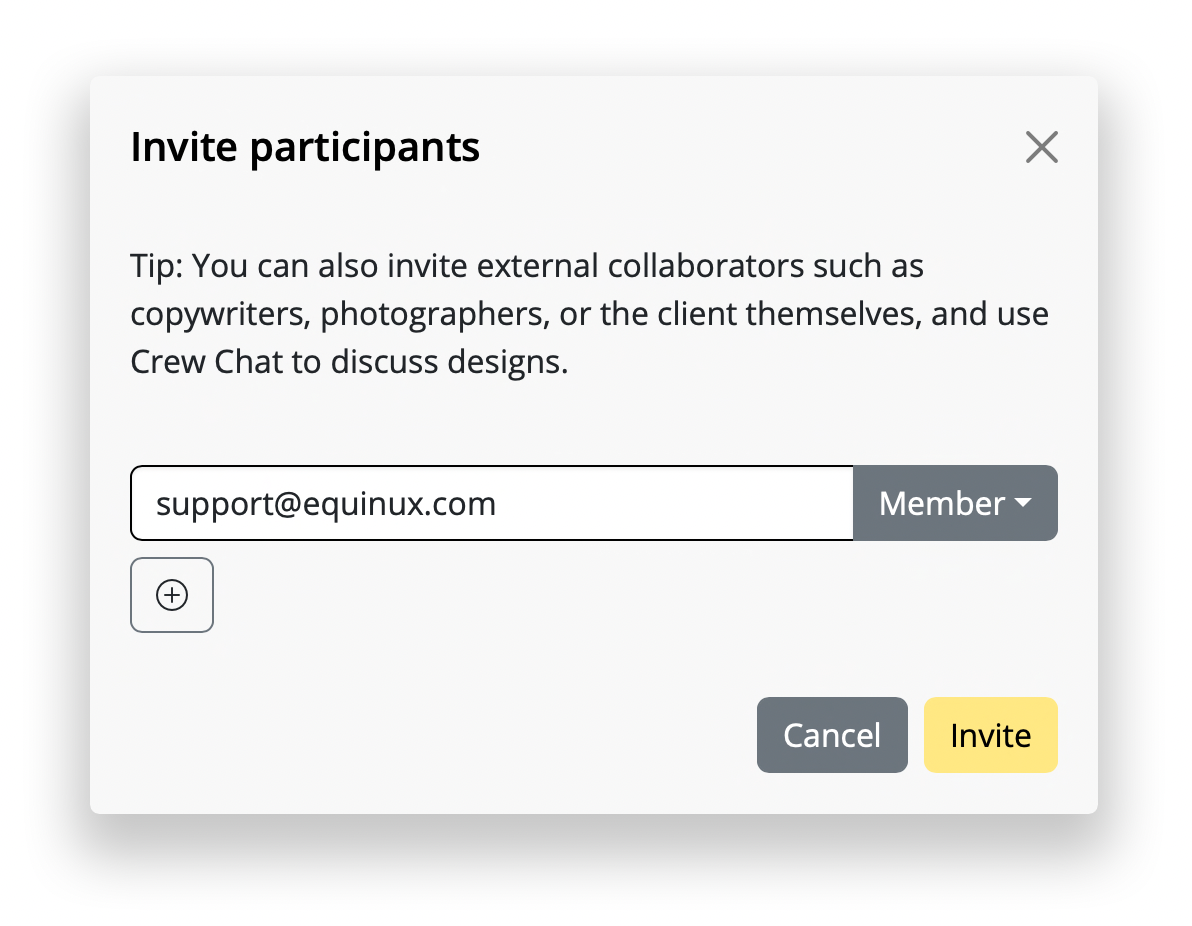
3. Enter our email address: support@equinux.com, then click “Invite”
You’ll now see the member “equinux Support” listed under Pending Invitations.
As soon as we’ve joined your project (you'll get notified via email), you can open the design you have questions about (or any design) and click the Crew Chat button in the toolbar.
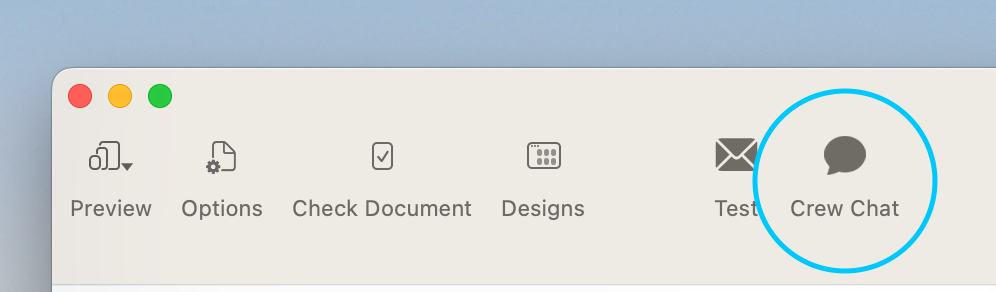
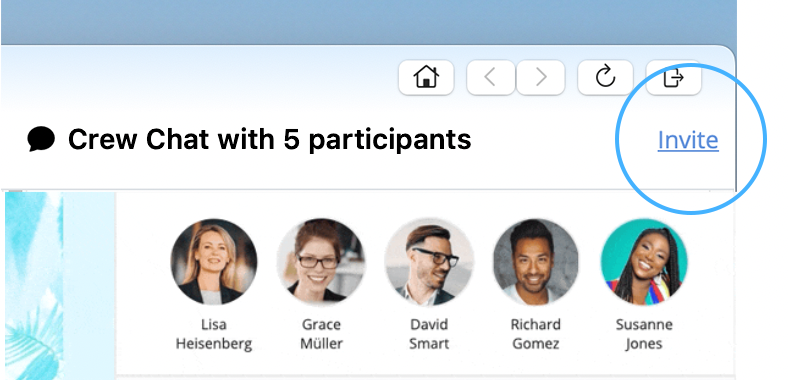
Then click “Invite” in the top right corner.
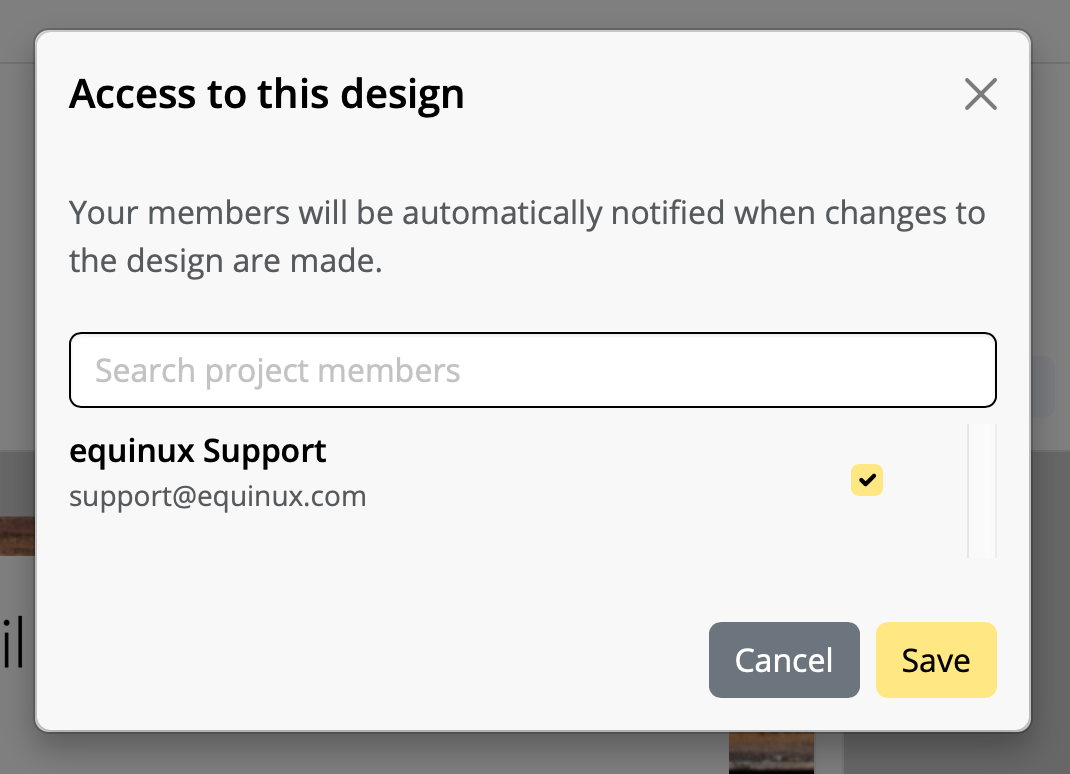
Check the member “support@equinux.com.” and hit Save.
Now, say Hello in Crew Chat, and we’ll be with you shortly.
Please note: We cannot guarantee that your designs will be stored and available for longer than one year with no plan linked to your account.
Renew my plan ...
Instead, you must press and hold the link to open a menu with available actions, such as composing an email to that address or adding it to a contact.
On iPads running iPadOS 26.1 or later, tapping mailto: links continues to work as usual.
Your free 30-minute kickoff session is a chance to get hands-on advice from our email design experts. Here are some ideas for how to use it:
- Designing your first newsletter with expert layout support
- Use image effects, text styles, and tables effectively
- Get help sending emails using Direct Mail or Campaigns
- Create targeted email groups for better segmentation
- Fix "From" address and domain setup issues
- Use placeholders or connect to FileMaker for personalization
“This website has been blocked from automatically creating emails” To prevent this error from occurring for recipients, Mail Designer automatically disables tracking for mailto: link structures in email campaigns.
Technical explanation:
Mail Designer’s link tracking works by rewriting links so they first pass through a tracking URL before opening the final destination. This approach functions reliably for standard web URLs (https://), where the browser can safely redirect the request.However, mailto: links behave differently. Instead of opening a webpage, they trigger the user’s default email application and attempt to create a new message. In recent macOS versions, Apple treats this behavior as a potential security risk when initiated via a redirected or rewritten link.
As a result, macOS blocks tracked mailto: links to prevent unwanted or automated email creation. Since this restriction is enforced at the operating system level, it cannot be overridden by Mail Designer.
To ensure a smooth and secure experience for recipients, Mail Designer disables tracking for mailto: links by default. These links will continue to work as expected, but clicks on them will not be tracked.
If you do not plan to send newsletters for a while, you can cancel your paid sending plan and switch to the free Karlsfeld plan. Your data will generally remain intact, but please note the following points:
Design limit in the Karlsfeld plan
In the Karlsfeld plan, you can store and fully edit up to 20 designs.
If you currently have more than 20 templates in your account:
- you can still open and view them
- however, you will no longer be able to edit or save them
Recommendation: Before switching plans, delete any unnecessary drafts until you reach the 20-design limit.
Handling your Stamps credit
Included Stamps: The monthly Stamps included in your sending plan (e.g. 15,000 per month) expire at the end of the respective billing period.
Purchased Stamps packages: Any additional Stamps packages you have purchased remain valid indefinitely and will still be available in the Karlsfeld plan.
Contacts and tracking statistics
- Your verified recipient addresses remain available (up to approximately 200 contacts in the Karlsfeld plan).
- The tracking statistics of your past campaigns remain accessible.
Data deletion and inactivity
As long as your Mail Designer 365 Design plan remains active, no data will be deleted.
Automatic data deletion for data protection reasons occurs at the earliest after 6 months of complete inactivity, meaning only if no active plan is being used.
While standard SMTP is fine for one-on-one emails, it wasn't built for modern email marketing. Using Mail Designer 365’s integrated sending (via Campaigns or Direct Mail) solves the primary disadvantages of SMTP:
- Guaranteed Deliverability: We use high-reputation, "warmed-up" IP addresses to bypass the strict filters at Gmail and Yahoo that often block volume-based SMTP sends.
- Actionable Analytics: Unlike the "black hole" of SMTP, you get real-time data on opens, clicks, and engagement.
- Audience History: Keep a clear record of exactly what you sent to whom, so you never lose track of your client communications.
- Simplified Security: We handle the technical headache of DKIM and SPF authentication for you, ensuring your emails are verified and trusted.
- Automatic Compliance: Unsubscribe requests are managed automatically, keeping you compliant with GDPR and CAN-SPAM laws.
- Flexible Scheduling: Stay productive while out-of-office by scheduling your emails to send at the perfect time, rather than having to hit "send" manually.
For a full breakdown of these benefits, check out our deep dive here:
The Disadvantages of SMTP Sending & Why to Switch