
Email placeholders let you personalize a campaign with contact details such as a recipient’s first name, last name, or email address. Mail Designer 365 replaces each placeholder with the matching value when you send through Mail Designer Delivery, so one design can create a personal message for every contact.
What are email placeholders?
An email placeholder is a special text token connected to a field in your contact list. You place the token where personalized information should appear, and Mail Designer Delivery substitutes the correct value for each recipient during sending. This saves you from creating separate copies of a design and helps keep recurring campaigns consistent.
Use placeholders only for information that is available and maintained in your contacts. Before sending, check that the relevant fields contain clean data and that names use the capitalization you want readers to see. A placeholder cannot correct missing or inaccurate contact details on its own.
This guide covers placeholders used with Mail Designer Delivery. If you export your design to another service, follow the provider-specific workflow instead:
- Use the Mail Designer 365 API for custom projects or external integrations.
- Follow the dedicated guide for Mailchimp placeholder text.
- Use the provider syntax described in the Campaign Monitor placeholder guide.
How to insert email placeholders
- Open your design and select the text area where the personalized value should appear.
- Place the insertion point exactly where you want the contact information to be shown. Include any punctuation or spaces outside the placeholder so the sentence remains readable.
- Open Insert in the toolbar and choose Mail Designer Standard Placeholders.
- Select the contact field you want to insert, such as a first name or email address.
- Review the surrounding sentence and repeat the process for any additional fields.
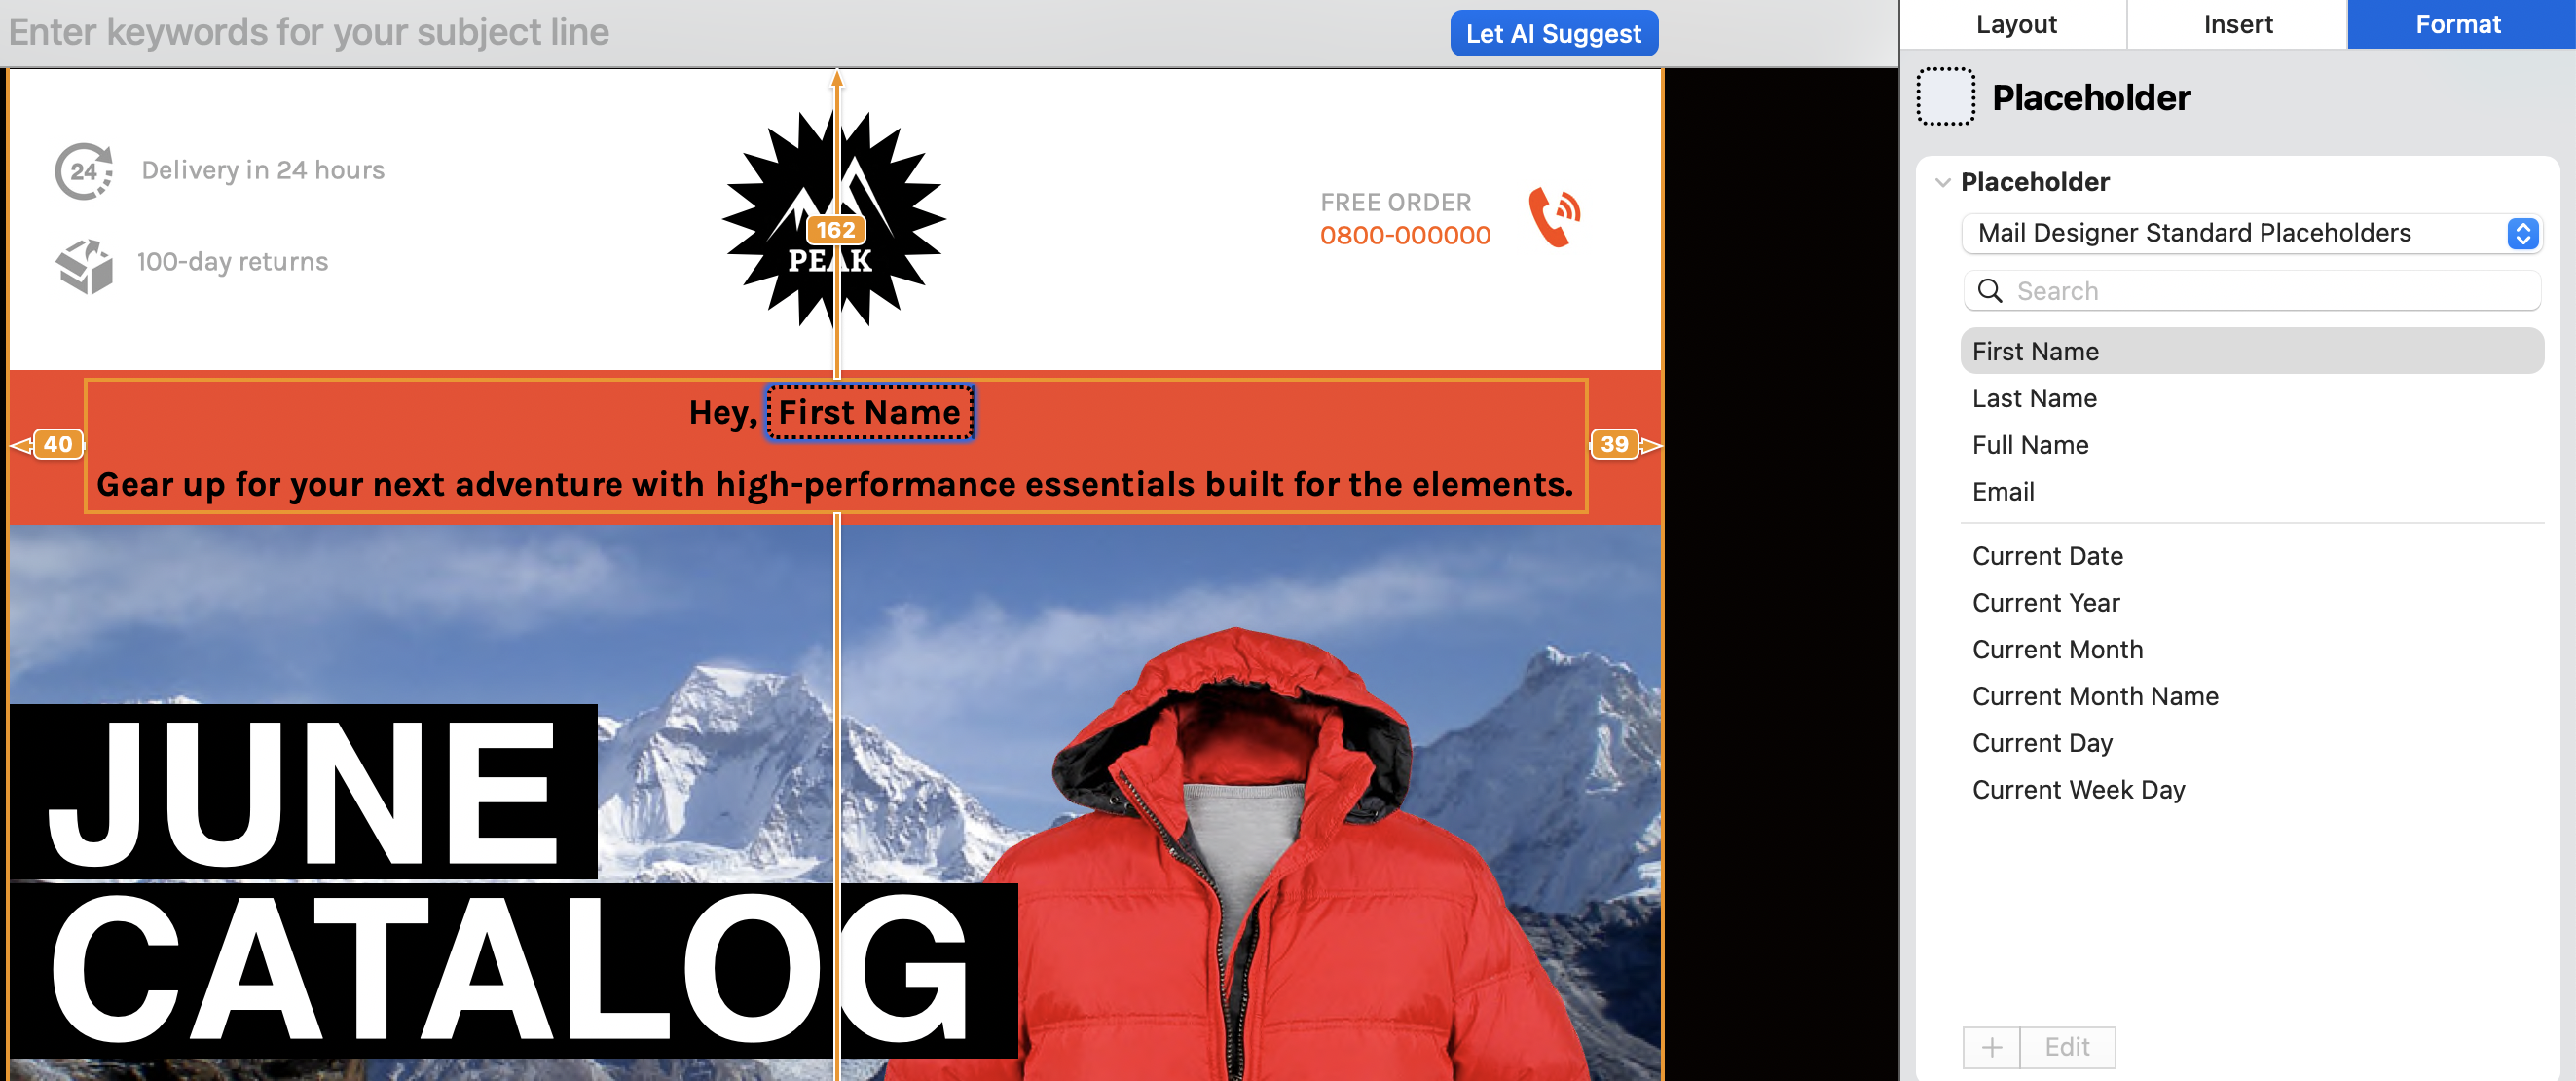
The placeholder remains visible as a token while you edit the design. After uploading the campaign, Mail Designer Delivery uses the information stored for each contact to replace that token.
Write safe fallback copy
Personalization works best when the sentence still makes sense if a contact field is unavailable. Avoid building an essential instruction around a first name or another optional value. For a greeting, consider whether a neutral opening is preferable for contacts whose profile is incomplete.
Keep formatting around the token simple. Apply the same font, size, color, and line spacing as the surrounding text, then check that a longer name will not create an awkward line break. This is especially important in narrow mobile layouts and buttons.
Preview and test before sending
Before you schedule the campaign, preview both desktop and mobile versions and test with representative contact records. Include one record with a short name, one with a long name, and one that is missing an optional field. Confirm that punctuation, spacing, wrapping, links, and text styles remain correct in every case.
Send a test email to yourself and verify the rendered result in more than one email client when possible. The test should confirm that placeholders are replaced, not displayed as raw tokens, and that the personalized content matches the intended recipient data.
Troubleshooting placeholder problems
If a token appears unchanged in a delivered message, first confirm that the campaign was sent through the workflow that supports that placeholder type. Mailchimp and Campaign Monitor use their own syntax, so Mail Designer Delivery tokens should not be copied into those services without conversion.
If the value is blank or incorrect, review the corresponding contact field and import mapping. Re-upload or refresh the campaign after correcting the data, then send another small test. Also check that the placeholder was inserted from the menu rather than typed manually; a visually similar string may not be recognized as a valid token.
Manage the contact data behind placeholders
Accurate contact records are the foundation of reliable personalization. These guides explain how to create signup forms, add email contacts, and import contacts from Apple Contacts.
Review your fields before every major send, use consistent naming conventions, and test the final campaign with real sample records. That simple validation step helps your email placeholders deliver useful personalization without introducing avoidable greeting or layout errors.