

Getting started
This guide shows you how to invite Team Members, assign Approval plans and share your designs with your team.

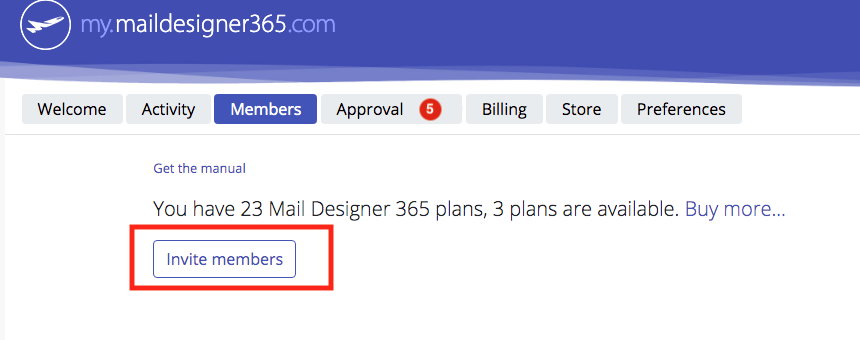
Step One: Invite Team Members
- Head to the "Members" tab in your my.maildesigner365 account.
- Use the button at the top of the page to send co-workers an email invitation to your team.
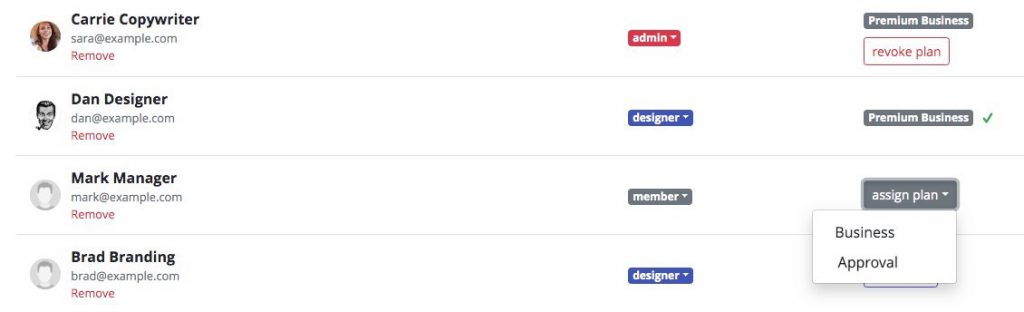
Step Two: Assign Approval plans
- Once team members have accepted your invite, they will appear on the "Members" page ready to assign a plan.
- If you haven't done so already, you can purchase as many standalone Approval plans as you need via the "Store" tab.
- Then, click the dropdown menu next to the member's name and select an Approval plan to assign them.
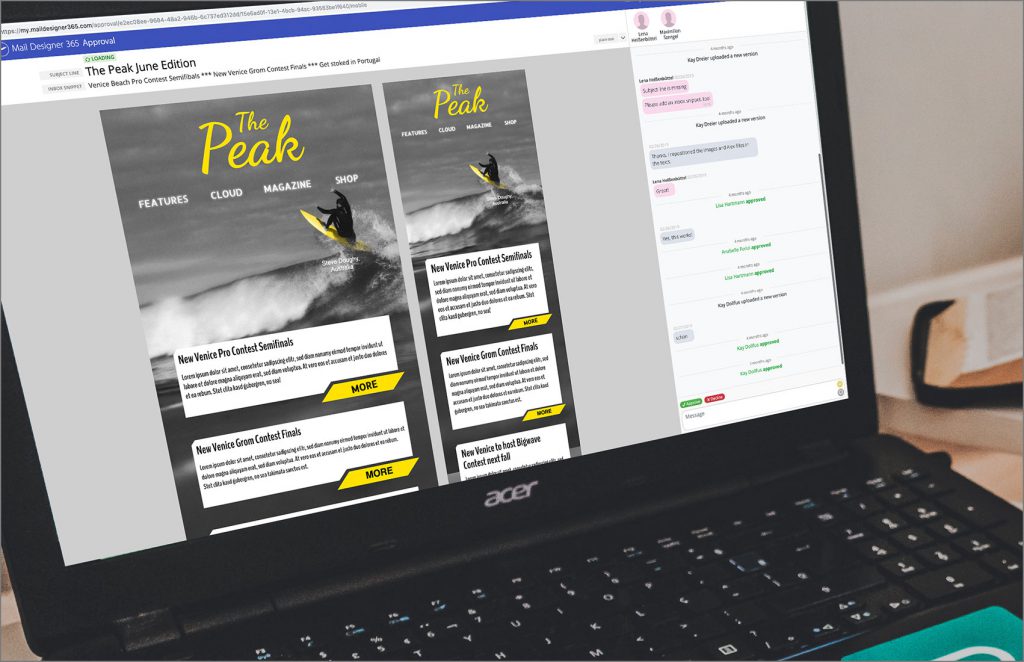
Step Three: Upload a design from Mail Designer 365
Approval is the natural next step for your Mail Designer 365 workflow:
- Build an email design in the Mail Designer 365 App
- Upload design drafts from the app to Mail Designer 365 Approval.

Step Four: Discuss the design with your team on the web
- Invite team members to give feedback and discuss designs.
- Approve or decline drafts on any device.
We want to hear from you!
Our team is always on hand ready to listen or lend a helping hand. If you have any feedback to share with us about your experience with Approval, or just need some extra help getting set up, get in touch!