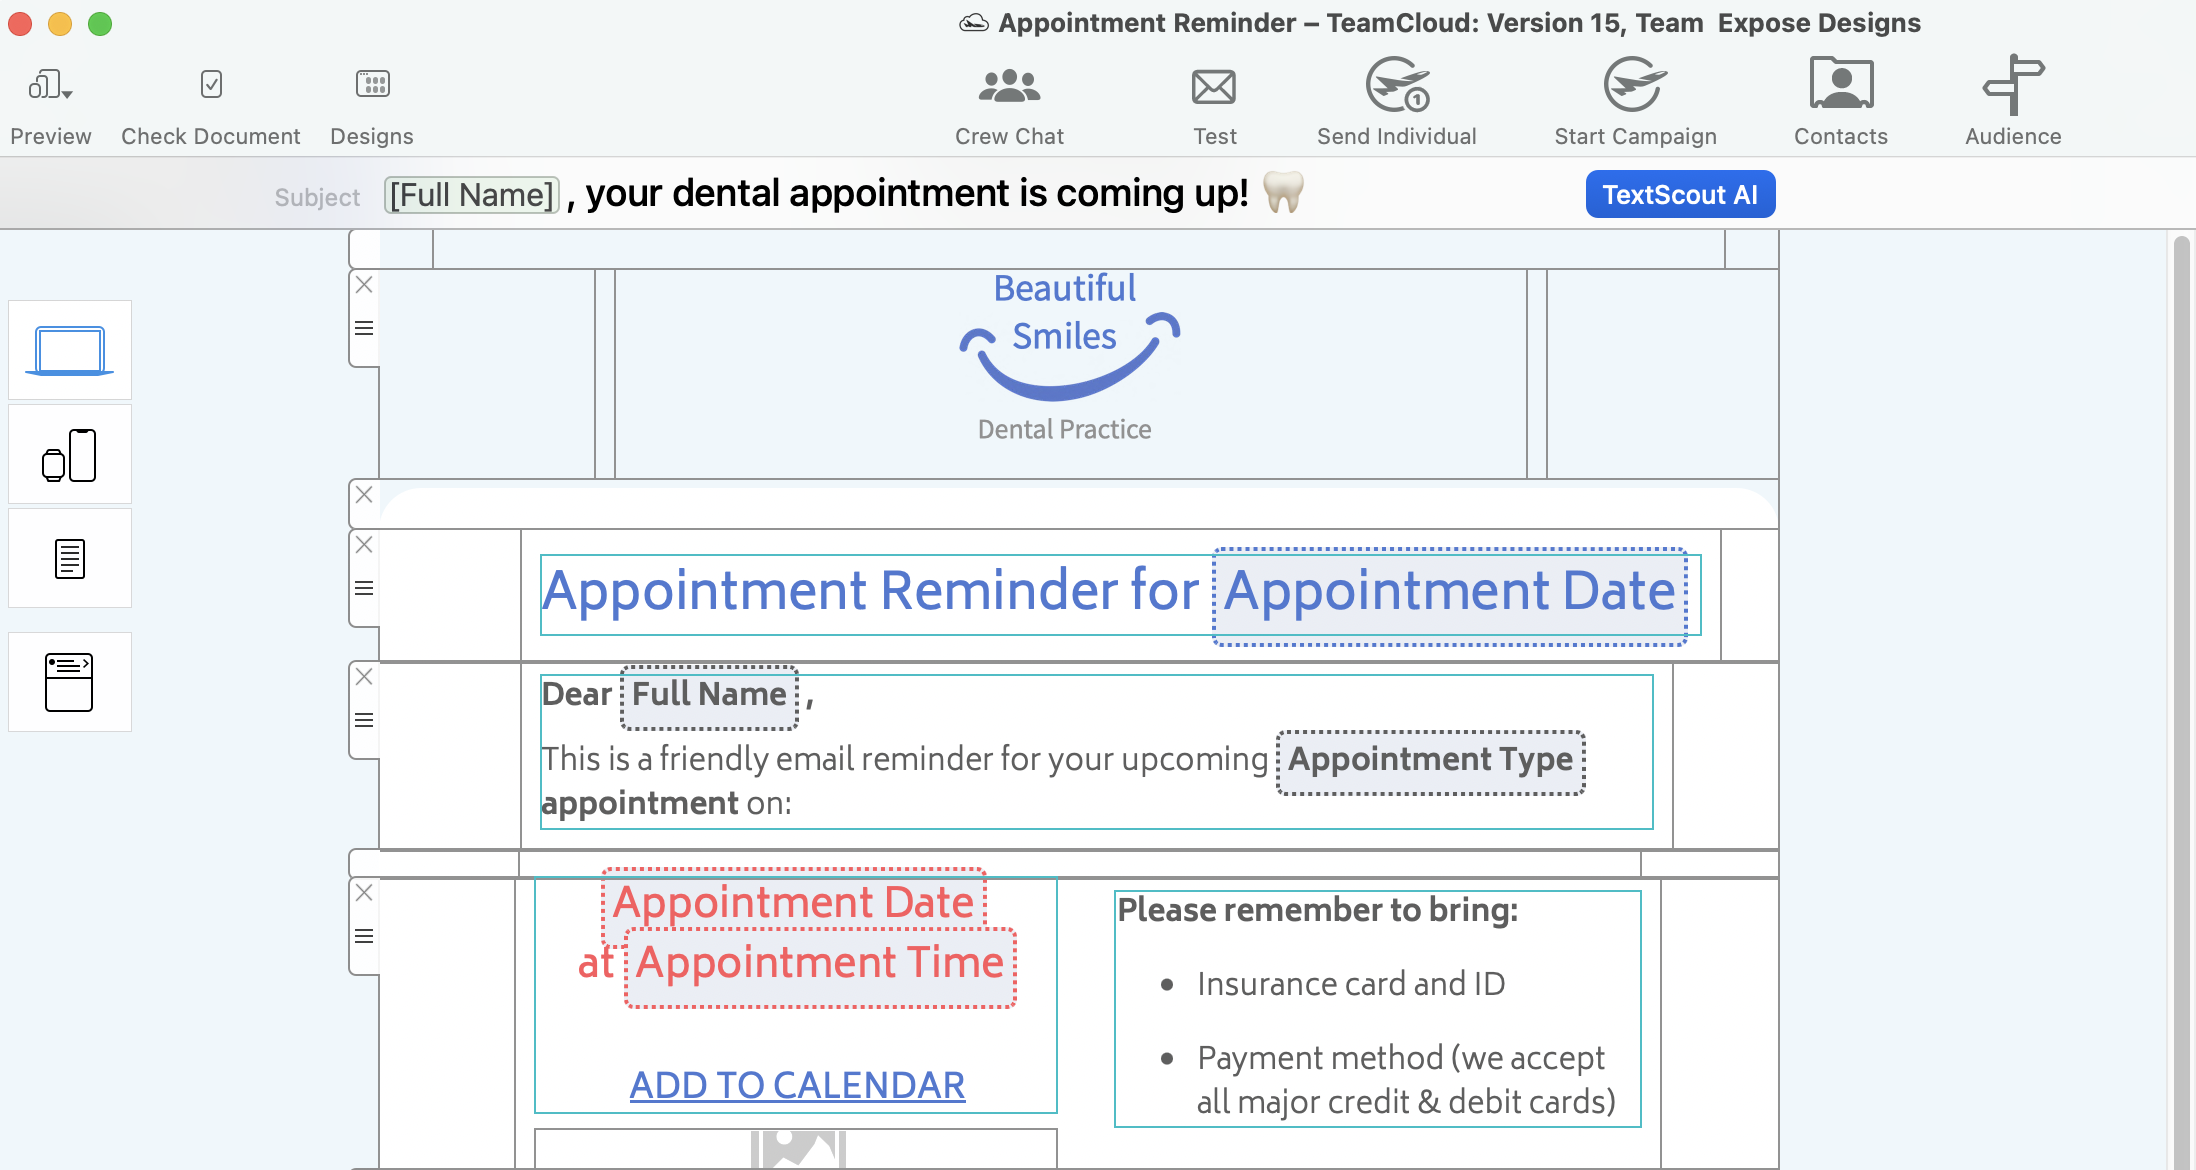
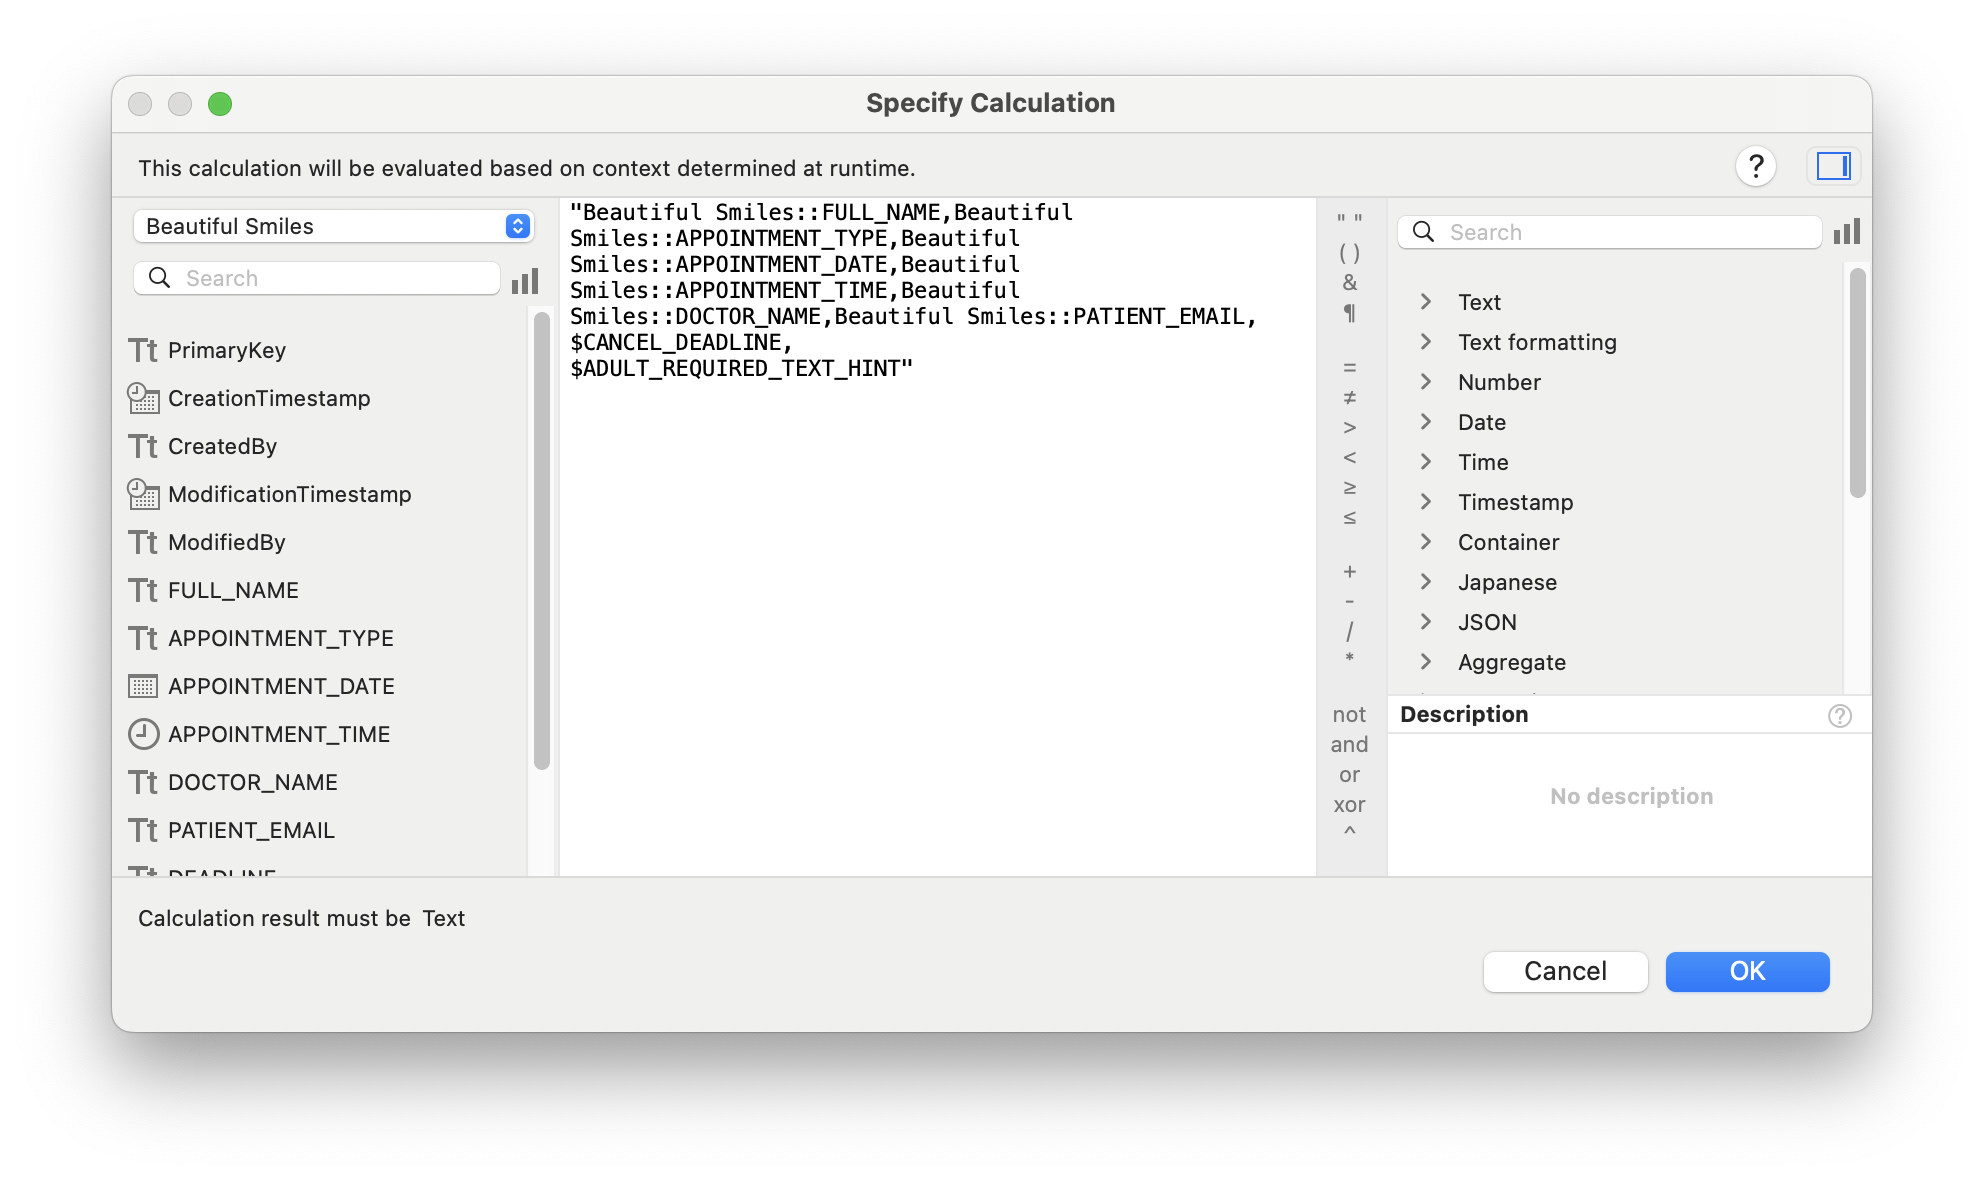
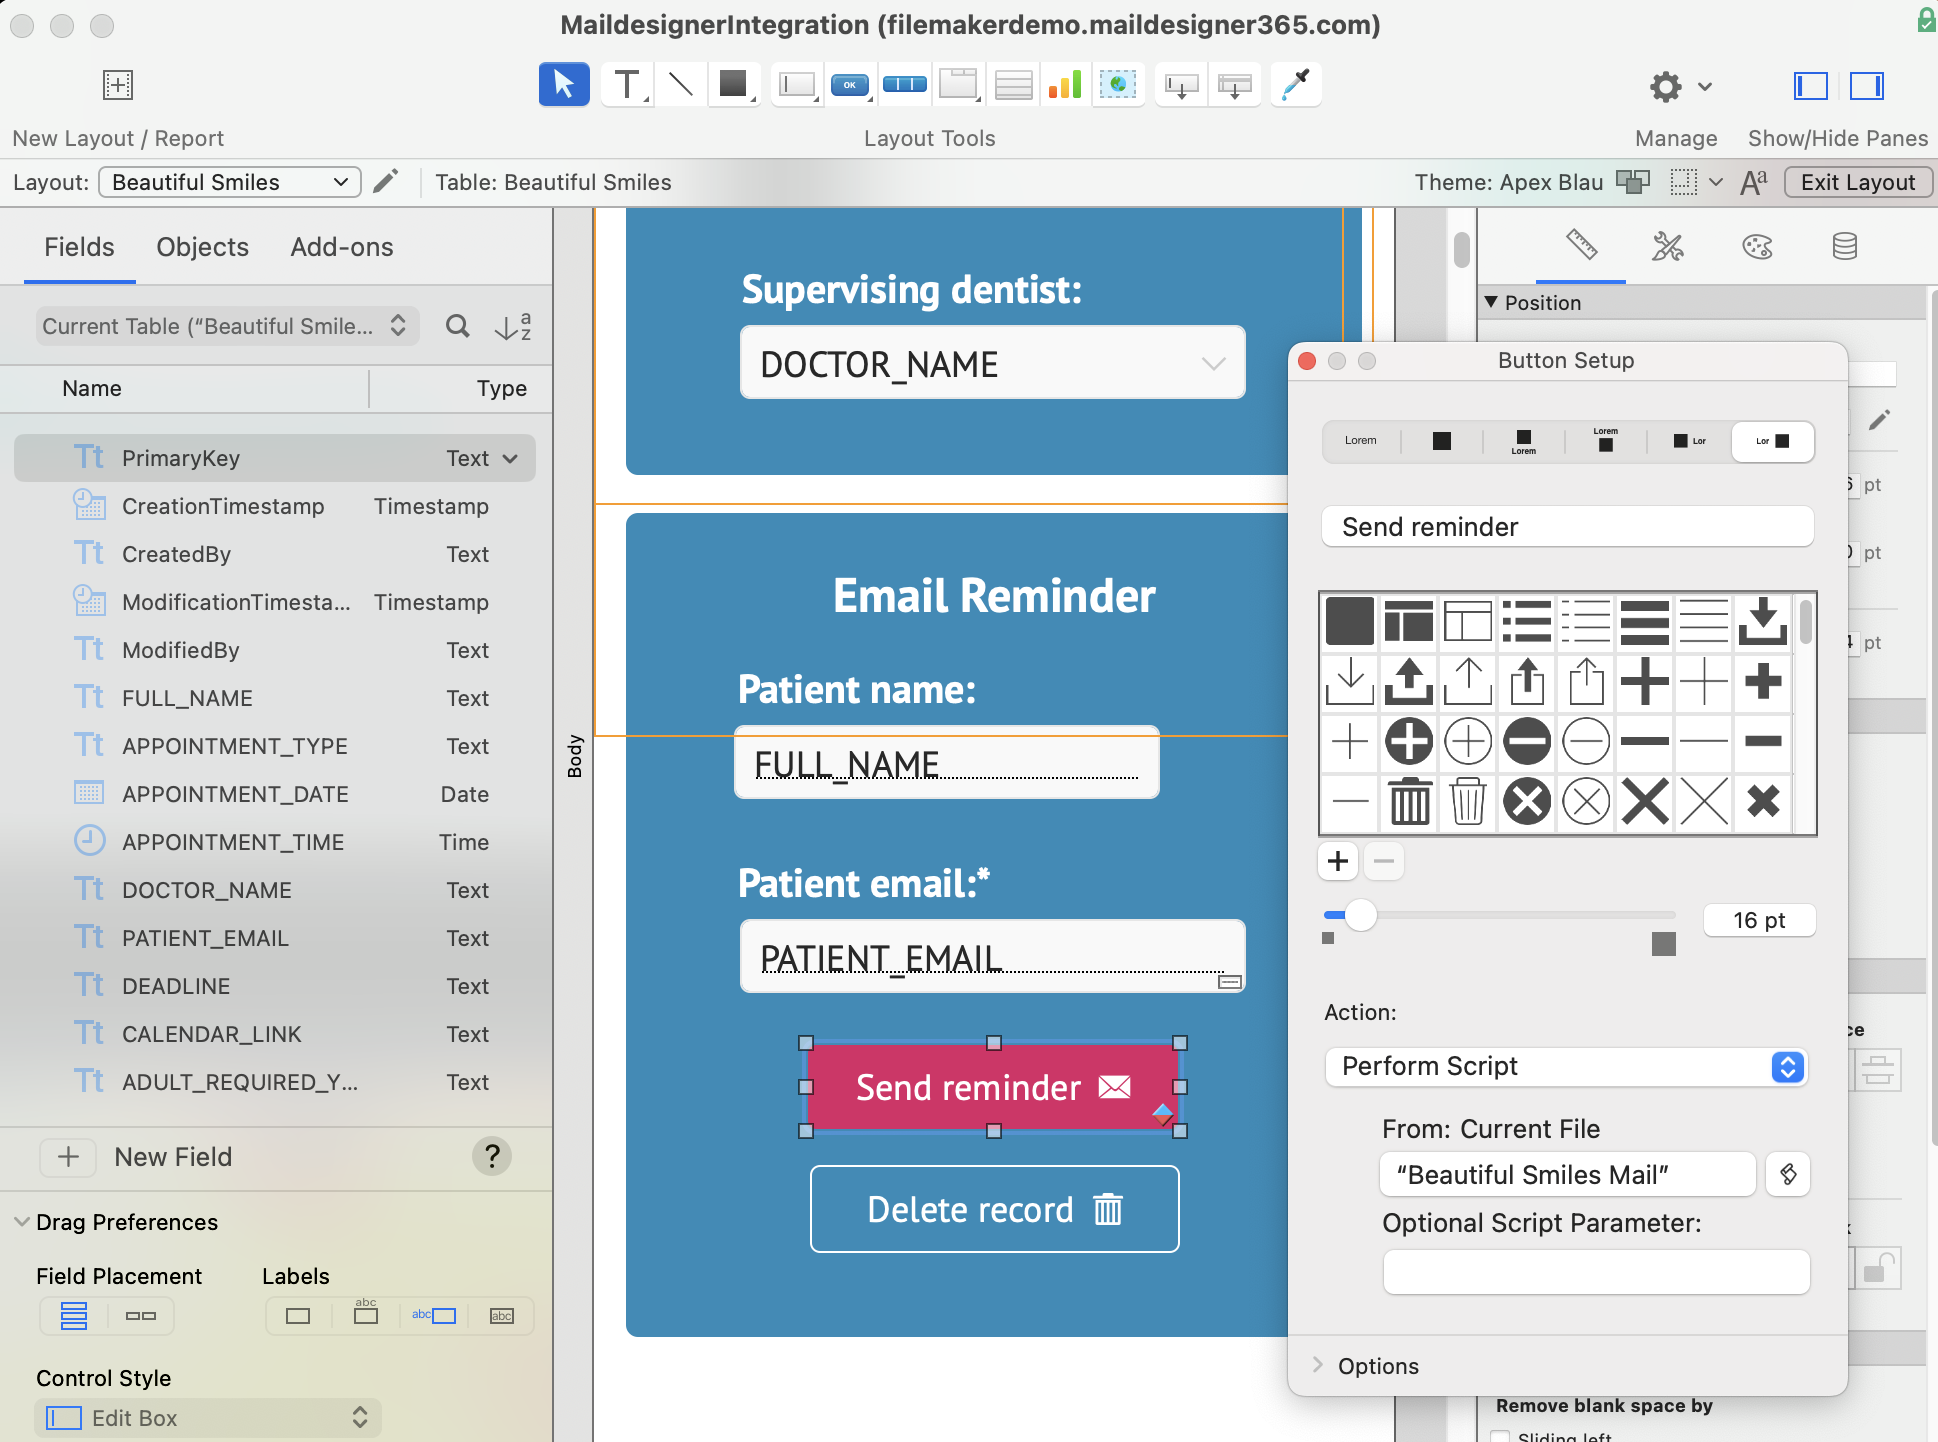
Personalized emails in FileMaker: How it works
Looking for a convenient transactional email solution to use with your FileMaker database? Mail Designer 365 perfectly complements your everyday FileMaker workflow, thanks to seamless integration and an easy to use API.
Our Get Started Guide provides a quick technical overview of how to connect Mail Designer 365 with Claris FileMaker in just a few steps.

1. Design your email template
Use Mail Designer 365 for Mac to create stylish email templates that are true to your brand and look good on all devices.
Start from scratch or choose from one of many ready-to-send Design Ideas, then insert placeholders to correspond with the fields in your FileMaker database.
2. Prepare the send script
Template ready? You can now instruct FileMaker to send it on-demand – with a little help from the powerful Mail Designer 365 API:
  • Utilise your Mail Designer 365 Design Ideas to use with FileMaker
  • Autofill email placeholders with your existing FileMaker variables
  • Send emails via Mail Designer 365 Delivery Hub servers from your own email domain
3. Send emails on demand!
And just like that, everything is in place for you to begin sending personalized transactional emails to your customers using Mail Designer 365 and FileMaker.
Add a send button to your FileMaker layout using the send script we set up in the previous step:
Now, each time you create a new record (e.g. a new client, booking, enquiry, etc.), you can also send out custom email content in just one click.

Who is it for?
Mail Designer 365's FileMaker integration lends itself to a wide range of use cases and is well suited to anyone who needs to regularly send on-demand, transactional style emails for their business.
Below are some real world industry examples of how Mail Designer can be fully integrated into your everyday FileMaker workflow.

Connect Mail Designer 365 with your FileMaker solution
It’s simple: You only need two key files.

The MailDesignerIntegrationExample file in FileMaker walks you through the required scripts step by step (.fmp12 FileMaker file):


And in the Mail Designer 365 template, you’ll find placeholders that show how your FileMaker fields come to life directly in the design (Mail Designer file):


Open this Mail Designer file and then go directly to File > Save to save it in your project.

Don’t have the Mail Designer app yet?


Create a FileMaker string with all your existing database variables so they correspond with the placeholders in your Mail Designer 365 template. Then, relay these to the FileMaker send script (cURL-based) to enable one-click emails directly from your records. It's that easy!
The API integration is also compatible with from FileMaker 12 onwards, as well as with the FileMaker Go iOS app. When using attachments, at least FileMaker 18 is required.
Yes – the Mail Designer API lets you fill placeholders in your designs and send emails automatically. For instance, you can send personalized messages to customers straight from FileMaker.

Use the Template ID to target a specific design. You’ll find the Template ID in the Placeholder Inspector: simply select a placeholder in your design and copy the Template ID from the bottom of the sidebar.

The API documentation can be found here:
https://my.maildesigner365.com/docs/api
You need to define the From address — you can only use addresses that have been set at:
https://my.maildesigner365.com/team/deliveries/domains
With placeholders, you can easily create target groups or personalize your emails. In third-party apps like FileMaker, you can create fields to use as placeholders in your designs. This allows you to send automated, personalized emails directly from FileMaker.

A placeholder (e.g., “Country”) can have multiple values (e.g., “Germany”, “USA”).

Add placeholders to your contacts to create target groups based on them (e.g., “Send newsletter only to users in the USA”).

Or use the Mail Designer 365 app to insert these placeholders into your emails for personalization (e.g., “All of ‘Germany’ is Celebrating the Super Sale!”).

Learn more in the handbook
The following steps are based on and explain the definition section of the script “Send record with Mail Designer 365.” This script is included in our freely available FileMaker demo database “MailDesignerIntegrationExample” (see link at the end of this FAQ).

Step 1: Create the $AttributeFields Variable

Start by creating a variable named $AttributeFieldsThis variable will contain the text string that defines the placeholder content used in your Mail Designer 365 email template. All values must be separated by commas.

Scenario A: FileMaker Field Names Match the Email Placeholders

Method:
Use FileMaker field names that directly match the placeholders in your email design. Build the $AttributeFields variable by listing these field names, separated by commas.

In Mail Designer, you simply use the field name as the placeholder.

Format:
$AttributeFields = "Table::Field1,Table::Field2,Table::Field3"

Example Definition of $AttributeFields in FileMaker:
$AttributeFields="CityHotel::GUEST_FIRST_NAME,CityHotel::GUEST_LAST_NAME,CityHotel::GUEST_EMAIL,CityHotel::BOOKING_METHOD"

In Mail Designer 365, you can reference the values later using these placeholders:
GUEST_FIRST_NAME
GUEST_LAST_NAME
GUEST_EMAIL
BOOKING_METHOD


Scenario B: FileMaker Field Names Do Not Match the Email Placeholders in Mail Designer

Method:
Build the $AttributeFields variable by manually mapping each placeholder name to the corresponding field or variable using the format:
$AttributeFields = "PLACEHOLDER_NAME:" & FieldName_or_Variable & "," ...
Example Definition of $AttributeFields in FileMaker:
"BOOKING_DATE:" & RESERVATION_DATE & "," &
"BOOKING_TIME:" & RESERVATION_TIME & "," & ...


Scenario C: Using FileMaker Variables as Placeholders

Method:
If your FileMaker variable has the same name as the placeholder in Mail Designer 365, you can directly assign it like this:
$AttributeFields = "$city,$country"
This tells Mail Designer to use the value of $city for the placeholder named “city”.

Example:
The FileMaker variable $city contains “Munich”. If your Mail Designer template includes a placeholder named “city”, then define:
$AttributeFields = "$city"
The script will reveal the content “Munich” and pass it to Mail Designer to populate the “city” placeholder.


The Best Scenario D: Mixing All Methods

You can combine the approaches above into a single $AttributeFields string.

Method:
Mix matching field names, manually mapped fields, and variables in the $AttributeFields variable.

Example:
$AttributeFields = "BOOKING_DATE:" & RESERVATION_DATE & "," &
"CityHotel::BREAKFAST_TYPE," & "$city"

In Mail Designer 365 you can then reference them with the name BOOKING_DATE, BREAKFAST_TYPE and city
To specify an email design to use with your FileMaker integration, go to:

https://my.maildesigner365.com/team/designs

On the template you want to use, click the three dots icon and select “Mail Designer 365 API: Copy Template ID.”

You will then use this ID to define the variable $EMailTemplateID.
The integration of Mail Designer does not require any additional installation of FileMaker plug-ins or similar components. Technically, the integration is handled via a CURL request to the API endpoint of our Mail Designer delivery service. This is executed using the appropriate FileMaker script step.

Thus, usage with FileMaker Go for iPhone and iPad is possible.

By providing a FileMaker demo file, all relevant steps can be easily followed, see FAQ "How do I get started with the Mail Designer integration?"
Yes, it’s possible. You need FileMaker 18 or later to add attachments using our API.
Currently, the API only supports text placeholders. Image placeholders are on our roadmap for a future release.y
Our own tests have shown that often the Filemaker script wasn’t saved before trying again. You can recognize this by the asterisk:

Yes, you can try out the integration in the FileMaker Go iOS app to send emails using your iPhone or iPad.
Absolutely. The API integration (from your web scripts or a FileMaker solution) only links to the Mail Designer template ID, so you can change the design anytime—logos, texts, seasonal styles—without touching a single script. Just edit in Mail Designer 365 and save. Done.
All our licenses include a free 7-day trial – perfect for exploring all features at your own pace and making a well-informed decision.

Visit our Mail Designer 365 Store.

If you have any questions or run into any issues during the trial period, feel free to contact us at any time.
We’re happy to assist with any questions or feedback via our support form

Plans and Billing FAQs
A Mail Designer 365 Design License is required to create the templates.
A Mail Designer 365 Campaigns Plan is needed to send emails later from your Filemaker solution.
Your client will need a Mail Designer Campaign Plan, depending on how many emails they want to send. Here’s how billing works:
1. Create a team:
Set up a separate team in Mail Designer 365 for each client. You can assign a payment method to each team.
2. You handle billing:
If you want to manage billing yourself, add your own credit card to the team. You’ll receive a separate invoice for each team. You decide how much to charge your client.
3. Client handles billing:
If your client should pay for the Sending Plan directly, simply enter their payment details in the team settings.
No, you need to create a separate team for each client. Do not mix clients within one team — this is important to keep email history and other client-specific data clearly separated, especially for data protection reasons.
Of course, you can be the administrator of all teams yourself.
Create a new team for each client here:
https://my.maildesigner365.com/teams/new
Each Mail Designer plan includes a monthly allowance of “stamps.” One stamp is used per email sent to an individual recipient—for example, sending to an audience of 10,000 requires 10,000 stamps.

When using the Mail Designer API, each delivery counts as 25 stamps.

Example: The “Paris” plan includes 15,000 stamps per month, which allows for up to 600 API emails.
Overview of the Mail Designer Delivery plans
All our licenses include a free 7-day trial – perfect for exploring all features at your own pace and making a well-informed decision.

Visit our Mail Designer 365 Store.

If you have any questions or run into any issues during the trial period, feel free to contact us at any time.
We’re happy to assist with any questions or feedback via our support form

Why Mail Designer 365?
  • Drag & drop to create: Powerful yet intuitive WYSIWYG editor
  • Explore a growing library of ready-to-send email design ideas
  • Responsive email designs that look great on all devices
  • Define custom placeholders that seamlessly integrate with your FileMaker database
  • Made for Mac lovers: Native Mac app, compatible with the latest macOS versions
Privacy Settings / Datenschutz-Einstellungen